Toddler Skirt and Baby Dress


I found this Micheal Miller Corduroy at a local Ben Franklins in the clearance bin because it was from the end of the bolt. I got just under a yard for close to $5.00! I was ecstatic because I had seen this fabric before but knew that I could not afford $15.00 a yard.

I first made the babys jumper. It is a pattern from New Look #6578. This pattern is super easy. The instructions are very clear and simple to understand. As I was sitting in church yesterday morning it dawned on me "why did I not make this dress reversible?!? I lined the chest area with a pink corduroy that I found at DI (our local thrift store) for a dollar or something for just under a yard.

Oh and for the buttons a little trick that I did was: faux buttons. Instead of doing the button hole I did snaps then hand sewed the button onto the dress making sure that I allowed for enough room for the snap to still work properly. Let me tell you...tons easier and still an adorable dress.

When I was finished with the jumper I realized that I had enough fabric of both corduroy to make the toddler a dress. She was so excited to be able to match her sister.

For her skirt I cut two rectangles (the width of the fabric). It ended up being whatever fabric I had leftover that formed a rectangle. Then I sewed them together. Then I trimmed the one big rectangle up (cause I did not do this before). Then I sewed the one big rectangle into one circle. Then I added the elastic waistband. Next Time I do this, I think that I will add elastic only to the back part of the skirt. I don't know quite how it will work but I am going to try it. Then I finished the bottom of the skirt and I was done. I think this skirt took me 20 minutes from start to finish.

The results were fabulous!

Selvage Edge Scraps Spike Fabric Flower Tutorial

Since I make a lot of blankets, I have a ton of small selvage edge scrapsSelvage Edge Scraps Spike Fabric Flower craft idea tutorial brown and pink hair bow green I am always wondering what I can do you use them and not just throw them away. Its such a huge waste of money and resources. So I sat down and played with them and this is what I got. A cute fabric flower

Reusable Gift Bag for Valentines Day

I don't know about you, but I never seem to have enough gift bags. I always reuse the ones that are given to me and my family with lovely gifts inside, but then I never seem to have the right style for whatever gift I am needing. Not anymore! Now I can make my own reusable Gift bags just using a little plastic, an iron, and a sewing machine. Easy Peasy, Lemon Squeezy!

Reusable Gift Bag for Valentines Day

Earring Frame Tutorial


This is a super cute Earring Frame! It is made from 1 Wire hanger and a mesh bag. If you use this tutorial I would love to see your creations! Send me a link :)Step 1: Gather your materials needed. 1 glue gun, 1 wire hanger, 1 mesh bag (or fabric that would be easy to poke the end of your earring through), 1 1/2 inch grosgrain ribbon, 1/3 yard of coordinating fabric (I used chiffon, but anything pretty much will work)


Step 2: Either cut or untwist the end of your hanger. Then bend it into a rectangle (or whatever shape you would like your bag to take on). I synched my bag closed, but do what works best for you
Step 3: Measure around your bag. Double this measurement. This measurement is for the ruffle to go around your "frame"
Step 4: cut strips of fabric 4 inches wide in the length that you need.
Step 5: Sew the strips together into one large circle

Step 6: Fold over the fabric and sew along the edge (I did not sew mine but you could)
Step 7: Hot glue the strip to your wire hanger frame. While you are glueing make sure to ruffle it. If you want to be exact then find the middle and glue on one corner. Then find the opposite side middle and glue that on the opposite corner and work your way around the frame. I really did not care and just started to glue. When I got close to the end I realized that I had not ruffled enough so I had to pull up some of what I had glued and ruffle it more.


Step 8: Glue your grosgrain ribbon onto the opposite side of the frame. This is going to be the front of your frame. You could pleat the ribbon or just do it straight.

Step 9: You are now complete and you MUST (wink, wink) send me a picture of your Earring Frame :)
Now you have a really fun Earring Hanger! You don't have to tell your friends that it did not cost you hardly anything.

Humanitarian Scrappy Quilt for the Needy

Our ward (its an Area of People organized by the Church of Jesus Christ of Latter-Day Saints) asked every family to bring a blanket for our Christmas party. Each blanket would be donated to the LDS church to send to people that need them. Humanitarian scrappy strip quilt twin size
They asked for colorful...thats what I gave them....
Humanitarian scrappy strip quilt twin size with sheet for backingMy intention was to make this full size, but I only had enough scraps for a twin size...
Humanitarian scrappy strip quilt twin sizeI ended up tying this quilt (I really, really, really wanted to quilt this blanket but just did not have time on my side)

Every single one of those pieces of fabrics came from a previous quilt that I had made.  They were all scraps that I hadn't used.  It was soooo nice to be able to use things that I already had in my scraps stash!

I used a twin size sheet for the backing so that I would not have to sew one together
Humanitarian scrappy strip quilt twin sizeTo bind it I folded the sheet over about a 3 inches and just sewed along the edge. I did not bother with turning the edge of the sheet over because they are already finished nicely on a sheet. The above picture is the corners that I did. I would sew down along the edge of the sheet all the way to the end of the blanket. Then I would move the blanket so that I could sew down the next edge...I folded the sheet that would be the binding, so that it was a triangle in the corner and then folded it over the blanket so that it looked like it was a miter corner. Even though I don't think technically it is (who knows). Then I pinned the corner down and just did the edge (I did not sew the corners down yet.

I did that all the way around the quilt and then went back and just sewed down the corners at the end
Humanitarian scrappy strip quilt twin size(here I am sewing down the binding of the blanket)

It is a good thing that I ended up not having enough scraps to do a full size; this blanket took up the entire living room as it was when I was tying it. I don't think I would have had enough room to tie a full size blanket. Thanks to my MIL she helped me finish tying this blanket..

Oh and all the yarn for tying was different colors. I used green, pink, and a multicolored (purple, yellow, and blue I think) yarns for this blanket.

These scraps all came from the rag quilts that I have been making over the last 6 months. This blanket is full of memories and I hope that the person who gets it loves it and keeps them warm...

How to Prevent Sewing Machines from Moving While Sewing

I don't know if you have this problem too, but as I sew, my sewing machine will slowly move and bounce around.

So then, when I stop sewing, I have to push my sewing machine back into its place.  It happens with my serger too!
So annoying!

How to Make Wired Ribbon Flowers: The Simplest Flowers EVER


 UPDATE:
This was one of my first tutorials.  It is still popular today.  I NEEEED to update it with new pictures, but that, as you all know, takes lots of time.  lol

I hope you enjoy this little tutorial on how to make wired ribbon flowers


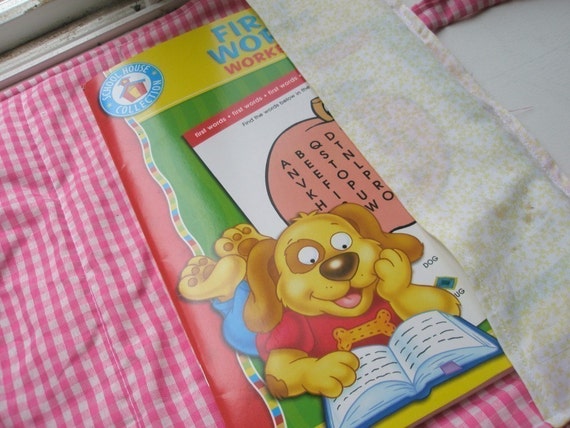
Pencil and Notebook Case Sewing Pattern by A Vision to Remember

I don't know about you but my daughters are constantly carrying around crayons, pencils, markers, coloring books, Notebooks and anything else to feed their creative sides.  They love to color and draw!

This is my solution:  A Pencil and Notebook Case.  It is perfect for them to pack around all their coloring supplies and keep it nice and organized.  A Win-Win in my book!

Pencil and Notebook Case Sewing Pattern by A Vision to Remember This pretty coloring book case is now available in my Etsy shop

Front Cover of the Pencil and Notebook Case Pattern with Raw Edge Applique Flowers

I just adore the fun raw edge appliqued flowers.  They are perfect to add a little dimension to the case, plus its just stinking cute

How fun is that?
Inside Cover of the Pencil and Notebook Case

The pattern includes all the information that you will need to complete your own pencil and notebook case.  It also includes the pattern pieces for the appliqued flowers.

This pattern is a great project for the kiddos to try out!  My 7 year old daughter decided she wanted to give one a try.  Here is her version


Image HTML map generator

Fabrics can be found at:
www.avtrfabrics.com

Let's Get Social

Image HTML map generator


Featured Post