How to Raw Edge Applique Tutorial

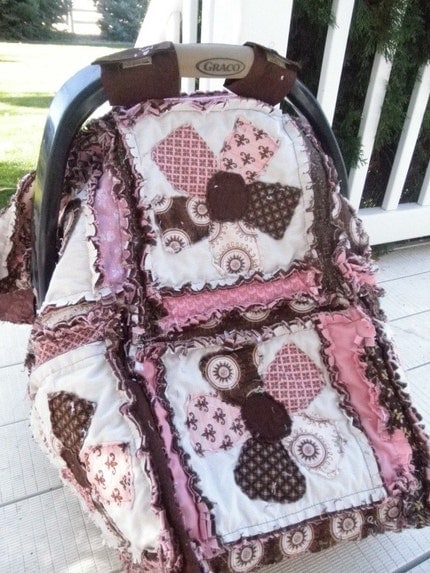
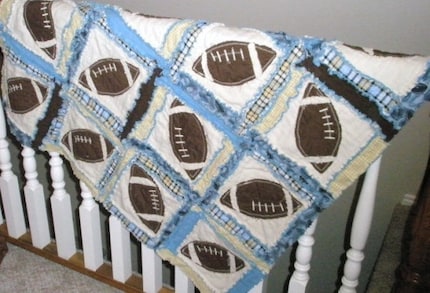
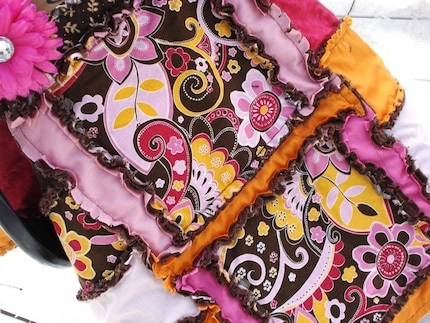
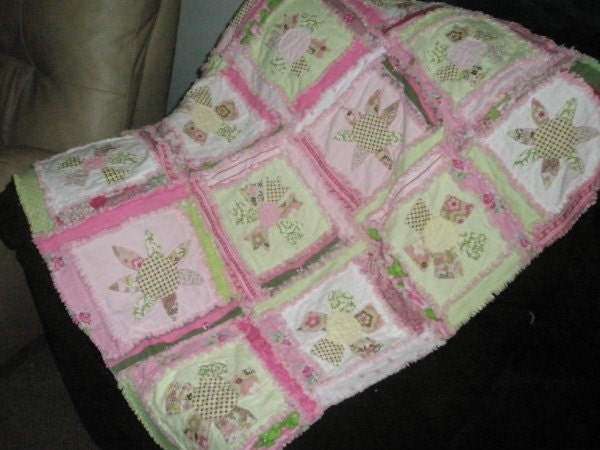
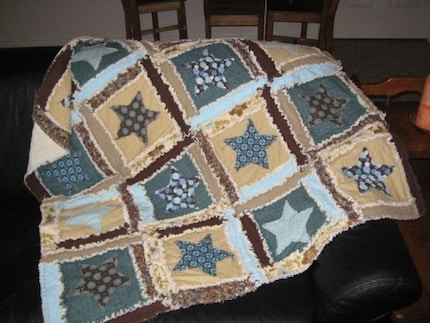
I love to raw applique. It is quick and easy and BEAUTIFUL. It can change the look of a quilt so quickly. I also raw applique clothing, baby bibs, receiving blankets, and tons of other items. Here are a few examples:

Pink and Brown Car Seat Tent
Football Blanket

Today I am going to show you how to raw applique:

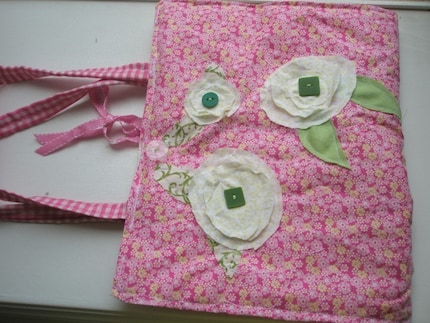
This is a childrens art case. The pattern can be found HERE. My daughter loves it, but can you imagine how boring it would look without those fun little flowers sewn onto it?

First cut out your appliques. Make sure you use fabrics that will fray (like 100% cotton and flannels) other fabrics like minky will not fray but are still fun to use as an applique.

I have lots of appliques that I have uploaded for you to use for FREE HERE. Many of the appliques that I have come up with were pictures found online. Then I printed them off, cut them out and then cut out the fabric in the same shape. It works well. Just be careful not to pick designs that are too detailed because they will be hard to reproduce with a sewing machine.
Now pin your appliques onto your fabric. The flower applique that I am doing today will require the fabric to be sewn on in layers. The first layer is the leaves.

Now sew around the edge of the fabric appliques using a 1/4 inch seam allowance. You want the edges of the fabric to fray.

Now pin on the next layer of your applique. Which in my case is the first set of circles. Sew around the edge of them with a 1/4 inch seam allowance.
Then repeat with the remainder of your layers. Each time pinning them in place and then sewing around them.
Now you have a beautiful piece of fabric with some awesome appliques. Embellish as desired (I did with the buttons)

Then make sure to wash your item to make your fabric fray. The more you wash it the more frayed it will be.

All of the above patterns are available on SALE for 25% off right now in my Etsy shop. Check it out today

Essentials for Etsy Selling Success and a Gardening Analogy

This week on Essentials For.... I am going to share with you what has helped make my etsy shop a success.
How to Be Successful on Etsy Selling


Selling online for me is like growing a garden: get the seeds (your product, your time that you devote to selling, your links to your shop and other places online, advertising, etc) You don't want to just plant potatoes in your garden, then you won't get a good variety but also what happens if that potato seed is not good. You won't have anything grown.

Then once you have gotten your seeds, you need to plant them. I like to plant my garden in a nice row, with all the different seeds planted in their own row or place. I don't just throw the seeds around and hope they grow. Some seeds need to be planted deep in the ground, others can be barely under the surface. Planting your seeds is like setting up your shop and starting to link to your shop.

Analogy to being a successful entreprenuer
Then once your seeds are planted you can't just walk away from the garden and come back in the morning and have a ton of produce for you to enjoy. It takes a lot of work, energy, and care. I have to water my garden several times a week, fertilize it, remove the weeds, protect it from the elements. This can all be likened to continuing adding items to your shop, taking out the items that are not helping your shop, promoting your items so they don't get lost among everyone elses stuff out there.

Then after a ton of work and effort you will start to see the fruits of your labor. I have been working hard on my shop for over a year and am now seeing all that hard work being rewarded. My garden also has tons of produce for me to enjoy. Now I am preserving whatever I can from the garden by canning the tomatoes, making salsa, digging the potatoes and storing them properly, and on and on. That way I can enjoy all that hard work during the next year. Same thing with my shop. I still have to maintain it. I need to preserve the hard work that I have put into it so that all that work does not go to waste.

Remember though, that not all the produce will mature at the same time. I canned beans several months ago, the corn about a month ago, but am now taking care of the onions, tomatoes, and potatoes. Different parts of your shop/garden start to reward you at different times. That has helped me keep going to start seeing my hard work actually produce something.

Here are a few things you might find helpful in growing and being a successful etsyer.
  1. Have a product that people want. This is the most important thing in selling anything. You need to have something others want. Maybe it is a piece of jewelry that is very unique, maybe it is something that is for Men (because we all know that the handmade business has not focused on Men).
  2. Take great pictures of your item. Photos are by far my weakest thing. Blankets/car seat tents are very large and are hard to photograph and get the details without loosing what the item is. I really struggle with the photographs. I do however keep learning and keep trying. I have a point and shoot camera. Nothing fancy. It works. It takes decent photos
Here are a couple of examples of items that I have sold. One was awhile ago and the other more recent. Definitely an improvement


  1. Get as many items in your Etsy shop as possible. I found that once I hit 50-60 items sales really started to do better. Then once I hit 100 I did even better. I am nearing 200 and I assure you that more is definitely better.
  2. Tag your items correctly. If you don't tag your items with the right keywords then people will not be able to find you. If you are wondering what the best keywords might be search etsy for other similar items, or you can also use this google keyword tool
  3. Learn the basics of SEO (search engine optimization). I have searched the Etsy Forums for SEO and have learned a ton. I attribute most of my success to learning the basics of SEO and implementing them. It works. Here is a search of the etsy forums already for you with all the SEO topics
  4. NETWORK, NETWORK, NETWORK: I read often in the forums of people that are not having any success and there are a few common denominators: they are not networking, or if they are networking they are not networking appropriately. This topic kinda goes along with the SEO thing. The more links you have out there in the World Wide Web, the more chances you have of Google and other search engines of finding you. So place your links appropriately, don't just throw them haphazardly around.
  5. Start a facebook fan page
  6. Start a twitter
  7. Blog
  8. Try other networking places (I like theblogfrog.com, martha stewart groups, yahoo groups, etsy teams, and many more)
  9. Continue to work on improving your shop. Again it is a work in progress. There will never be a time that you can just sit back and watch the money roll in without much effort. Those stories are to go to be true. Your success will come after a lot of hard work.
  10. No time is better than the present to get going on it. Remember that this will all take time. It will not happen overnight so the sooner you put in the time the sooner you will be seeing the rewards come in.
to view the other Essentials for go here

Do you have any essentials for selling or questions on how to make your shop better. Please comment below and I will help you in any way that I can
If you have any ideas or questions for the essentials for series or would like to write your own essentials for on my blog please email me at boblyns at yahoo dot com

Essentials for Cooking

This is the 3rd part in my Essentials for... series. You can find part 1 here and part 2 here. Also make sure and stop by and enter the giveaway here

Today we are going to talk about what I think is essential to COOKING. I love to cook. I have a list of 20 recipes that are my fall back recipes. We end up having those things a lot.

A good stock pot. You can use a large stock pot like this one or even have a set of smaller ones. I have 4 different sizes. A small one that holes 4 cups about, a medium one, a large one, and an extra large one like pictured. I use them all, but for different purposes. When it was just my hubby and I, I rarely used the extra large one and mostly used the 2 smallest sizes. Now that I cook for 6 every night I use all the different pans at least once a week.


A good frying pan. I use a frying pan at least a couple times a week. Just like with the stock pots I have 3 different sizes. One small one, a medium one, and then a large one. I love using the non stick ones. They make for easy cleanup.


Spatulas that can be exposed to high heat. This is what I use because I use pans that you should not use things that will scratch the surface of the pans. I have a set of different sizes and really those sizes don't matter much to me. Just that I have a good set of spatulas and several of them so that I am not constantly washing them while I am cooking.


Good set of knives. Again, I am a Cutco nerd. I love them. I rarely use my 2 set of knives that are not Cutco. If one of my Cutco knives are dirty that I am needing then I will use my back up set but not very often. They are extremely sharp, lightweight. Just super nice all around, but they are spendy. If you are really wanting a set of these check out Ebay. That is where I got my set and they are perfect.


A way to grade cheese
I have several different ways that I can grade cheese. A regular cheese grader, a cheese slicer, and my bosch. I use all 3 ways just depending on what is easier for me at the moment.

A can opener. Even though many cans are now having pull tabs on them there are still many out there that don't.
a good set of food storage. It is never more frustrating for me when I have decided to cook something and then to find out I don't have all the ingredients needed. I HATE that. This is not my pantry, but it looks great. I know what we use a lot of and what we don't. I try and keep a list on my phone of the things that I need to pick up at the grocery store. I also try to only go grocery shopping once every week or 2. If we really need something from the store hubby will stop and pick it up on his way home from work.
For me having the right tools to cook makes my job much easier as a mother. What tools are essential for you to cook?

Zucchini Bread


I LOVE Zucchini bread. So do my girls. Even my baby luvs it for her snack in the afternoon.

This recipe with make 2 loaves:


Zucchini Bread

3 eggs 1 c oil
2 c sugar 3 c flour
2 c peeled and grated 1 tsp baking soda
zucchini 1 tsp salt
2 tsp cinnamon 3 tsp vanilla
Mix together. Bake at 350 for 1 hour.


Essential Tools for Baking


This is the 2nd part in the series that I am doing on essential tools for...fill in the blank.
Part 1 Sewing,

Today I would like to share with you all what I think are essential tools to bake with. These are the tools that I would really not how to cook/bake without them. That also includes baking.

A good cookie baking sheet. These pans are not just for baking cookies, I toast bread, make brownies or thinner cakes, or bars, or making shake and bake pork chops or chicken, or insert whatever else requires a nice shallow large baking pan. I have the larger size and then also one that is half the size. They all get used a ton.
Notice how the edges of the pan are are browned but the pan still works great. It is definitely worth spending the extra dollars to get a GOOD pan to bake on

A Bosch. This is like a glorified kitchen aid with a blender and food processor. It works great. I use it to make bread dough, cookie dough, mashed potatoes and many other things. The blender we use for making salsa, milk shakes, smoothies. The food processor/chopper we use to shred bricks of cheese, shred and slice veggies, make hash browns.


There is also an attachment a food chopper that goes where the blender does. I don't have this part but I would love to. Instead I have this little machine and it only cost $10 at Walmart. We use it almost everyday. Seriously. To mash crackers, chop garlic and onions, mash cookies. Seriously I thought this machine would die within the first year of use and I did not know if we would actually use it much, but 3 years later this little thing is still chugging along.


Of course you need a variety of sized mixing bowls. I like to have a couple glass ones to use in the microwave and then also some plastic ones so the little ones can help without worry of breaking my nice bowls.
Then like I told you all a while ago, that these cookies scoopers are the best thing ever invented. They make baking cookies so simple and they always turn out great and perfect. Mine came from pampered chef but I have seen them around town at other stores too.
I think I have gone through one blender for every year I have been married. It always seems to be my hubby burning them up. We do use them a ton for making cake from a box, fluffing egg whites, making frosting, and whipping cream.
A whisk is always a good tool to have around. Especially if all the beaters to the hand mixer are dirty then I default to this little tool. There are many times that I don't really have to beat something to death but I need to mix up all those little crumbs that never seem to mix in very well and this solves that problem
Inevitably I use a rubber spatula when I am baking. I use them while I am mixing in the bosch to scrape down the sides sometimes and to scrape cake mix into the pan.


A rolling pin is really nice to use instead of a drinking cup. At least that is what I used to use to roll out my dough.
These are just a few of the tools that I find essential to my success in baking. Do you use any of these tools? What are your essential tools for baking? Do you use other tools to do the same job?

Rice Pudding


image borrowed from here

I love rice pudding. My family often refers to it as Maggot Stew. I really don't care. It is just so good.

This is my family's recipe. My grandma has used this recipe, my mom has used this recipe, and now I use this recipe:

Rice Pudding
1/2 cup rice
1 quart milk
1/2 tsp cinnamon
1/2 c sugar

Mix all together in a oven safe bowl. Milk tends to boil over if there is not enough room in the bowl to hold it all in so make sure to use an overly large bowl for this. If you are still worried about it boiling over then just place it on a cooking sheet to make cleanup a bit easier if it does boil over. Bake at 275 for 3 hours

I am not really a fan of it hot, but man it tastes good chilled. This last batch that I made I hid all of it from my family so that I could savor it over a few days. I just barely finished it off and now I am definitely going to be making me another special batch

Raggy Quilt Valence and Curtains

I have written a pattern for rag quilt curtains and a valence. I am looking for at least one person to test the pattern out for me. Please email me if you are interested boblyns at yahoo dot com...or if you would like me to make you a set of curtains without knowing exactly how they are going to turn out please email me :)

Essential Tools for Sewing

We all have our favorite sewing tools. Here are the ones that are most important to me:
  1. My sewing machine. It was a Christmas gift from my parents a few years back. It is a Bernina 1008. It is the perfect machine for me. It is very basic. Not computerized, but man its a workhorse.
2. A really good pair of scissors. Mine are Gingher. My hubby and kids know that if you cut something other than fabric with these I might just come unglued. They are definitely expensive scissors but they are worth every penny.
3. Rotary Cutter. I have a fiskars version. I change my blade about once a month, but I cut yards, and yards of fabric also.
4. A cutting mat. The first one I bought was a package deal with my rotary cutter and ruler from fiskars. It worked great. It was 18 x 24 maybe? Well it worked great until there were ravines from me cutting in the same spot many times. Then I set my iron on the board not thinking anything of it but it warped it bad. So finally I broke down with my hubbys help and bought a much larger, self healing, reversible, cutting mat. It is 24 x 36 ish and looks like this:I love it. It works great for what I do. I use my cutting board everyday almost.

5. A cone thread stand. This thing is really great for using those large cone threads for your serger in the sewing machine. The cone thread is much more economical to use. You are not constantly changing out the thread because you ran out. Plus it costs a little bit more than the small things of thread.
I got mine at Joann's for $5-$10. You could use a coupon or buy it when they have their notions on sale for 50% off which happens fairly often. Definitely worth the money.

6. A small pair of scissors to cut thread. The scissors that I use came from my provo craft paper trimmer when I bought it. I actually have 2 pairs of scissors that are about the same size. One sits at my sewing machine and the other at my serger when I have it out.
7. Lots of extra sewing machine needles because I always break mine at the most inconvenient of times. I have had to call my hubby and ask him to stop by the store to get me more needles when he comes home from work. Then I wait very impatiently because it would be a waste for me to drive to town to just get needles when he will be coming home in a few hours.

8. Several extra bobbins. I think I have around 20 bobbins. When I am doing a bigger project before I thread my machine I wind up several bobbins of the same color. That way when my bobbin runs out of thread then I have some all ready to replace it without having to unthread my machine to wind another bobbin. Saves lots of time and frustration. If you don't have a bunch of bobbins already and think you might need some more make sure that they will fit your machine. My mom gave me some bobbins that did not fit my machine and many needles later I figured out it was the bobbin breaking my needles.

9. One of the best things I ever did when setting up my sewing table was to get a small set of drawers for next to my sewing machine with all the small essentials (like bobbins, needles, scissors, unpicker, ruler, calculator, etc). I got mine at walmart but I know lots of other stores that sell them to.
I am thinking I am going to get a set of drawers like this to sit next to my sewing machine for things like my regular cutting scissors, thread, velcro, elastic waistband, and all those other little sewing things that I need at the sewing machine.

10. A good place to store your fabric. I use those plastic drawers to store the fabrics that are less than 2 yards. I have 2 sets of them. For the fabrics that I buy by the bolt I keep on the bolt behind my couch, but I really need a bookcase to store them on so that I can see them. I have some fabrics that I keep forgetting about that are behind the couch.

If bolts would work well for you the fabric stores just throw away or recycle the cardboard pieces so just ask to take some home with you. I almost always leave the store with a couple of them. They are really handy for storing fabric on. It keeps it from getting wrinkled.

Do you have any tips or tools that are essential to you successfully sewing?

Let's Get Social

Image HTML map generator


Featured Post

Where Can I Buy Personalized LDS Baptism Gifts Online?