Showing posts with label pattern. Show all posts

Jelly Roll Rag Quilt Pattern Ideas

Jelly roll rag quilts are a fun and easy project that can be made with a pre-cut jelly roll or by cutting your own strips. The ragged edges give the quilt a cozy, rustic look that's perfect for snuggling up on the couch. In this blog post, we'll explore some of the best jelly roll rag quilt patterns that are sure to inspire you.k.


Visit each pattern by clicking on the pictures below

Rail Fence Jelly Roll Rag Quilt The rail fence jelly roll rag quilt is a classic design that's easy to make and looks great in any color scheme. You'll need one jelly roll and some flannel to make this quilt.
 

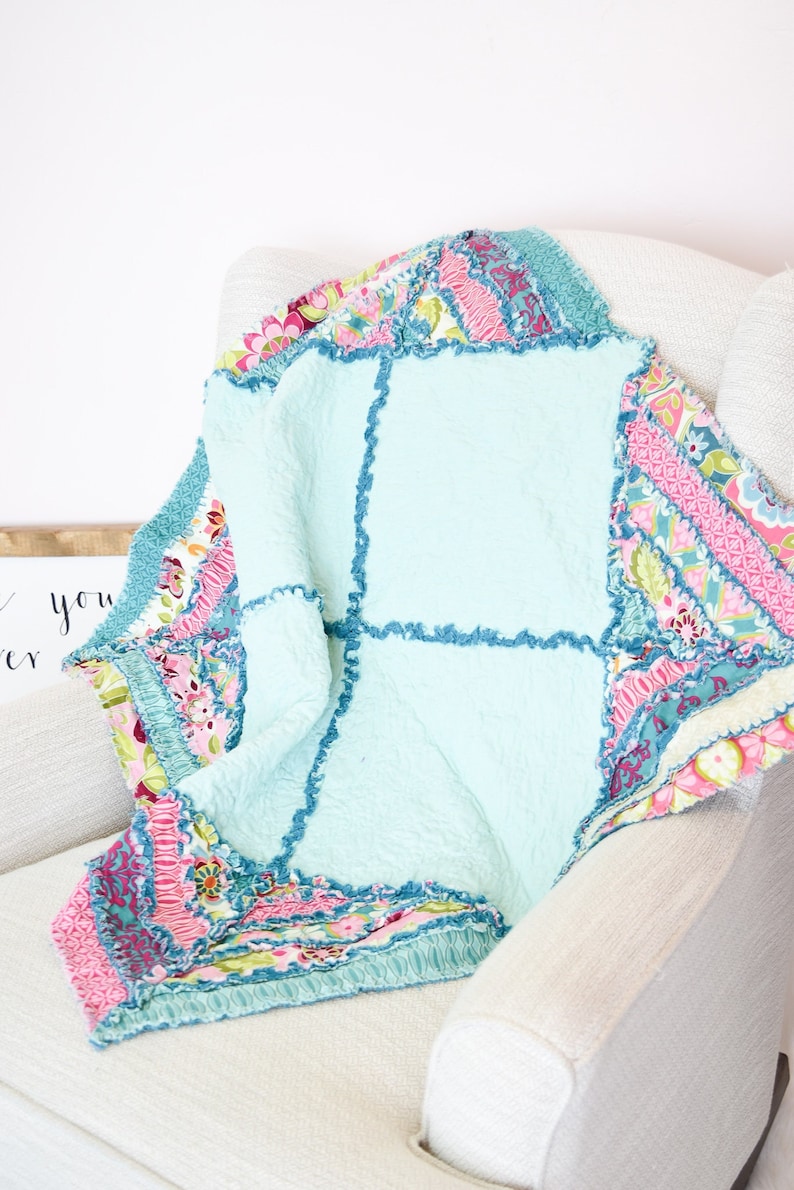
The easy peasy rag quilt pattern is the perfect quilt pattern to use your jelly roll and fat quarter bundles together.

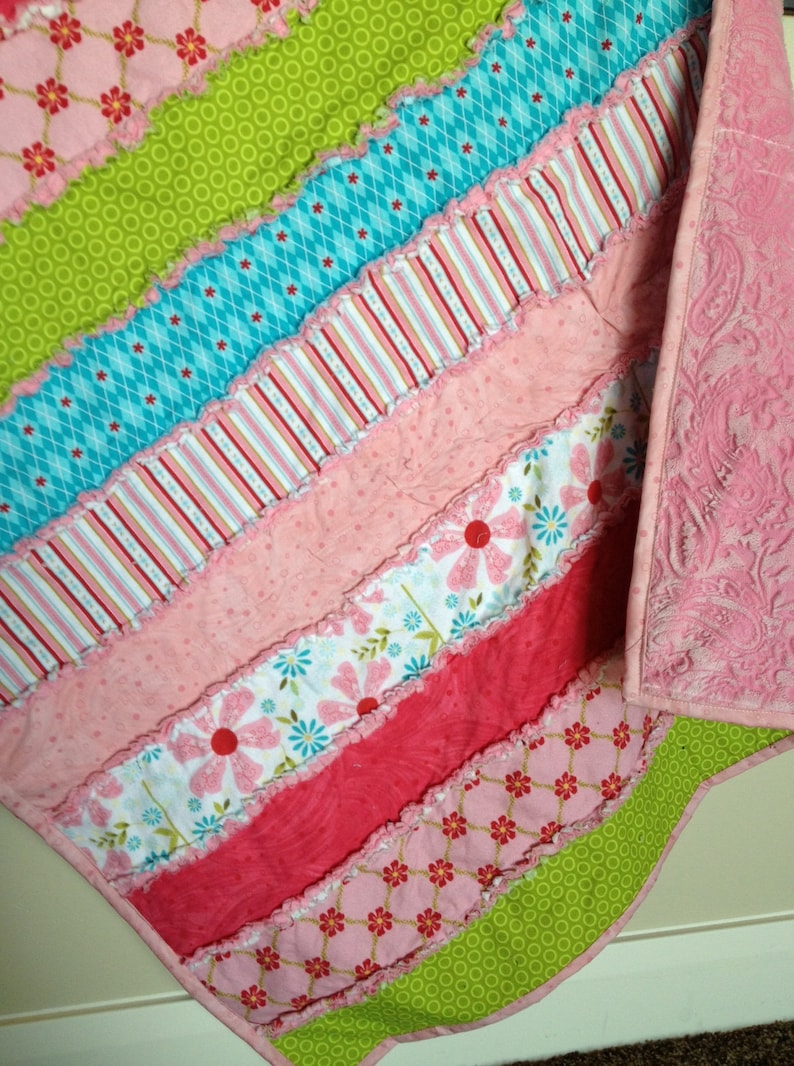
Sew girl rag quilt pattern uses a few jelly rolls which is a great quilt project to use up your scraps!

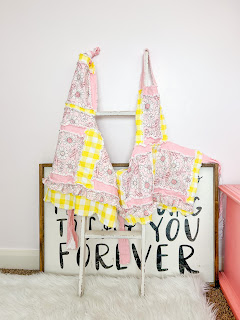
The rag quilt purse uses a few large blocks, but also some jelly roll strips too. Perfect for those random jelly roll strips leftover from other projects.

 
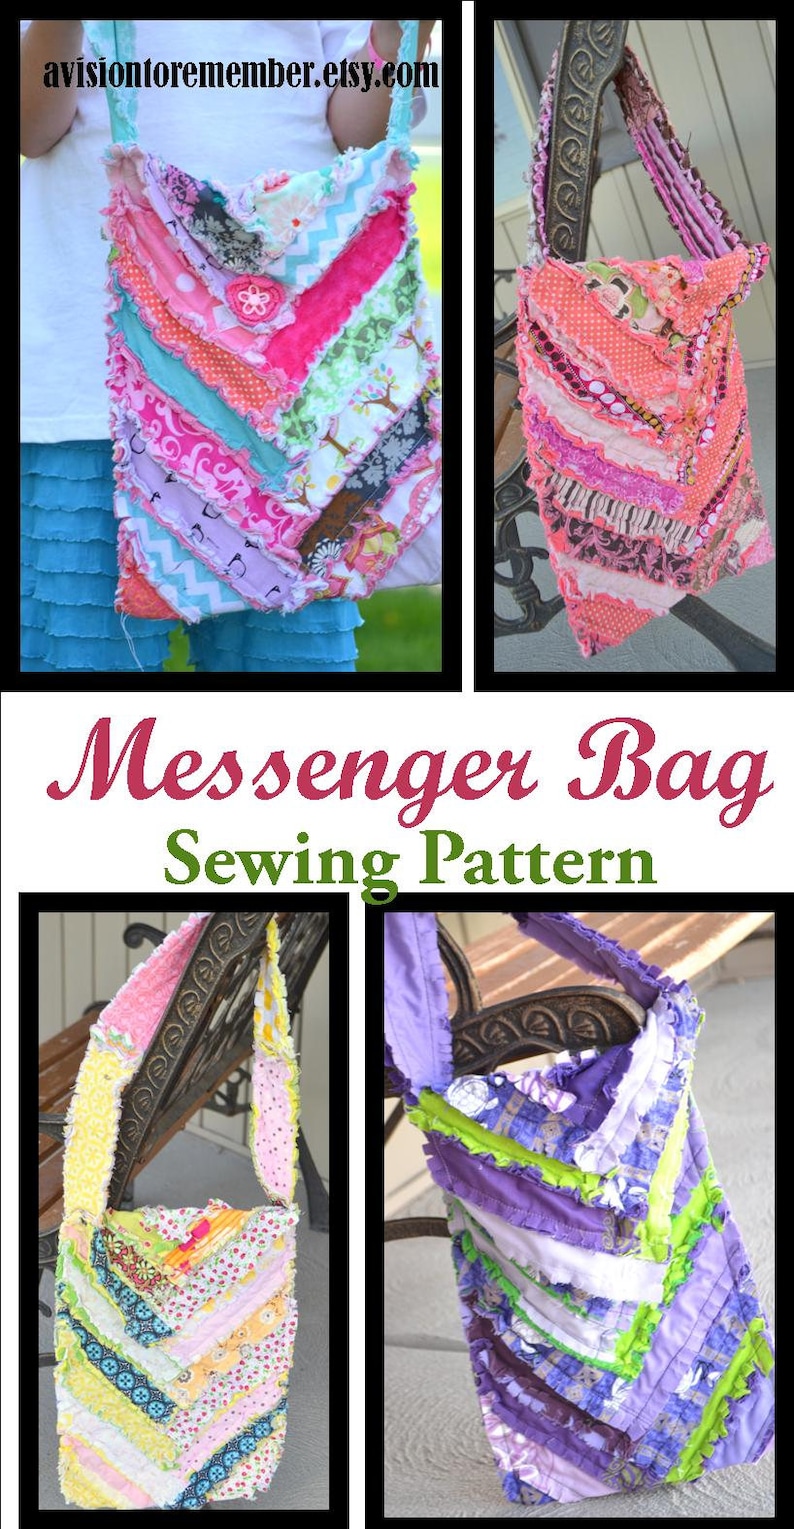
Chevron Jelly Roll Rag Quilt turned into a bag! Can be used to make a quilt as well.  The chevron jelly roll rag quilt is a modern take on a classic design.
 
Scrappy Jelly Roll Rag Quilt The scrappy jelly roll rag quilt is a great way to use up your leftover jelly roll strips.


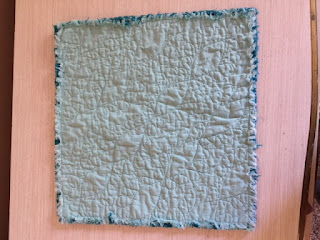
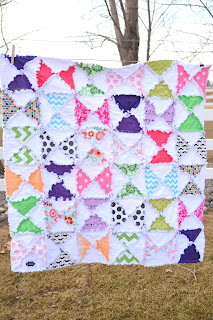
 Jelly rolls on point rag quilt is a really fun scrap buster project. With quilted large squares for your to embroider, applique, or quilt your favorite designs.

In conclusion, jelly roll rag quilts are a fun and easy project that can be made in a variety of designs and color schemes. Whether you're a beginner or an experienced quilter, these patterns are sure to inspire you to create your own unique quilt. So gather your materials and get started on your next project!
 
Make sure to visit our blog for more Rag Quilting information including all of the basics you will need to know to complete your first (or 50th) rag quilt. 

Rag Quilt Fabric Requirements

Are you planning on making a rag quilt but not sure how much fabric you need? We've got you covered! Here's a general guide on how many yards of fabric you'll need for each size of quilt.


Crib Size Quilt:


 For a crib size quilt, you'll need 2 yards of cotton for the top and 2 yards of flannel for the back. This will give you enough fabric to make a quilt that's approximately 36 inches by 52 inches. This size is perfect for a baby or toddler to snuggle up with.

Mini Quilt:


 If you're making a mini quilt, you'll only need 1.5 yards of fabric. This will give you enough fabric to make a quilt that's approximately 30 inches by 40 inches. This size is great for wall hangings or for a small lap quilt.

Baby Quilt:


 For a baby quilt, you'll need 1.25 yards of fabric. This will give you enough fabric to make a quilt that's approximately 30 inches by 30 inches. This size is perfect for a baby to use as a play mat or to snuggle up with.

Twin Size Quilt:


If you're making a twin size rag quilt, you'll need 7 yards of fabric. This will give you enough fabric to make a quilt that's approximately 70 inches by 90 inches. This size is great for a child's bed or for a smaller adult bed.

Of course, these fabric requirements are just a general guide. Depending on the pattern you choose and the size of your blocks, you may need more or less fabric. Always double-check your measurements and calculations before making your final fabric purchases.

In conclusion, knowing how much fabric you need for each size of quilt can help you plan and budget for your next rag quilt project. Whether you're making a small mini quilt or a larger twin size quilt, we hope this guide has been helpful. Happy quilting!

Image HTML map generator

Rag Quilt Style Womens Apron Pattern

One of our favorite patterns at AVTR is the rag quilt style women's apron. 


This patchwork style apron sewing pattern is for women. It was originally designed as part of a quilt line for home and can be used with any cotton fabrics. The finished dimensions are approximately 40 inches across the bottom edge and 30 inches in length from top to bottom hemline.

We recently had a wonderful custom return and ask if we could make her 7 breast cancer themed aprons as gifts for Christmas. 

We picked some fun and beautiful custom printed fabrics from Spoonflower


The apron is a fun and unique gift idea for Christmas, Birthday's, Mother's Day, and just because


The apron pattern is full of tips and tricks on how to complete your very own apron.

The ties are extra long so that it fits many different body shapes and sizes.
The apron is also easily customized for adults and children. We simply adjusted the number of squares in the apron!
It seriously is the cutest little apron for your little ones too


To make the apron, you will need:

To make the apron, you will need:

  • The apron pattern.

  • Fabric. As described on pattern cover at bottom of blog post

  • Sewing machine with straight stitch capability. If you have any concerns about your machine's ability to handle sewing curves (only for the scallop bottom edge), please test it before beginning this project!

  • Matching thread. I recommend using cotton thread because it won't snag easily when turning corners when topstitching.

  • Rag quilt scissors . These scissors have blunt tips so they don't slip and slide as much when cutting through layers of fabric like denim or twill.* Rotary blade , cutting mat , ruler highly recommended!


Sewing machine and matching thread

The first step to making a great apron is to get your sewing machine ready. You'll need:

  • A sewing machine. Any general-use sewing machine will work, but if you want something that's extra durable, opt for an industrial-strength model.

  • Needles and thread that match your fabric type (most often polyester). We recommend using the same brand of both so that your stitches won't unravel—and make sure they're compatible with your sewing machine!

  • A walking foot attachment (recommended). This will help keep the layers from shifting during stitching and prevent uneven seams from forming where you don't want them to be!


This is a patchwork style pattern for women wanting to reproduce the style for themselves

The apron pattern is easy to follow, and the instructions are clearly written. You can easily modify this pattern to fit your own size and style. The fabric requirements are listed at the top of each page.

If you have any questions about this pattern, don't hesitate to contact me!

Conclusion

This is a patchwork style pattern for women wanting to reproduce the style for themselves. Sewing machines can be purchased from many sources, including local fabric and craft stores as w


Helpful links:

Rag Quilt Seam Allowances

Best Fabrics for Rag Quilts

Best Gift ideas for Seamstresses

Image HTML map generator

Strip Rag Quilt

Rag quilts are traditionally made with squares. Here at AVTR, we like to think outside of the rag quilt box. Instead we're thinking about simple quilt patterns that are made in a strip rag quilt. 

Unique? Yes!

Fun? Yes!

Most importantly...

Quick? Absolutely!

Enjoy the following strip rag quilt patterns (click on the picture for more information on each quilt)

Log Cabin Quilt Pattern

Log Cabin Quilt Pattern

Arrow Quilt Pattern

Arrow Quilt Pattern

Ashlyn Quilt Pattern

Ashlyn Quilt Pattern

Split Strips Quilt Pattern

Split Strip Quilt Pattern

Rail Fence Quilt Pattern

Rail Fence Quilt Pattern

Jelly Roll Quilt Pattern

Jelly Roll Quilt Pattern

Free Strip Log Cabin Rag Quilt (Perfect for scraps)

Free Strip Log Cabin Rag Quilt Pattern

Strip Quilt Pattern

Strip Quilt Pattern


  Image HTML map generator

Rag Quilt with Batting

Typical quilts are made by first creating a quilt top, then by making a quilt sandwich that includes the quilt top, batting, and backing. Rag quilting short cuts the quilt top assembly and creates the quilt top while sewing the backing and batting pieces at the same time.

You have several different options for the middle layer.

Warm and Natural Batting

Warm and Natural batting will give your quilt a really nice weight. If you choose to use this as your middle layer, you will need to cut the batting pieces 1'' smaller than the bottom and top layers so that the batting doesn't show in the exposed seams on the top of the quilt.

You will not be able to use batting for patterns like the Flying Geese, the Hourglass Pillow, or the Arrow Quilt because as you are assembling your quilt you will be cutting sewn pieces, and then sewing them again. Your batting would show in the exposed seams.

Diamond Rag Quilt Pattern by A Vision to Remember
Arrow Rag Quilt Pattern by A Vision to RememberRoadways rag quilt pattern by avisiontoremember

If you use Warm and Natural for your middle layer, you must quilt each and every one of your fabric sandwiches. If you don't, the batting will move around and ball up in your quilt when it is washed. One easy way to quilt the sandwiches is to sew an X in the sandwich from point to point. But you can quilt the block using any quilting technique.

Examples of sewing squares together before sewing the quilt together: 

X from corner to corner


Quilting like on a quilt over entire block 


Straight line quilting

Flannel Fabric for Rag Quilt Batting

For the middle layers in my quilts, I prefer a coordinating layer of flannel. The flannel will add color to your quilt in the exposed seams, while still adding weight.

Cut the middle layer the same size as the bottom layer. This middle layer works well for the quilt assembly method where pieces are sewn together and then cut to make different shaped blocks. Quilts like Flying Geese, the Hourglass Pillow, or the Arrow Quilt will be perfect for flannel middle layers.

Rail Fence Rag Quilt Pattern by A Vision to Remember

Another reason I prefer flannel for the middle layer is that it keeps the cost of the quilt down. Flannel costs about half as much as Warm and Natural batting.

Below is a quilt I made with black flannel batting, red flannel back, and kids pajamas as the top of the quilt. I loved how it turned out.  It was very warm and snuggly!


 I used the easy peasy rag quilt pattern for the above quilt. It can be found in our rag quilt pattern shop on etsy.


  Image HTML map generator

Quilt - As - You - Go Car Seat Canopy Pattern

Protecting my newborn baby has always been an upmost priority. Especially from prying eyes when we are out in public.

Que, the simplest Quilt as you Go Car seat Canopy pattern out there!


Isn't this quilt just to die for?


Quilt Features:
  • Finished Quilt measures 33x44" (quilt size can easily be changed by adding more strips)
  • The quilt can be used as a car seat canopy OR a quilt!  Simply don't add the handles and you have the perfect baby quilt
  • The quickest quilt out there....for sure!  Its quilted as you, so its even quicker!
Quilt Requirements:
  • 1 Yard of Fabric for the front of the quilt (can be split between 2-5 fabrics)
  • 1 Yard of Fabric for the back of the quilt
  • 1 Yard of Batting
  • 1/2 Yard for Binding


The quilt pattern is available HERE  Make sure to download it today!


Image HTML map generator

Rag Quilt Pattern Scripture Tote for Baptism Gifts

Who doesn't love a free pattern?!

I know that I always do. 

Today I am sharing one of my most popular patterns to date, and am giving it to you all for FREE!

It is the Rag Quilt Scripture Tote for Baptism Gifts


Pinwheel Little Girls Apron Pattern

Every little girl needs an apron, or at least my little girls all insist that they need an apron.  Especially, when its a free apron pattern that includes 3-d pinwheel sewing technique and rag quilting all in one.  It doesn't get more unique and simple than that!

How to Make a Girls Apron Free Pattern by A Vision to Remember


How to Sew a Gnome Pillow Sham

Only a couple more days until 2016, I can't believe it!  No, seriously!  I can't believe it.  Wasn't it just yesterday that my little baby boy was born....ok really it was 15 months ago, but it should've been just yesterday!
How to Sew a Gnome Pillow Sham using FMA and Free Motion Quilting FMQ
Today, I am here to share with you, during the Christmas break, a fun little pillow sham that works for both Christmas and through all of winter!  I always love to keep out a few of my Christmas decorations, and this one is one that is great for the transition!
FMA Elf and Gnomes onto Fabric for Pillow Sham with a aqua hat
You can download the gnome pattern pieces HERE
FMA Elf and Gnomes onto Fabric for Pillow Sham

Cutting out the pillow:
1. Cut out 1 piece of fabric measuring 17" wide by the width of fabric.
2.  Cut that piece of fabric into 3 pieces.  They will measure 17" square, and then two 12" by 17" pieces.  The 12" pieces will be for you back envelope
3. Cut out all the gnome pattern pieces


Christmas Pillow Decorations Tutorial with Elf and Christmas Ornament FMA
Assembling your Ornament Christmas Pillow Sham
1. Follow along with the video to complete your pillow
OR
2. Top stitch all gnomes onto the pillow
5. Finish the edge of the fabric using your favorite method on both of the 12" pieces for the back of your pillow (I used the sew, then roll method)
6. Place both of the 12" pieces on the back of the pillow, making sure to line up the corners of the front of the pillow with the back of the pillow.  Pin in place.
7.  Sew around the pillow sham using a 3/8 Seam allowance.  Make sure to backstitch over the places where the envelope opening will be because you will be putting extra pressure on these points when stuffing the pillow sham with a pillow.  
8.  Trim the corners so that when you turn you will have nice and pretty corners
9.  Turn right sides out and stuff with pillow and Enjoy!

If you want to watch how I finish the edges of my pillows check out this youtube video on a Christmas Ornament Pillow (seen in a couple of the pictures)
Free Motion Applique Gnome Pillow Tutorial


Gnome and Ornament FMA Pillow Shams


If you enjoyed this video and tutorial, make sure to share it on Facebook and Pinterest!
How to Sew a Gnome Pillow Envelope Pillow Sham

Also, make sure to join the Facebook Group to share your pictures and to ask any questions that you have!
Image HTML map generator

Subscribe

Enter your email address:

Delivered by FeedBurner

Let's Get Social

Image HTML map generator