A Warm and Cozy Guide: How to Make a Rag Quilt

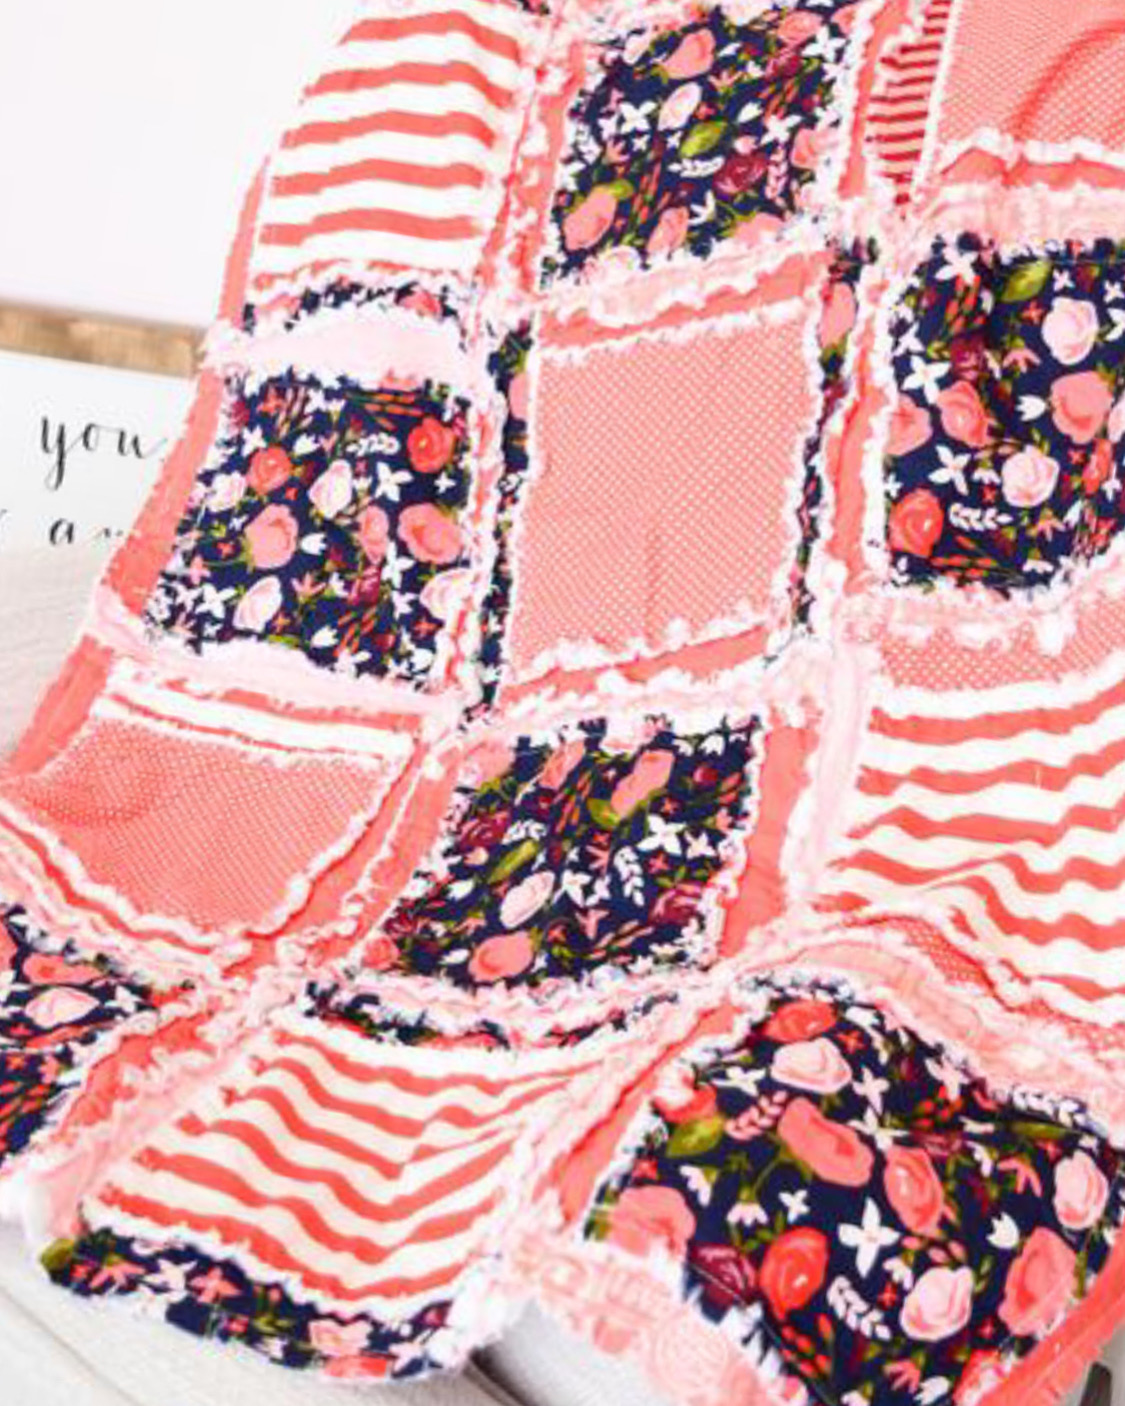
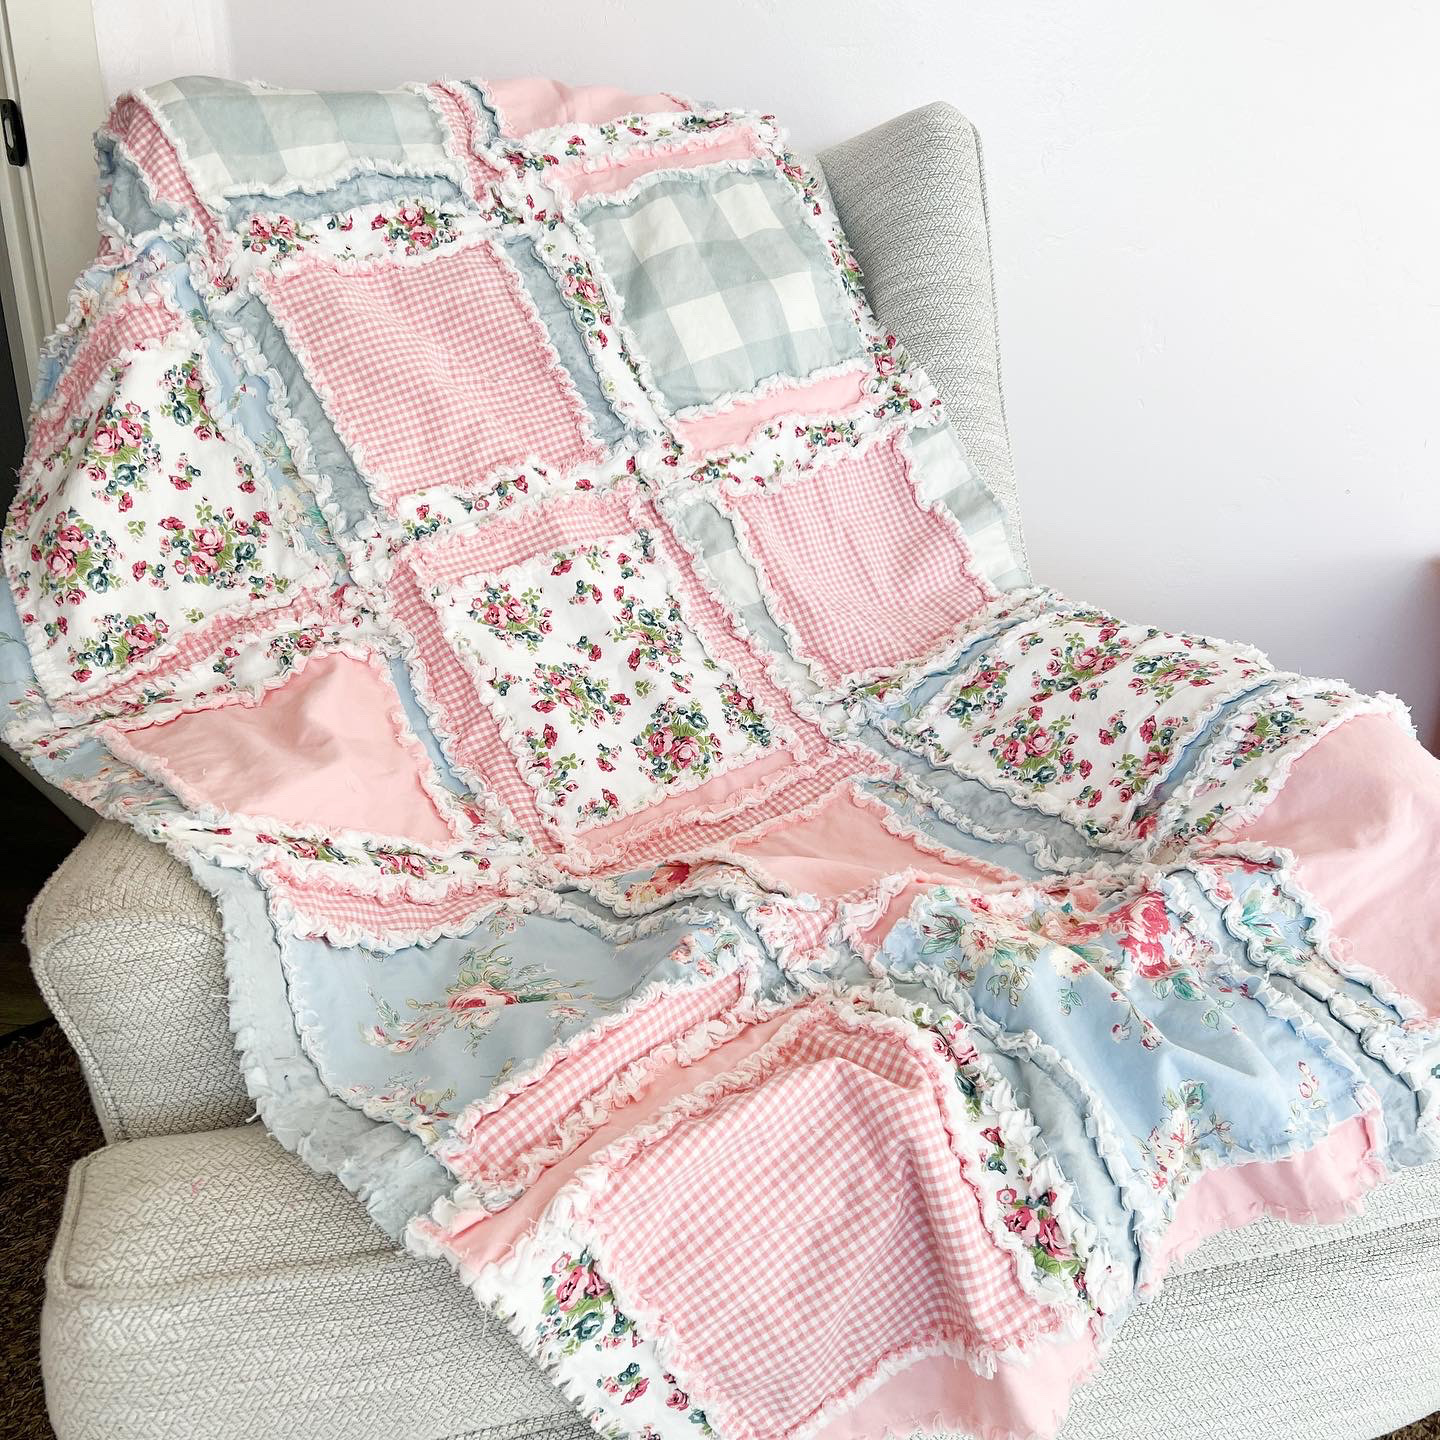
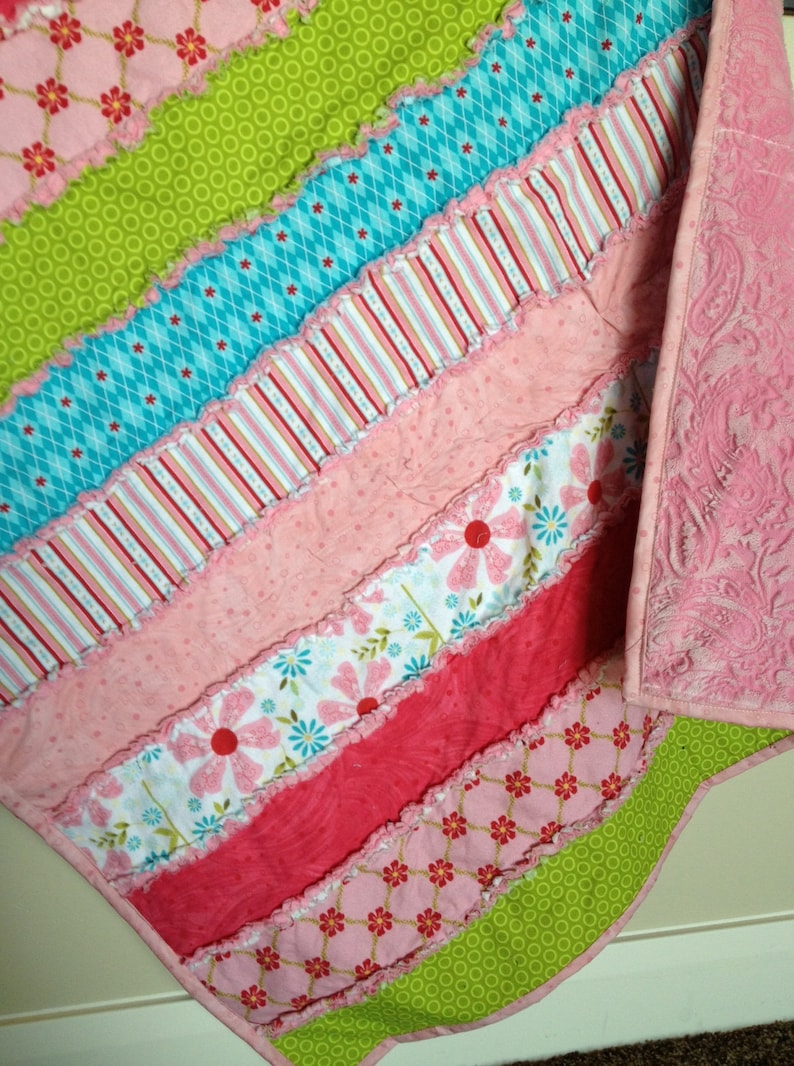
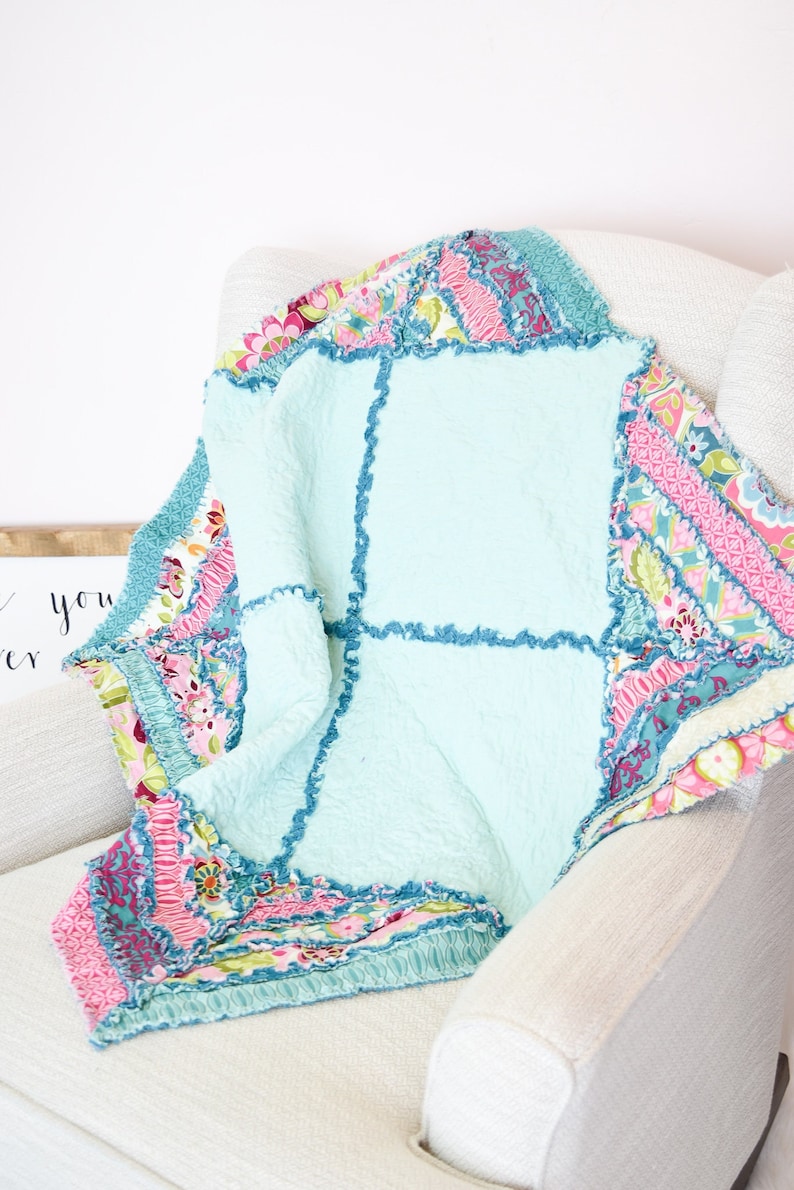
Few things compare to the comfort and warmth of a well-made rag quilt. Rag quilts, characterized by their exposed seams and frayed edges, offer both style and coziness. Whether you're a seasoned quilter or just starting your journey, making a rag quilt is a satisfying and approachable project. In this comprehensive guide, we'll walk you through the step-by-step process of creating your very own rag quilt. From selecting fabrics to sewing the perfect seams, you'll soon have a beautiful and snuggly quilt to call your own.


Materials Needed

Before we dive into the actual crafting process, let's gather the materials and tools you'll need for this project:

  1. Fabric: The heart of any quilt is the fabric. For a rag quilt, you'll typically need two types: one for the quilt top (also called the "face") and one for the backing. Flannel, cotton, and fleece are popular choices for their softness and warmth.

  2. Batting (or flannel for batting): This layer goes between the top and backing fabrics to provide extra warmth and thickness to your quilt.

  3. Ruler and Rotary Cutter: These tools are crucial for precise fabric cutting.

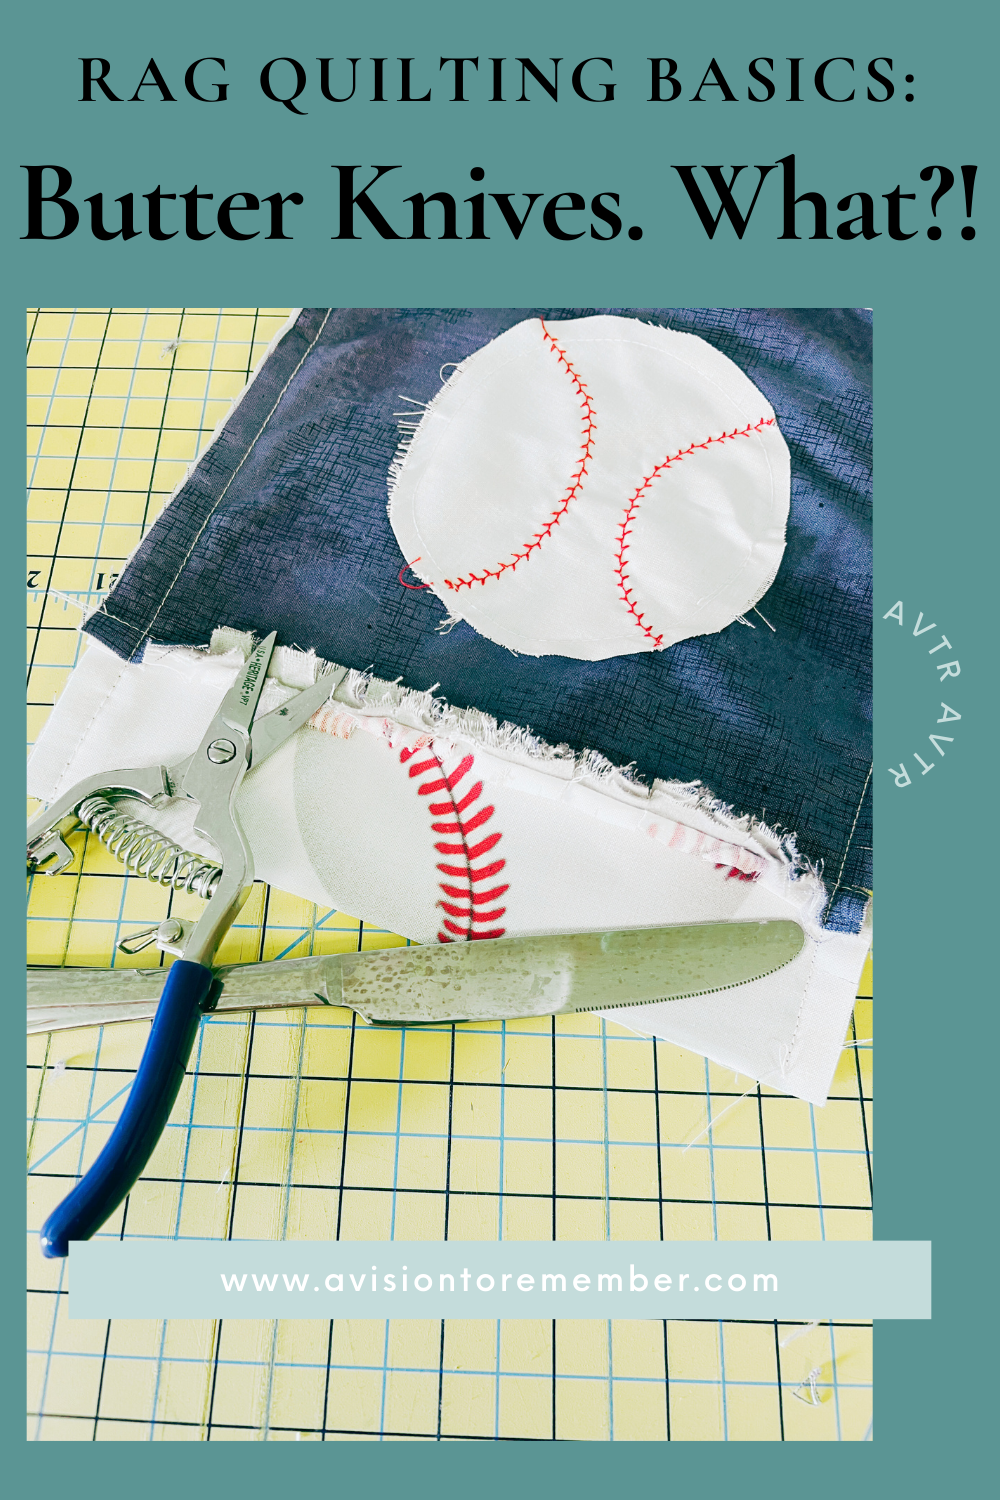
  4. Scissors: For snipping seams and creating the signature ragged edges.

  5. Sewing Machine: While you can sew a rag quilt by hand, using a sewing machine will save you time and effort.

  6. Thread: Match the thread color to your fabric for a polished look

  7. Seam Ripper: Just in case you need to undo any stitches.

With your materials at the ready, let's embark on our rag quilt-making journey.


Step 1: Choosing Your Fabrics

The first step in creating a stunning rag quilt is selecting the perfect fabrics. Consider the following tips:

  • Colors and Patterns: Choose fabrics that match your style and the quilt's intended purpose. Solids, plaids, or themed prints are all wonderful options.

  • Texture: Opt for fabrics with a pleasing texture, as this will enhance the tactile appeal of your quilt. Soft, cozy materials like flannel or fleece work wonderfully.

  • Pre-Washing: It's a good idea to pre-wash your fabrics to prevent color bleeding or shrinkage after your quilt is complete.

  • Contrast: Ensure there's enough contrast between the fabrics for your quilt pattern to shine through. High contrast can create a striking, eye-catching design.


Step 2: Cutting Your Fabric

Now that you've selected your fabrics, it's time to start cutting. Follow these steps for precision:

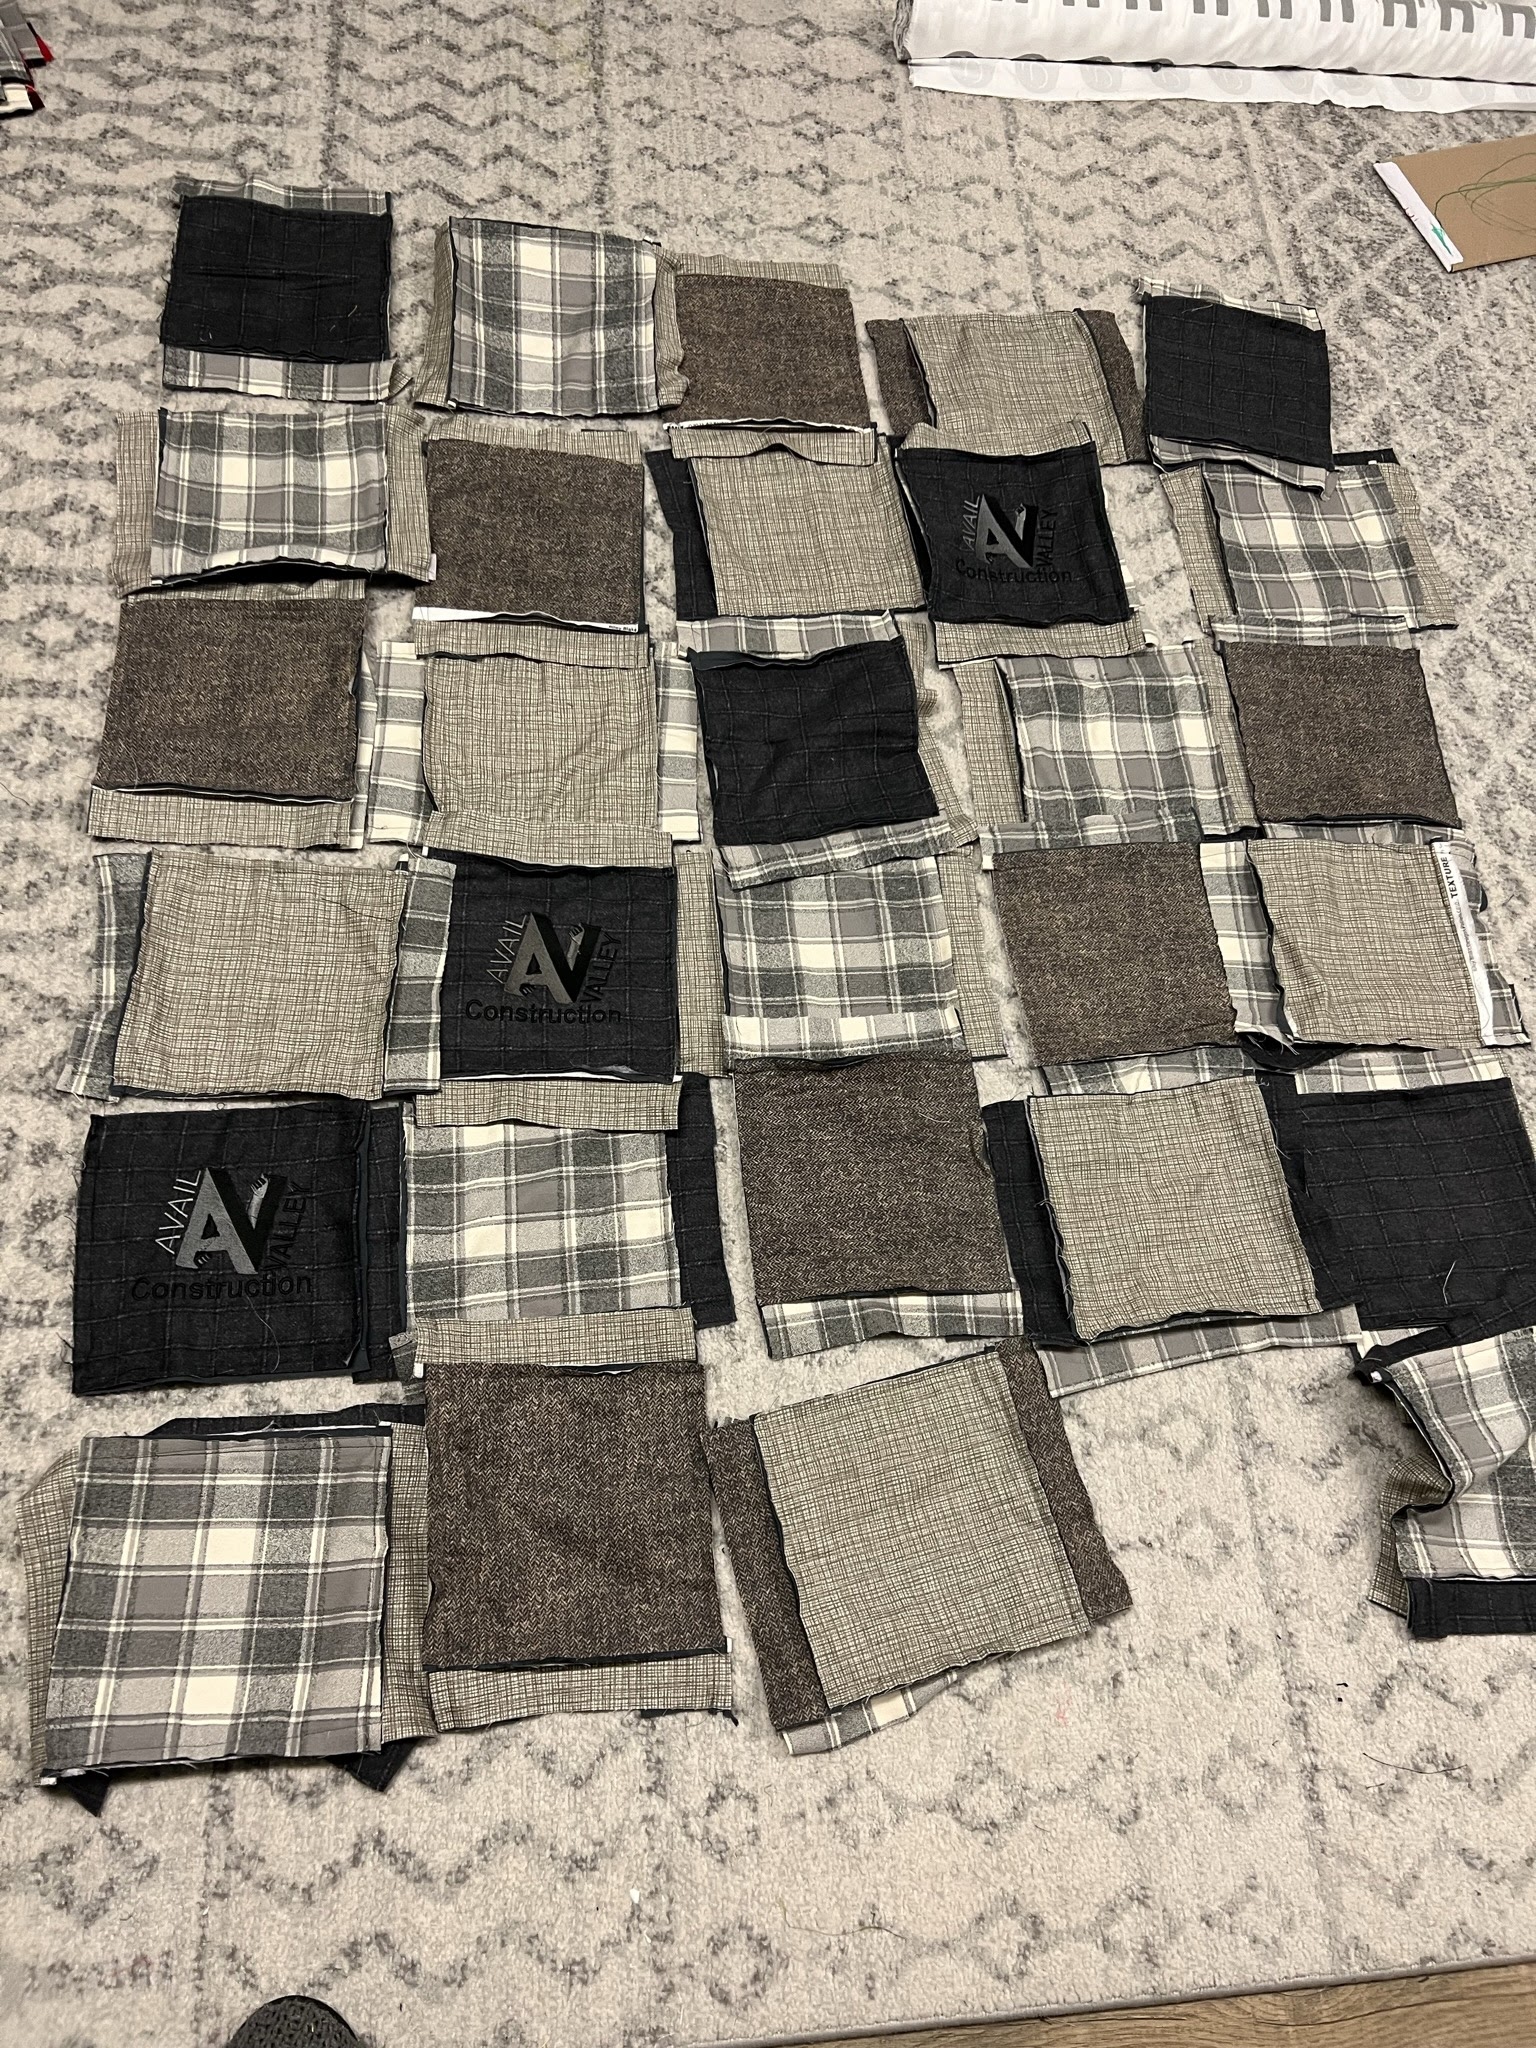
  • Use your ruler and rotary cutter to cut identical squares or rectangles from your face and backing fabrics. These will be the same size since rag quilts are typically symmetrical.

  • Cut an additional layer of batting that's slightly smaller than your fabric pieces. This allows for a ragged edge to form around the quilt's perimeter.

  • To create the classic "frayed" look of a rag quilt, make small snips along the edges of your fabric squares, about 1/4 to 1/2 inch apart, being careful not to cut too close to the seam line.

  • Assemble your squares into pairs, with a face fabric square and a backing fabric square, and place a batting square in between.


Step 3: Sewing the Quilt Blocks

Now, it's time to start sewing your quilt blocks together:

  • Align the edges of your quilt block layers, making sure the batting is sandwiched in between the face and backing fabrics.

  • Use your sewing machine to stitch along the edges, creating a seam allowance of about 1/2 inch. You can choose a straight stitch or a decorative stitch, depending on your preference.

  • Continue sewing your quilt blocks together, creating rows and columns until you have the desired quilt size. Be sure to backstitch at the beginning and end of each seam for added durability.

  • Press your seams flat with an iron, ensuring that they lie in the same direction to reduce bulk.


Step 4: Assembling the Quilt

With all your quilt blocks sewn together, it's time to assemble the entire quilt:

  • Lay out your quilt blocks in the desired pattern, arranging them into rows and columns. Ensure the seams from adjacent blocks nestle together neatly.

  • Pin the rows and columns together using quilting pins to keep everything aligned.

  • Stitch the rows together, and then stitch the columns together, using a 1/2-inch seam allowance.

  • Once your quilt top is complete, trim any excess batting that extends beyond the fabric edges.


 Step 5: Clipping and Fraying

Now, let's create those charming frayed edges:

  • Use scissors to make small, close snips along the seam allowances, being careful not to cut through the actual seam.

  • The more snips you make, the fluffier and frayed your quilt will appear. You can adjust the density of snips to achieve your desired look.


Step 6: Washing and Drying

Give your rag quilt its signature look by washing and drying it:

  • Place your quilt in the washing machine, along with a few towels or sheets to help create friction.

  • Use cold water and a gentle detergent to prevent excessive fading.

  • After washing, tumble dry your quilt on low heat. The agitation and heat will encourage the fraying process.

  • Periodically check on your quilt during drying to ensure it doesn't become overly tangled.


Step 7: Enjoy Your Rag Quilt

Congratulations! You've successfully created a beautiful rag quilt that's not only visually appealing but also wonderfully warm and cozy.

Whether you're keeping it for yourself or gifting it to a loved one, your rag quilt is a labor of love that will provide comfort and style for years to come. Curl up with a good book or wrap it around yourself on a chilly evening—it's the perfect companion for relaxation and warmth.

Now that you've mastered the art of making rag quilts, you can explore different patterns, colors, and sizes to create a collection of these charming and timeless pieces. Enjoy your quilting journey and happy crafting!

 Image HTML map generator

Rosette Fabric Flowers from Scrap Material


In a world where sustainability and creativity go hand in hand, finding ways to repurpose scrap materials has become an exciting and rewarding endeavor. If you have a collection of fabric scraps lying around, gathering dust in a corner, why not transform them into stunning rosette fabric flowers? These exquisite blooms are not only eco-friendly, but they also add a touch of elegance to any accessory, garment, or home decor item.

Whether you're an avid crafter or simply looking for a fun and budget-friendly project, this step-by-step guide will take you through the process of creating your very own rosette fabric flowers. By upcycling these humble remnants, you'll give them a new lease of life while expressing your personal style and unleashing your creative flair. So gather your scrap materials, prepare your tools, and let's dive into the world of rosette fabric flower making!

 Ingredients:

  • pieces of scrap fabric about 2 inches wide. I used a lot of flannel and that made the flower thicker. If you are using more thin cotton fabrics then I would double them up. You will need enough fabric to make a 50 inch strip. A 50 inch strip of fabric will make a flower that is approximately 4 inches wide.
  • Hot glue gun
  • sewing machine or needle and thread
  • hair clip or pin for attaching the flower to

How to make Rosette Fabric Flowers from Scrap Material:

  1. Gather your fabric scraps or cut your fabric into strips. I used several different colors, but if you want the same color then you could cut a strip of fabric 2 inches by the width of your fabric. If you fabric is 45 inches then I would not worry about adding the extra 5 inches to it. Notice that my pieces of fabrics are not all the same width, some were a little wider and some were a little smaller. Remember it is a scrappy flower. Each of my scraps are anywhere between 4 inches long and 12 inches long. The ones that were longer than that I cut in half. If you are using cotton then I would double your fabric up for this part or use fabric that is 4 inches wide instead of 
  2. Sew the pieces of fabric together with right sides facing each other
  3. Continue to sew the pieces of fabric together until you have a long piece of fabric that is about 50 inches long. 
  4. Now take your long strip of fabric and fold it in half or roll it into a tub. It might be easier for you to put a small drop/line of glue along one edge of the strip to hold the fold/roll into place
  5. Roll the fabric strip onto itself. Imagine making a cinnamon roll. As you are rolling the fabric onto itself add a little glue here and there to hold the flower into place. You could even do a thin line of hot glue to make sure that it stays in place.
  6. Continue rolling until you get to then end of your fabric. With the last inch of the fabric strip roll it under tha last row that you made. Tuck the end into there so that it is hidden. Put a little dab of glue in there to hold it into place

  7. The possibilities are endless for what you can use this flower on.
    1. sew it onto your clothing for an accessory
    2. attach it to a purse, shoes, or other item of clothing
    3. glue a hair clip onto it and clip it into your hair
    4. attach it to a pin for a corsage
    5. Attach to a headband.

Make sure to check out all of the fabric flower tutorials we have here including the below: 


Image HTML map generator

Selvage Edge Scraps Flowers Tutorial

Are you tired of throwing away the selvage edge fabric pieces from your sewing projects? Well, here's a fun and easy way to turn them into something beautiful: ruffled flowers!

This blog post includes affiliate links. Thanks for clicking!
 

To make these flowers, you will need some selvage edge fabric pieces and some elastic. You can use any fabric with a selvage edge, but I recommend using lightweight cotton or linen fabrics for a softer and more delicate look.


Here are the steps to create your own ruffled flowers:

 Ingredients:

30 inches of ¼ inch elastic
50 inches of pieces of scrap fabric that measure between 1/2 inch and 1 inch wide. They don’t have to be one continuous piece. They don’t have to be even, the wavier and different they are the better.
Thread
Hot Glue
Alligator Hair clip (or pin for a corsage)
3/8 inch grosgrain ribbon to cover the hair clip
Small piece of fabric to cover the back of the flower

Directions:

1. sew the fabric scraps to the piece of elastic. Pull the elastic as tight as you can while sewing so that the
fabric bunches/ruffles.


2. After you have sewn the first piece of fabric onto the elastic, continue with the second piece. Do this will all the pieces of fabric. You don’t have to worry about little gaps within the fabric. Don’t even worry about finishing the ends of all the scraps. This is a scrappy flower. It is GOOD when it is messy.
3. Continue until you are either at the end of the elastic or you have used all your fabric scraps.
4. Take your long piece of scraps and elastic. Put a line of glue onto the elastic and start rolling it onto itself.


5. Put a lot of glue onto the bottom of the flower to secure it into place.
6. Cut a circle the same size as the bottom of the flower and glue it onto the bottom of the flower.
7. Attach your pin or hairclip to the bottom of the flower.

Notes:

To make the flower bigger or smaller, use more or less elastic and ribbon. Just follow the rest of the directions.

And that's it! You now have a beautiful ruffled flower made from selvage edge fabric pieces and elastic. These flowers can be used to embellish clothing, bags, or home decor items, or they can be attached to a hair clip or headband for a fun accessory. Give it a try and see what kind of unique creations you can come up with!

Check out our other scrap flower craft ideas for scrap fabrics 


Image HTML map generator

Memorizing Book of Mormon Scriptures: Mosiah 15:6-7


One of our goals the last couple years is to memorize important scriptures and quote. I’m going to start sharing them in hopes that it might help someone else with their goals and to keep them organized for me

The memorizing sheets include the entire scriptures, some words left out with the first letter remaining, and then the first letter remaining for each word.

I love this set of scriptures because Christ chose to come to this earth knowing that he would die for our sins. But before that would happen, he would perform many miracles for those he loved so much. 

He had been prophesied of throughout the Old Testament, but the most famous prophet to prophesy of his coming to me is Isaiah. He spoke of how he would come and die for us. 

This was quoted by the prophet in Mosiah 15. He talks about how Christ would be led, like a sheep (the sheep and lamb being a symbol of Christ throughout his ministery). He could have stopped what was going on, he could have performed a miracle for himself. Instead he opened not his mouth. He allowed the Atonement and his death to continue.

Why? for us! He did it for us. He also did it because it was the will of the Father. He gave his life for others. 

I hope you enjoy memorizing this sacred scripture as much as I have. 

Mosiah 15:6-7

And after all this, after working many mighty miracles among the children of men, he shall be led, yea, even as Isaiah said, as a sheep before the shearer is dumb, so he opened not his mouth.

7 Yea, even so he shall be led, crucified, and slain, the flesh becoming subject even unto death, the will of the Son being swallowed up in the will of the Father.

First Letter of Each Word of Mosiah 15:6-7

A a a t, a w m m m a t c o m, h s b l, y, e a I s, a a s b t s i d, s h o n h m. 

7 Y, e s h s b l, c, a s, t f b s e u d, t w o t S b s u i t w o t F. 

A screen shot of the memorizing verses in my notes section. Feel free to save the picture or screen shot it for yourself. 


https://drive.google.com/uc?export=view&id=1jmKHcoi3FG7IVAfnSrva7MX8q-zKP66H

We have shared several other things that we are working on memorizing here on our blog. Including the Living Christ, The Proclomation to the Family, The Restoration, and more!

10 One Hour Rag Quilt Patterns

Here are A Vision to Remember, we specialize in rag quilts. Especially making a quilt in an hour. Making a one hour rag quilt can really be done. 


Rag quilts are a popular choice for those looking for a cozy and rustic touch to their home decor. The technique involves using a layer of batting between two layers of fabric and then sewing the layers together with exposed seams that will fray over time. The result is a warm and cuddly quilt with a textured, frayed edge that's perfect for snuggling up with on a chilly day.

If you're looking for some new rag quilt patterns to try, here are ten unique designs that can be completed in just one hour each.

All of the quilt patterns include the following:

  • Instructions for cutting, piecing, and finishing your quilt
  • Hints and Tricks that I have learned along the

Suggested Fabric for the Rag Quilt Patterns:

  • Cotton
  • Flannel
  • Minky
  • Chenille

Apron Pattern for Women & Children

The rag apron is the perfect gift to create for your friend, mom, sister, aunt, or anyone that loves to be in the kitchen while still being stylish
 

Ashlyn Rag Quilt Pattern

The pattern is easy to sew and a great blanket for the beginner. It can be whipped up in just a few hours. Also, not pictured will be the instructions for making the blanket larger for crib size or basically any size you would like.


Disappearing 9 Square Rag Quilt Pattern


 The pattern is easy to sew and a great blanket for the beginner. It can be whipped up in just a few hours.

Patriotic Quilt Pattern - Flag Rag Quilt

Includes instructions on how to make the throw size quilt.


Pinwheel Rag Quilt Pattern


 Pinwheel Quilt Pattern for Baby is a quick and easy quilt pattern for any level of expertise. Beginner to advance. Complete your rag quilt in as little as an afternoon with our fun and simple pattern

Strip Rag Quilt Pattern


  The strip Rag Quilt Pattern for a throw size quilt and easy to sew and simple to follow.

Triangle Rag Quilt Pattern 


 The pattern is easy to sew and a great blanket for the beginner. It can be whipped up in just a few hours. Also, not pictured will be the instructions for making the blanket larger for crib size or basically any size you would like.

Around the World Rag Quilt Pattern


 Around the World Rag Quilt Pattern for Baby is a fun quilt to create for a baby shower gift, for your own little new one on its way, or to even create a queen size quilt. It is easy to sew and simple to follow.

Addy Mae Rag Quilt Pattern


 Addy Mae Rag Quilt Pattern for Baby Car Seat Cover to sew a great baby shower gift for a boy or a girl. The pattern can be used as a blanket or a carseat cover.  It is a great way to keep your baby germ free,

Diaper Bag Pattern Rag Quilt Style


 Diaper Bag Pattern Rag Quilt Style. The bag you create from the Instant Download PDF Pattern Instructions will be oversized, with pockets, and perfect!

BONUS: Butterfly Applique Rag Quilt Pattern


This Butterfly Applique Quilt Pattern - Instant Download blanket is so easy to sew and a great blanket for the beginner. It can be whipped up in just a few hours. This is one of my favorite patterns to sew because I can use the same basic building block in this quilt to make anything from a doll quilt to a kind size quilt and everything in between.

Make sure to check out all of the rag quilt pattern ideas we have here on our blog!


  Image HTML map generator

Quality heirloom bedding for everyone in the family. Quilts like grandma used to make avtrboutique


When it comes to bedding, there's nothing quite like a cozy, handmade quilt to add warmth and charm to any room. And while quilting may have originated as a practical way to repurpose scraps of fabric, today it has become an art form in its own right. This is especially true when it comes to heirloom quilts, which are created with care and attention to detail that ensures they will last for generations to come.


One of the most popular styles of heirloom quilts is the rag quilt, which is characterized by its frayed edges and soft, fluffy texture. Made from a combination of cotton or flannel fabrics, these quilts are perfect for snuggling up in on chilly evenings or for adding a touch of rustic charm to your home decor.

At AVTRBoutique, we specialize in creating high-quality rag quilts in a variety of sizes to suit every member of your family. Our quilts range from baby blanket size to king-sized, and we offer a wide variety of color and pattern options to suit any taste or style.


All of our quilts are handmade with care and attention to detail, ensuring that each one is a true work of art. We use only the highest-quality fabrics and materials, and our experienced quilters take the time to carefully stitch each quilt together by hand to ensure that it is as durable as it is beautiful.

Whether you're looking for a special gift for a new baby or want to add a touch of cozy charm to your own bedroom, our heirloom rag quilts are the perfect choice. So why not visit AVTRBoutique today and explore our wide range of high-quality quilts? We're sure you'll find something that you and your family will love for years to come.


via https://youtu.be/aeRBKRXx7yA 


Make sure to check out all of the beautiful bedding for young and old here on our blog and in our etsy shop

Using a Butter Knife While Making a Quilt? Weird...Nope!

Rag quilts are a popular style of quilt that feature exposed seams that are frayed to create a soft and cozy texture. While many quilters choose to fray the edges of their rag quilts by washing and drying them multiple times, there is another method that can be just as effective: using a butter knife.


Here's how to use a butter knife to fray the edges of a rag quilt:

  1. Start by clipping the edges of the quilt so that they are all even.

  2. Take a butter knife and run the blade along the edge of the quilt, pressing down firmly as you go. The goal is to loosen the weave of the fabric so that it will fray easily.

  3. Once you have run the butter knife along the entire length of the edge, use your fingers to gently pull the loose threads away from the quilt. You may need to go over the edge with the butter knife a few more times to get all of the threads to loosen.

  4. Repeat this process on all four sides of the quilt until you have the desired amount of fraying.

    Watch as we butter knife a quilt block over on our youtube channel

One advantage of using a butter knife to fray the edges of a rag quilt is that it allows you to have more control over the amount of fraying that occurs. With washing and drying, it can be difficult to predict exactly how much the quilt will fray, but with the butter knife method, you can choose to fray the edges as much or as little as you like.

Also, if you miss clipping a seam, and notice after washing, just use the butter knife instead of laundering again. 

Another advantage is that it can be quicker than laundering the quilt multiple times. While laundering the quilt is certainly effective, it can be time-consuming and may take several cycles to get the desired amount of fraying.

In conclusion, using a butter knife to fray the edges of a rag quilt is a simple and effective  

Check out more sewing tips on our blog

  Image HTML map generator

Memorizing Quotes: My Son Peace Be Unto Thy Soul with Joseph Smith

Memorizing scriptures is an essential part of many religious traditions. For example, in Christianity, memorizing Bible verses is a fundamental part of spiritual practice. Memorizing scriptures can have many benefits for individuals, both spiritually and practically. In this blog post, we will explore the importance of memorizing scriptures and the benefits it can bring. 
 
  • Strengthens Faith Memorizing scriptures can help to strengthen one's faith. It can give individuals a sense of comfort and peace, especially during times of difficulty. Knowing and recalling scriptures can help individuals to feel connected to their faith and give them a sense of purpose and direction. 
  • Personal Growth Memorizing scriptures is an act of discipline that can have a positive impact on personal growth. It can help individuals to focus their minds, improve concentration, and increase their ability to recall information. The act of memorizing can also help individuals to develop patience, perseverance, and self-discipline. 
  • Source of Guidance Memorizing scriptures can provide a source of guidance and wisdom for individuals. Scriptures contain teachings and principles that can help individuals to navigate life's challenges and make sound decisions. Memorizing these teachings can make them more accessible, and individuals can draw on them when needed. 
  • Witnessing Tool Memorizing scriptures can also be an effective witnessing tool. It can help individuals to share their faith with others and to communicate important messages. Knowing scriptures can also help individuals to answer questions and provide guidance to those who may be seeking spiritual guidance. 
  •  Overcoming Trials and Troubles- Memorizing scriptures can help individuals to overcome temptations. When faced with temptation, recalling a scripture that relates to the situation can provide individuals with the strength and resolve they need to resist. Memorizing scriptures can help individuals to develop a deeper understanding of their faith and to develop a stronger relationship with God.
 In conclusion, memorizing scriptures is an important part of spiritual practice. It can strengthen faith, foster personal growth, provide guidance and wisdom, be an effective witnessing tool, and help individuals to overcome temptation. While memorizing scriptures can be challenging, the benefits it brings make it well worth the effort.
 
Use the picture of the words below to aid in memorizing an important scripture that can bring peace during trials and troubles. 
 
The scripture comes from a time in Joseph Smiths life when he was imprisoned falsely. He prayed and was answered with this power reminder. 


My son, ​​​peace​ be unto thy soul; thine ​​​adversity​ and thine afflictions shall be but a ​​​small​ moment;

​​​8 ​And then, if thou ​​​endure​ it well, God shall exalt thee on high; thou shalt triumph over all thy ​​​foes​.

​​​10 ​Thou art not yet as Job; thy ​​​friends​ do not contend against thee, neither charge thee with transgression, as they did Job.

My s, ​​​p​ be u thy s; thine ​​​a and t a s be but a ​​​s m;

​​​8 ​And t, if thou ​​​​ it w, G shall e t on h; thou s t o all thy ​​​f

​​​10 ​Thou a not y as J; thy ​​​f​ do not c a t, n c t with t, as t did J

M s, ​​​p​ b u t s; t ​​​a a t a s b b a ​​​s m;

​​​8 ​A t, i t​​​​ it w, G s e t o h; t s t o a t f

​​​10 ​Thou a n y a J; t ​​​f​ d n c a t, n c t w t, a t d J


For other memorizing prompts head on over to our blog.  


Jelly Roll Rag Quilt Pattern Ideas

Jelly roll rag quilts are a fun and easy project that can be made with a pre-cut jelly roll or by cutting your own strips. The ragged edges give the quilt a cozy, rustic look that's perfect for snuggling up on the couch. In this blog post, we'll explore some of the best jelly roll rag quilt patterns that are sure to inspire you.k.


Visit each pattern by clicking on the pictures below

Rail Fence Jelly Roll Rag Quilt The rail fence jelly roll rag quilt is a classic design that's easy to make and looks great in any color scheme. You'll need one jelly roll and some flannel to make this quilt.
 

The easy peasy rag quilt pattern is the perfect quilt pattern to use your jelly roll and fat quarter bundles together.

Sew girl rag quilt pattern uses a few jelly rolls which is a great quilt project to use up your scraps!

The rag quilt purse uses a few large blocks, but also some jelly roll strips too. Perfect for those random jelly roll strips leftover from other projects.

 
Chevron Jelly Roll Rag Quilt turned into a bag! Can be used to make a quilt as well.  The chevron jelly roll rag quilt is a modern take on a classic design.
 
Scrappy Jelly Roll Rag Quilt The scrappy jelly roll rag quilt is a great way to use up your leftover jelly roll strips.


 Jelly rolls on point rag quilt is a really fun scrap buster project. With quilted large squares for your to embroider, applique, or quilt your favorite designs.

In conclusion, jelly roll rag quilts are a fun and easy project that can be made in a variety of designs and color schemes. Whether you're a beginner or an experienced quilter, these patterns are sure to inspire you to create your own unique quilt. So gather your materials and get started on your next project!
 
Make sure to visit our blog for more Rag Quilting information including all of the basics you will need to know to complete your first (or 50th) rag quilt. 

Subscribe

Enter your email address:

Delivered by FeedBurner

Let's Get Social

Image HTML map generator


Featured Post

How to Memorize The Living Christ - Simple and Easy