Pink and Green Nursery and Girls Room

 I finally got caught up with my etsy orders this last week so I have had a little time to finish up on a few projects that have been being neglected around my house. 
 When I was a girl, I had an obsession with Porcelain dolls.  I have a ton of them, they really aren't my thing anymore but I just can't get rid of them!

The rag quilt, minky sheet, and ragged bumpers that I made for the little lady a couple months after she was born. 
 Tulle Pom Poms.  I think my black one is a little lopsided. 
 Today, I put the finishing touches on the curtains.(for the curtain tutorial go HERE ) The 2 older girls are obsessed with the beaded trim. 
 The the 3 year olds side of the room.  More Pom Poms, Blessing dresses in shadow boxes, the treasure chest/cedar chest from my childhood, and the cute puzzle rocking chair my parents made my girls. 


Follow Me on Pinterest  

Shabby Chevron Flower Pin Cushion


Riley Blake asked me a few weeks ago to to make a pin cushion for their pin cushion club 

This is the pin cushion that I came up with.  It was so exciting to be able to be apart of Riley Blake! 
Shabby Flower Pin Cushion (finished size 8 inches square)
For this shabby flower I used:
  • 1/8 yard of yellow sweetest chevron and 1/4 yard of the sweetest dots pink, and 1/8 yard cream flannel.
  • Stuffing
  • Sewing Stuff (seam ripper, small scissors, sewing machine, thread)
Cut:
  • 2 - 4 1/2 inch circles with the yellow chevron
  • 2 - 4 1/2 inch circles with the cream flannel 
  • 14 - 3 inch x 2.5 inch ovals with the sweetest dots pink fabric
  • 7 - 3 inch x 2.5 inch ovals with the cream flannel
Assembling the Flower
  • taking the 2 large cream circles and one of the chevron circles, layer them with the 2 cream on the bottom and the chevron on the top 
  • Stitch along the chevron stripes.                                                   Make sure to stitch along the top and bottom of each chevron
  • Using your seam ripper and/or small scissors cut the white chevron stripes and 1 layer of flannel.    Then rub your fingernail along all the cut seams to help them fray as much as you can. 
  • Now taking all of the remaining pieces...layer them with a polka dot on the bottom, then a cream flannel piece, and finally a polka dot on the top.  Sew around the perimeter of each of the fabric sandwiches you just created.  
  • Now you will be assembling your flower. 
  • First take your chevron piece that you have sewn and the remaining chevron piece and layer them with the sewn piece on the top and the other piece on the bottom with the right sides facing out.
  • Take a petal (the polka dot pieces) and scrunch/pleat the bottom of it so that it looks like a petal.  Place the petal in between your chevron sandwich.  You can pin it into place or you can sew that one into place whichever works for you. 
  • Repeat with all but 1 of the petals.                                                              
  • Before sewing the final petal into place stuff the center of your flower with your batting
  • Now taking your final petal sew it into place.  It will be a little difficult because the center is all stuffed but it is possible :)       
  • 11.  Voila!  You now have an adorable pin cushion!


    Follow Me on Pinterest  

    What's on my floor today?

    I was able to get some custom orders cut out today while the little miss was sleeping. A little of a bunch of colors. Hot pink, turquoise, orange, black, purple. I think the only color from the rainbow I am missing is yellow

    Simple, Cheap Art with Leather Texture

    I had a huge blanket wall in my basement.  I hated looking at it.  Seriously!  So when my when opened our new clothes I had a little a-ha moment.  Its actually kinda embarrassing that I have cardboard on my wall.


     So here is how I did it.

    I took the 2 pieces of cardboard.  They are about 2 1/2 ft square and 1 inch thick. 
     I gathered my other supplies (paint, tissue paper, and painting supplies)
     Then we got to work painting. 
     First roll a coat of paint on.  I work in sections about as big as my tissue paper. 
     After you have painted a spot then place the wrinkled tissue paper onto the board. After you have done that with all of the board then do another coat or 2 over the tissue paper so that it is all covered. 
    Then after I painted I took some stain and did a little rubbing of it all over to get it into the creases to age it a bit.  

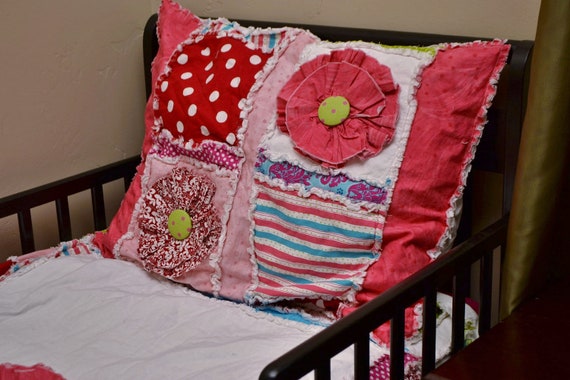
     Then after I painted with the tissue paper texture I painted a couple lines for the stems. Then I used some of the clay buttons I made a while ago, and some metal flowers I got from Pick Your Plum and hot glued them onto the board.

    So yes, I now have some cheap ol art to cover up my big huge blank wall. 
     Follow Me on Pinterest Photobucket

    Rag Quilt Pillow Shams

    I have been making a few custom rag quilt pillow shams lately for customers. Here are 2 of them:

    Ruffled flower pillow sham 


    Zebra and hot pink pillow sham
    Want to make your own? I now offer the sewing pattern in my etsy shop


      Follow Me on Pinterest Photobucket

    Ruffle and Minky Baby Blanket


    I think this is one of my favorite blankets I have made so far for my little baby girl.  It has minky on one side and ruffled fabric on the other. 

    To start out I cut my minky into a 44 inch square.  Then I cut my ruffled fabric into the same size.  I have noticed that the ruffle fabric comes in different widths.  I wanted my blanket square and the ruffle fabric came in 44 inches wide.  When I cut in between the ruffles I cut right in the middle so that I would have something to sew without catching the ruffle. 
    then take one of your pieces and lay it down with the right side facing you.  Then put the other one on top of that with the wrong side facing you like the picture above.  Pin them together.  Just make sure that all of your ruffles are heading the same direction
    Sew all the way around the blanket but make sure to leave a little hole big enough for you to turn the blanket right side out.  I like to use a walking foot when I work with minky.  When you are done pull out ALL of the pins (for some reason I left one in and had to unpick a spot so I could get it out)
    Make sure to check around the blanket for any missed sewed spots or if you caught any ruffles going the wrong direction. 
    I didn't take a picture of this part but, sew your little hole closed.  The minky will hide really well where you sew the hole shut.  I hid the sewing on the ruffle side by flipping up ruffle and sewing under neath it. 

    This blanket I think took me about 45 minutes and most of that time was in pinning the ruffles.  I get so many compliments on how cute this blanket is, and now that it is getting cold around here I think I need to make her a couple more. 

    Follow Me on Pinterest Photobucket

    Old Trunk Turned Sofa Table

     If you follow me on Instagram you would know a couple months ago I found this awesome trunk for a steal of $10!  It is OLD.  Its cracked.  Its definitely not in very good shape but I think in its oldness there is a lot of beauty!
     At the same garage sale I found a table. So of course I bought the table.  It was only $10 (now I have to figure out what to do with the table top) and made my trunk into a table itself.  Its not quite finished yet.  I need to make a shelf for about 8 inches off the floor and pain that board red.  But all in due time. 
     So I painted and distressed the legs and my husband helped me attach the legs to the trunk.
     Lets just say I love looking down my stairs now seeing my trunk. 

    Follow Me on Pinterest Photobucket

    Subscribe

    Enter your email address:

    Delivered by FeedBurner

    Let's Get Social

    Image HTML map generator


    Featured Post

    How to Memorize The Living Christ - Simple and Easy