Showing posts with label quilting. Show all posts

Rag Quilt with Batting

Typical quilts are made by first creating a quilt top, then by making a quilt sandwich that includes the quilt top, batting, and backing. Rag quilting short cuts the quilt top assembly and creates the quilt top while sewing the backing and batting pieces at the same time.

You have several different options for the middle layer.

Warm and Natural Batting

Warm and Natural batting will give your quilt a really nice weight. If you choose to use this as your middle layer, you will need to cut the batting pieces 1'' smaller than the bottom and top layers so that the batting doesn't show in the exposed seams on the top of the quilt.

You will not be able to use batting for patterns like the Flying Geese, the Hourglass Pillow, or the Arrow Quilt because as you are assembling your quilt you will be cutting sewn pieces, and then sewing them again. Your batting would show in the exposed seams.

Diamond Rag Quilt Pattern by A Vision to Remember
Arrow Rag Quilt Pattern by A Vision to RememberRoadways rag quilt pattern by avisiontoremember

If you use Warm and Natural for your middle layer, you must quilt each and every one of your fabric sandwiches. If you don't, the batting will move around and ball up in your quilt when it is washed. One easy way to quilt the sandwiches is to sew an X in the sandwich from point to point. But you can quilt the block using any quilting technique.

Examples of sewing squares together before sewing the quilt together: 

X from corner to corner


Quilting like on a quilt over entire block 


Straight line quilting

Flannel Fabric for Rag Quilt Batting

For the middle layers in my quilts, I prefer a coordinating layer of flannel. The flannel will add color to your quilt in the exposed seams, while still adding weight.

Cut the middle layer the same size as the bottom layer. This middle layer works well for the quilt assembly method where pieces are sewn together and then cut to make different shaped blocks. Quilts like Flying Geese, the Hourglass Pillow, or the Arrow Quilt will be perfect for flannel middle layers.

Rail Fence Rag Quilt Pattern by A Vision to Remember

Another reason I prefer flannel for the middle layer is that it keeps the cost of the quilt down. Flannel costs about half as much as Warm and Natural batting.

Below is a quilt I made with black flannel batting, red flannel back, and kids pajamas as the top of the quilt. I loved how it turned out.  It was very warm and snuggly!


 I used the easy peasy rag quilt pattern for the above quilt. It can be found in our rag quilt pattern shop on etsy.


  Image HTML map generator

Rag Quilt Seam Allowance

Seam allowances and rag quilts are a funny topic among avid rag quilters. There really is no right or wrong answer when it comes to answering this age old questions.  But there might be a right answer for you!


Let me help you decide which seam allowance is best for you.   

 Rag Quilt Seam Allowance 1/2 inch 

How to Determine the Best Rag Quilt Seam Allowance

  1.  Fluffiniess vs hiding fabric - the width of the exposed seam allowance will partially cover up the fabric underneath it. But rag quilts are also known for the fluffy exposed seams. If using a small block, reduce the width of the exposed seam (the seam allowance) to allow for the block to be more visible (for example a 5 inch block with a 1 inch seam allowance will only show about 3 inches of the block. Versus a 5 inch block with a 1/2 inch seam allowance will show 4 inches of the block)
  2. Clipping the Seams - the width of the clipped seams also lends to the how fluffy the exposed seam is. Clip 1/8th inch apart from each other for a very ragged effect, or clip 1/4 inch apart as the picture above is. 
  3. Type of Fabric - if using 100% cotton fabric, the exposed seam will really fluff up a lot. Cotton frays, which is exactly what is wanted for rag quilts. A wider seam allowance will be great with 100% cotton fabrics. If using polyester, minky, or other fabrics that don't fray as well, a smaller seam allowance will be best. 

I personally use (and prefer) a 1/2 inch seam allowance. Especially because of the skinny rectangles I most often use in quilts. It allows for more of the rectangle to be visible. 

I also prefer it over a wider one, as that is the perfect width for the scissors that I use to easily open up to, the clip the next spot. 

These are the scissors I personally prefer (and a post about all the ones I have tried)

In 2021 alone, I sewed and clipped over 200 quilts for A Vision to Remember (also known as avtrboutique.com)
For all of the majority of those quilts, I used the Easy Peasy Rag Quilt pattern with a 1/2 inch seam allowance.


I also use a simple little straight edge magnet and place it on my seam allowance line on the plate on the sewing machine.  This helps me to create a consistent seam allowance every single time without guessing. I have also used this little trick with my 13 year old that has become a wonderful seamstress. Check out these magnetic seam allowance guides on amazon

 Check out all of our Rag Quilting Basics here on our blog!

As always, please let us know if you have any questions by emailing me at Bobbie@avisiontoremember.com


Image HTML map generator

Best Fabrics for Rag Quilts

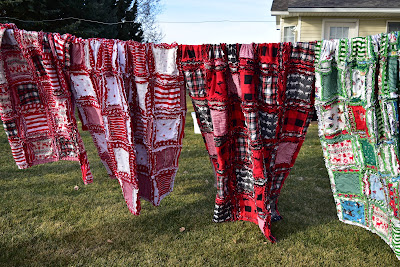
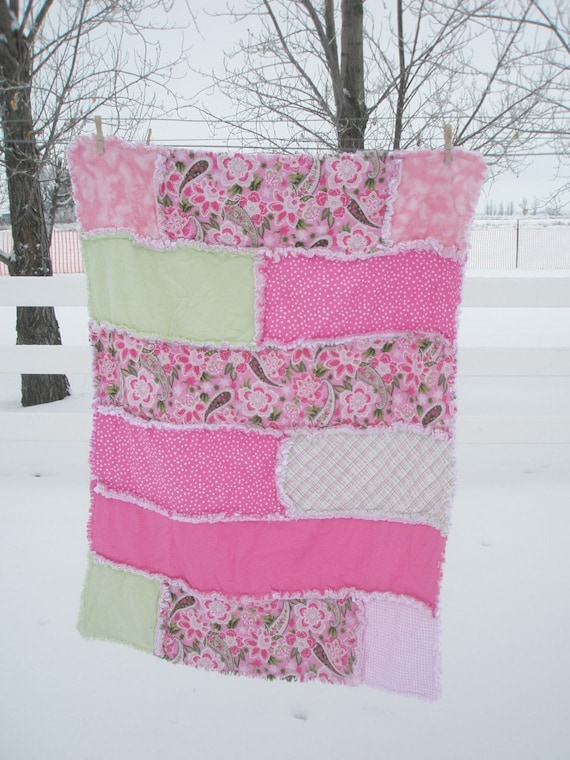
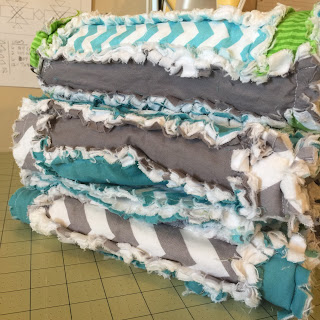
The type of fabric you choose for your rag quilt is very important. The frayed edges, and washing the quilt AFTER you’ve assembled and BEFORE using it, make rag quilting very unique. So here are a few tips on choosing the right fabrics, and why. 


To choose the best fabrics for rag quilts, or to see if you have the right fabrics for your rag quilts here are a few characteristics of good rag quilt material: 

100 percent cotton. Cotton fabric frays. Polyester fabric does not. If you want your exposed seams to fray and get really fluffy, then you will want to choose 100 percent cotton fabrics. How do you know if the fabric is 100 percent or not? Look at the top of the bolt for the fabric content. If it says 100 percent cotton, you are good to go. If you love a fabric that is not 100 percent cotton, it will be ok! But keep in mind that wherever that fabric is in your quilt, it will not fray. The flannel underneath it, and the cotton fabrics surrounding it, will all fray and get really fluffy. But the non-cotton fabrics, especially polyester, will not. This includes Minky, fleece, and broadcloth fabrics. They will not fray at all, but if you don’t mind that your exposed seams are not fluffy, then go ahead and use these fabrics. If you REALLY want a Minky back to the quilt, check out the best method for adding one. 
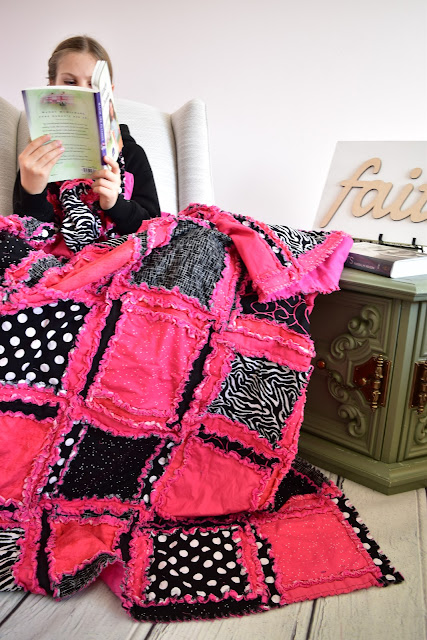
Softness. When I am snuggled up under a quilt, I want it to be soft and cuddly. When choosing fabric in your local quilt shop, make sure to get a feel for the fabric, and not just the looks of it.

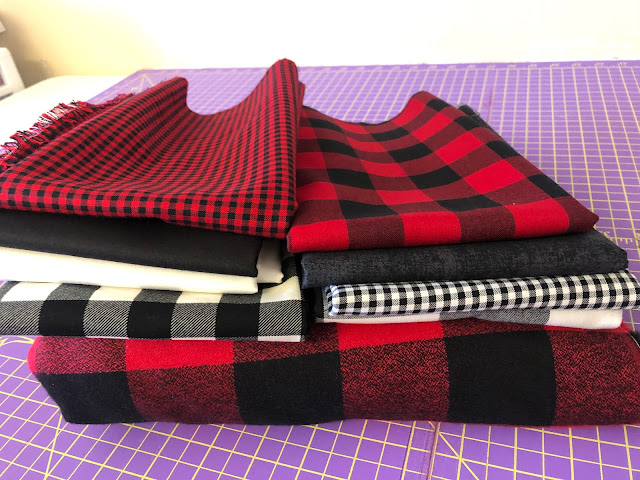
 • Colorfast fabric. I can’t tell you how many quilts I have ruined over the years because I bought a cheap fabric, thinking I needed to save a buck, then saw that one fabric bleed into all my other fabrics after my beautiful quilt was sewn together and washed. Red fabrics are the worst! But I will tell you my little secret for avoiding the dreaded fabric bleed: Buy designer fabrics. Riley Blake is my favorite, but you can also use Cloud 9, Moda, Art Gallery, Windam Fabrics, Robert Kaufman and others. They are all amazing quality, but more important, when I’ve used these fabrics, they have never bled. Not once. 

If you are shopping in a big box store and find the fabric that you can’t live without, give that fabric a couple of good prewashes before you put it in the quilt. After the quilt is finished, throw in a color catcher when you wash it, especially the first two or three times. 


 • Flannel or cotton? Contrary to popular belief, flannel fabric is not the only fabric one can use to make a rag quilt. Flannel frays amazingly well, but quilting cottons also fray pretty darn well too.
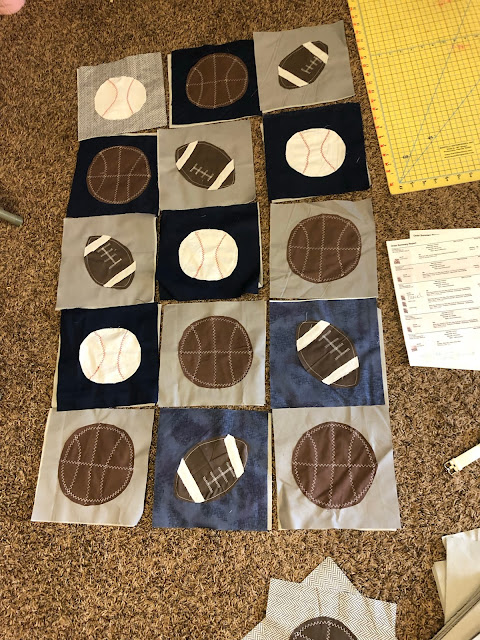
For all of my rag quilt tops, I use a combination of flannels and cotton fabrics for the top layer of the rag quilt. I actually prefer to use only cotton fabrics for the tops of rag quilts. Flannel fabrics that have designs on them seem to look dull after a few washes, and begin to look not as bright as the rest of the cotton fabrics in the top of the quilt. I’ve seen flannel fabrics (especially discount flannel fabrics) begin to look very worn after being washed only a handful of times. After putting in all that time and money to make a beautiful quilt, I would get discouraged if the quilt began to look old after using it only a couple of times. So I try to stick with quilting cottons for the top of the quilt.

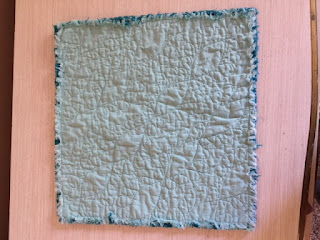
For the back of the quilt, I use solid flannels. I’ve found that the majority of the time, even inexpensive solid flannels hold their colors and don’t fray or peel as much as the flannel prints. Plus, flannel solids are available in a huge assortment of every color of the rainbow, with many colors in between. My absolute favorite brand is Robert Kaufman for flannel solids and we carry them in our online fabric shop.


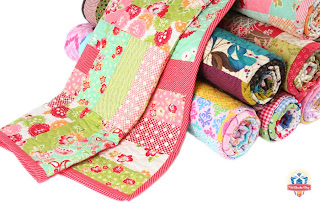
• Quality. I am sure you’ve heard a million times that it is best to buy designer fabrics from your favorite quilt shop. I tend to lean to this opinion. I have made so many quilts over the years, and the quilts with the designer fabrics from the brands we all know and love have held up the best.
But, I have also found some very beautiful, quality fabrics at the big box stores, and these also have held up through the years. When you are choosing fabrics, take time to run each fabric through your fingers and make sure it feels nice. Look at how tight the weave is; if it is loose it will not hold up very well. Hold the fabric up to see how well it drapes. If it is really stiff and doesn’t drape well, then it probably will not be comfortable to snuggle up with.


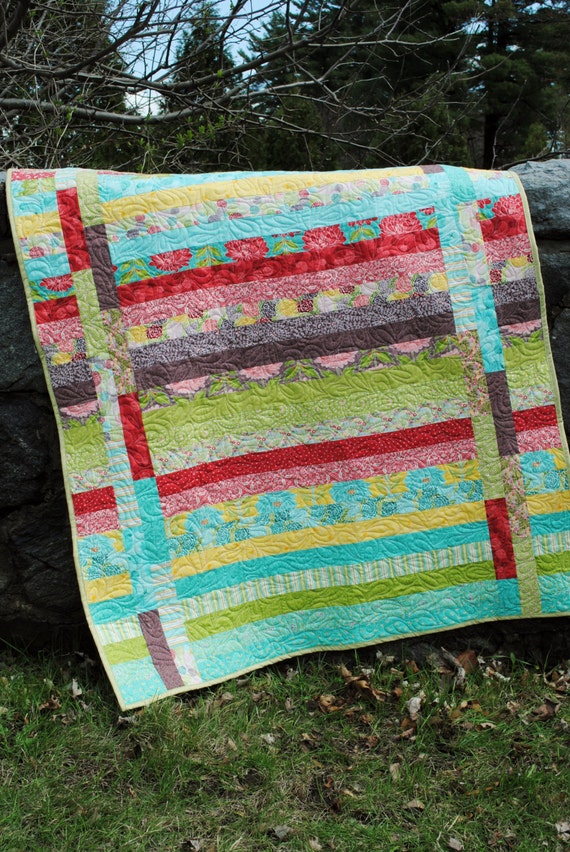
Choosing the right fabrics for your rag quilt is very important if you want a long lasting quilt to treasure for yourself or to give to a special person, especially when you put so much time, effort, and money into making such a unique and beautiful quilt. 

Make sure to check out all of the rag quilting resources on our blog, including which scissors to choose, walking feet, how to wash a rag quilt, rag quilting seam allowances, a wide variety of quilt patterns, and more!

Image HTML map generator

The Best Strip Quilt Patterns on the Web

Am I the only one that is in a constant need for a quick gift?  Strip quilts seem to be a quick way to to make a beautiful quilt.  Here are a few strip quilt patterns that inspire me!

the best strip quilt patterns on the web


Free Patterns:

ruffled strip quilt
Ruffle Strip Quilt on the Ribbon Retreat

Jelly Roll Jam Quilt Pattern
Jelly Roll Jam Quilt Pattern on Moda Cutting Table Blog

skinny strips quilt
Skinny Strips Quilt with All People Quilt

strip rag quilt pattern
Strip Rag Quilt Pattern

strip quilt tutorial
Strip Quilt Tutorial by FITF

strip and flip quilt tutorial
Strip and Flip Quilt Tutorial on Cluck Cluck Sew

braided stripe quilt
Braided Stripe Quilt by Anne and Will

strip tubing quilt
Strip Tubing Quilt Pattern by A Joyful Soul Fabrics

baby showers quilt pattern
Baby Showers Quilt Pattern on Moda Bake Shop

simpel strip quilt block
Simple Strip Quilt Block by Imagine Fabric

Strip Piecing by Diary of a Quilter

Patterns Available for Purchase:

Quick and Easy Jelly Roll Pattern

Shabby Strip Rag Quilt Pattern


All Strips Quilt Pattern


For more Quilt Pattern inspiration please visit my Quilt Layouts, Patterns, and Designs Pinterest Board:


Follow Bobbie A Vision to Remember's board Quilt Layouts, Patterns, and Designs on Pinterest.


Churn Dash Quilt Top: A Vision to Remember Instagram feed

Loving this pattern from Karrie at Two Kwik Quilters.  It will soon be released (don't have a date yet)


Quilt top ✔️ @karie_twokwikquilters I loved #patterntesting this quilt! Can't wait to get it quilted! #isew #quilt via Instagram http://ift.tt/1q2TRNq


Loving the #churndash #quilt pattern by @karie_twokwikquilters Only 8 more blocks to go. #wonky #isew. Ps. This is the first thing I am making for baby boy. Better late than never right? via Instagram http://ift.tt/1vrgAuM

Half Square Triangle Pillow from Kona Charm Squares

I always love to learn something new, and this was no exception.  I have seen half square triangle quilts all over the webosphere, but I hadn't attempted one of my own.  I was able to complete this Half Square Triangle Pillow with the help of +Amy Smart!
half square triangle pillow
 A couple weeks ago I attended +Tauni Everett Event for bloggers called Snap!  It was held in SLC.  At the conference they had a sewing room.  It was Awe-Some!  I pretty much hung out there the whole time.  Mingling with fellow sewers, sewing away on +Baby Lock sewing machines.
half square triangle pillow
It was tons of fun! 

So here are the basics.  
  1. We took 8 charms from a Kona solid fabric stack.  Each stack only has 1 of each color so I bartered and traded until I had enough of the pink and turquoise bluish fabrics.  Then you will also need 8 solid white 5" squares.
  2. Then take a pen and something straight that is stiff and mark down the middle of the squares going from 1 point to the opposite point (you will only need to mark down the colored squares or down the white squares, not both)
  3. Stack 1 colored square on top of 1 white square, with right sides together. 
  4. Sew down each square 1/4" away from the line that you just marked, on both sides of the mark.
  5. Cut each square down the marked line and you will now have 2 new squares from each of the 2 squares you sewed together.  They will be made up of 2 triangles, 1 white and 1 colored
  6. Figure out the layout you would like with all the squares.
  7. Sew your squares into 4 strips (made up of 4 squares)
  8. Then sew your strips into a square
  9. For the back you will need 1 fat quarter.  You can finish the pillow however you would like.  I finished mine with an envelop back because that is what is easiest for me.  Plus when I need to wash the cover then I can just pull the pillow out and give it a quick wash.

I hope you enjoy making your very own Half Square Triangle Pillow

Follow on Bloglovin

Easiest Quilt Binding Method EVER! Binding a Quilt with Clear Thread

easiest quilt binding method ever.  Binding a quilt with clear thread
I don't know about you, but after I have sewn together a quilt top, then basted, and finally quilted a quilt, the last thing I want to do is sit with a needle and thread and hand sew binding onto the quilt.


So here is my method for binding a quilt with no hand sewing required, just your regular ol sewing machine, a walking foot, and clear thread are all you need!
For more info on the type of machine I use and recommend head on over to our blog post
easiest quilt binding method ever.  Binding a quilt with clear thread
I first sew my binding onto the quilt like you would normally. 
machine binding with clear thread
Then change your thread to clear thread in both the top thread and the bobbin.  Fold your excess binding over and hid it under your exposed binding and then sew as close to the edge as possible. 


machine binding with clear threadmachine binding with clear thread
and Voila!  You have a beautifully bound quilt, without a ton of hand sewing! 
Easiest Quilt Binding Method Ever binding with clear thread


Fabrics from AVTRFabrics.com


You might also like:
How to add Minky to the Back of a Quilt:

How to Add Minky to the Back of a Quilt Tutorial


How to Sew a Ruffle Valance:

How to Sew Ruffle Valances Tutorial

Subscribe

Enter your email address:

Delivered by FeedBurner

Let's Get Social

Image HTML map generator


Featured Post

Where Can I Buy Personalized LDS Baptism Gifts Online?