Only a couple more days until 2016, I can't believe it! No, seriously! I can't believe it. Wasn't it just yesterday that my little baby boy was born....ok really it was 15 months ago, but it should've been just yesterday!
Today, I am here to share with you, during the Christmas break, a fun little pillow sham that works for both Christmas and through all of winter! I always love to keep out a few of my Christmas decorations, and this one is one that is great for the transition!
You can download the gnome pattern pieces HERE
Cutting out the pillow:
1. Cut out 1 piece of fabric measuring 17" wide by the width of fabric.
2. Cut that piece of fabric into 3 pieces. They will measure 17"
square, and then two 12" by 17" pieces. The 12" pieces will be for you
back envelope
3. Cut out all the gnome pattern pieces
Assembling your Ornament Christmas Pillow Sham
1. Follow along with the video to complete your pillow
OR
2. Top stitch all gnomes onto the pillow
5. Finish the edge of the fabric using your favorite method on both of
the 12" pieces for the back of your pillow (I used the sew, then roll
method)
6. Place both of the 12" pieces on the back of the pillow, making sure
to line up the corners of the front of the pillow with the back of the
pillow. Pin in place.
7. Sew around the pillow sham using a 3/8 Seam allowance. Make sure to
backstitch over the places where the envelope opening will be because
you will be putting extra pressure on these points when stuffing the
pillow sham with a pillow.
8. Trim the corners so that when you turn you will have nice and pretty corners
9. Turn right sides out and stuff with pillow and Enjoy!
Just like usual, I complete a project ahead of schedule, but then for some reason life gets in the way, and I don't get it blogged for awhile.
I videoed while sewing the pillow. The Youtube video is below for you to follow along with it. I made the video play at double time because sewing can sometimes be slow and tedious, but you still get the idea. So its a quick video because I know you don't have time to sit and watch sewing videos all day. Otherwise you won't get one of these cute pillows done (if you are like me at all ;)!
Cutting out the pillow:
1. Cut out 1 piece of fabric measuring 17" wide by the width of fabric.
2. Cut that piece of fabric into 3 pieces. They will measure 17" square, and then two 12" by 17" pieces. The 12" pieces will be for you back envelope
3. Cut out a large circle measuring 13" diameter
4. For the hanging bow I used 12" of sequin trim
5. For the lace center trim I used a piece 14" long
6. Gather Buttons or other items for embellishments
Assembling your Ornament Christmas Pillow Sham
1. Using fabric glue, glue the sequin trim to your pillow
2. Place the circle in the center of the large square and then decide on how to place your other embellishments
3. Follow along with the video to complete your pillow
OR
4. Top stitch all embellishments and the ornament onto the pillow
5. Finish the edge of the fabric using your favorite method on both of the 12" pieces for the back of your pillow (I used the sew, then roll method)
6. Place both of the 12" pieces on the back of the pillow, making sure to line up the corners of the front of the pillow with the back of the pillow. Pin in place.
7. Sew around the pillow sham using a 3/8 Seam allowance. Make sure to backstitch over the places where the envelope opening will be because you will be putting extra pressure on these points when stuffing the pillow sham with a pillow.
8. Trim the corners so that when you turn you will have nice and pretty corners
9. Turn right sides out and stuff with pillow and Enjoy!
If you enjoyed this video and tutorial, make sure to share it on Facebook and Pinterest!
It is so dark and dreary here. It has been so bright and warm and cheerful here that I have almost forgotten that Winter is coming. But sadly, that was just a dream. Now the rain is here and I needed something bright to warm up my living room. So this is what I made to chase the blues away.
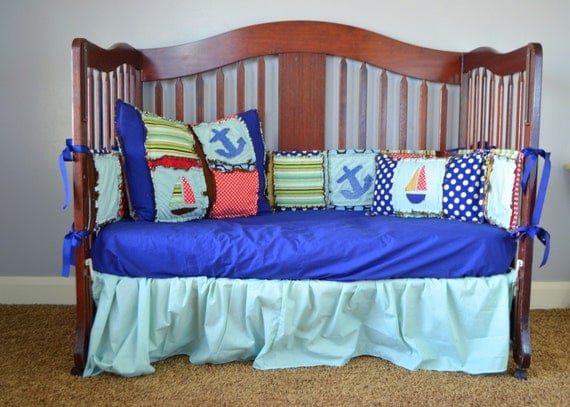
My favorite part of sewing as a business is being able to do custom requests. A customer will see something that sparks interest, but they want something changed. So they email me and we figure out how to make that dream a reality.
Love this little boy crib set with sailboats and anchors. This particular one was done in seafoam green, red, navy blue, and brown. The boats and anchors are raw edge applique.
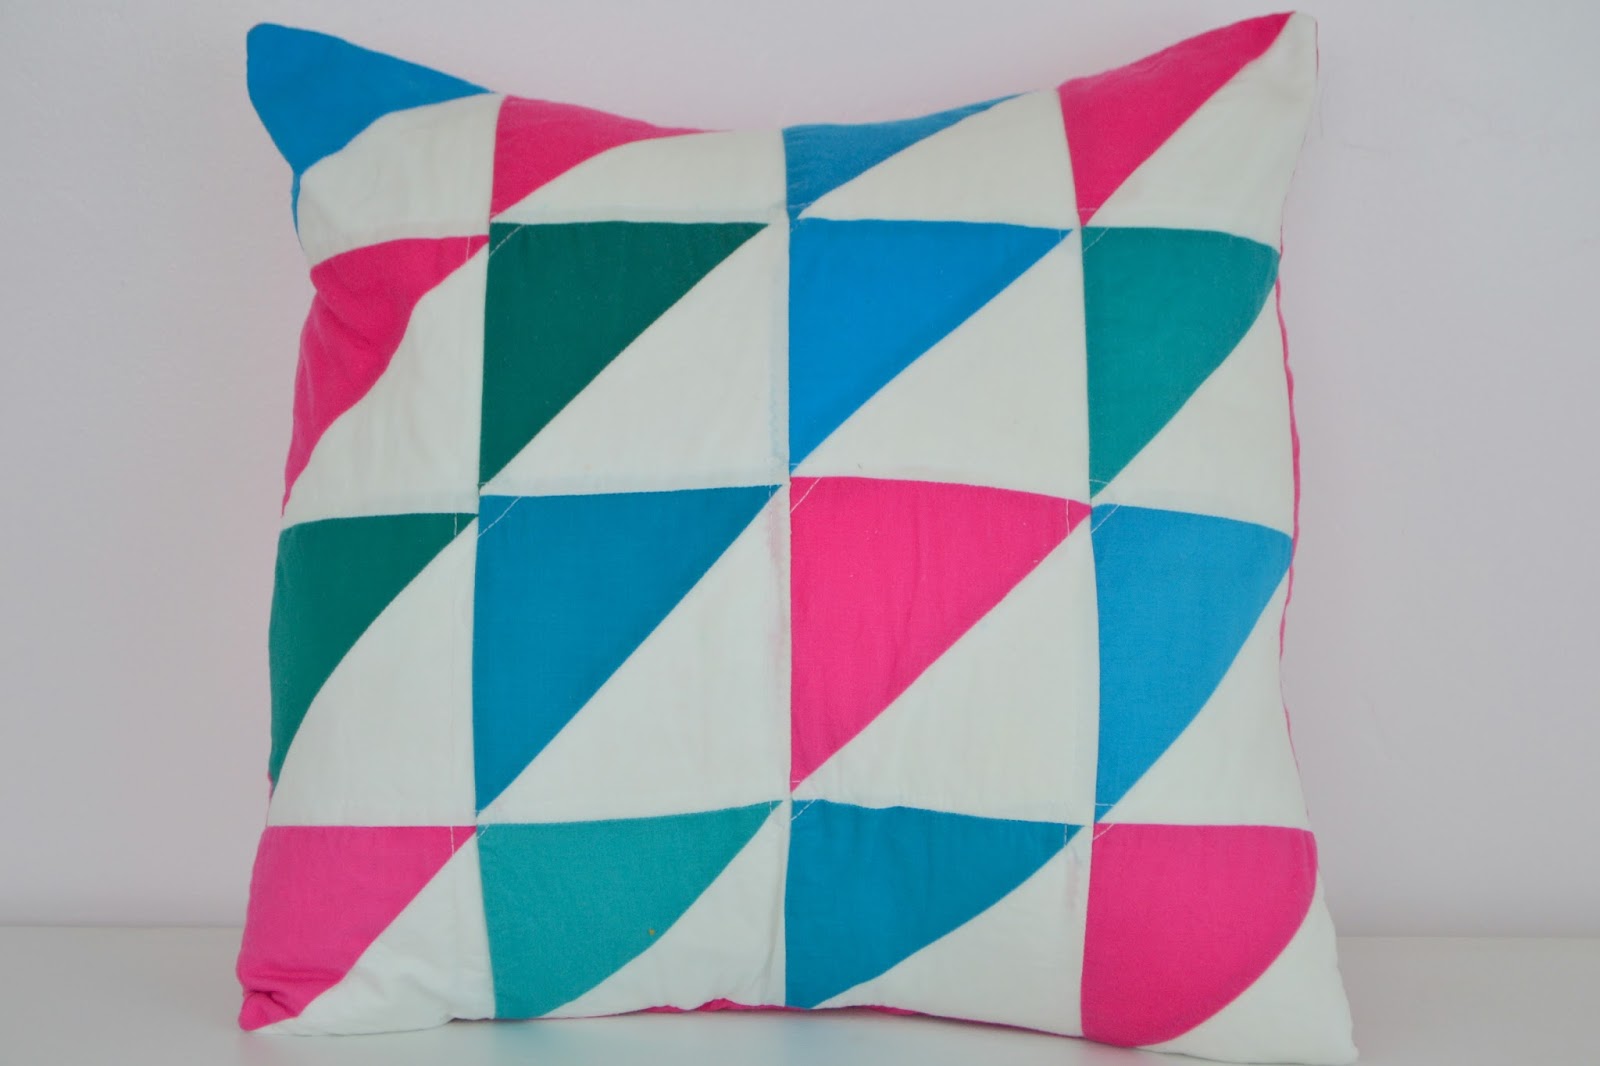
I always love to learn something new, and this was no exception. I have seen half square triangle quilts all over the webosphere, but I hadn't attempted one of my own. I was able to complete this Half Square Triangle Pillow with the help of +Amy Smart!
A couple weeks ago I attended +Tauni Everett Event for bloggers called Snap! It was held in SLC. At the conference they had a sewing room. It was Awe-Some! I pretty much hung out there the whole time. Mingling with fellow sewers, sewing away on +Baby Lock sewing machines.
It was tons of fun!
So here are the basics.
We took 8 charms from a Kona solid fabric stack. Each stack only has 1 of each color so I bartered and traded until I had enough of the pink and turquoise bluish fabrics. Then you will also need 8 solid white 5" squares.
Then take a pen and something straight that is stiff and mark down the middle of the squares going from 1 point to the opposite point (you will only need to mark down the colored squares or down the white squares, not both)
Stack 1 colored square on top of 1 white square, with right sides together.
Sew down each square 1/4" away from the line that you just marked, on both sides of the mark.
Cut each square down the marked line and you will now have 2 new squares from each of the 2 squares you sewed together. They will be made up of 2 triangles, 1 white and 1 colored
Figure out the layout you would like with all the squares.
Sew your squares into 4 strips (made up of 4 squares)
Then sew your strips into a square
For the back you will need 1 fat quarter. You can finish the pillow however you would like. I finished mine with an envelop back because that is what is easiest for me. Plus when I need to wash the cover then I can just pull the pillow out and give it a quick wash.
I hope you enjoy making your very own Half Square Triangle Pillow
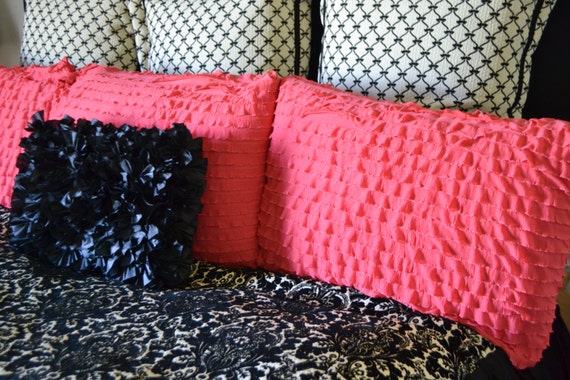
I have had a couple requests lately to make some ruffle pillows. The one pictured above is a standard size pillow sham. I used 1 inch ruffle fabric.
Here's how to do it.
1. decide the size you want your pillow
2. You will need to cut a total of 3 pieces of fabric. For a Euro pillow sham I cut the front piece 27 inches square, 1 back piece I cut 27x13 inches, and the other I cut 27x20 inches. That way you can have an envelope type place to stuff your pillow into.
3. Make sure to cut your fabric 1 inch bigger all the way around from the size of pillow you are wanting. The coral pillow I did ruffle fabric front and back.
4. Pin the front and back pieces into place with the right sides touching.
5. Sew around the perimeter. I like to use my walking foot when I sew with ruffle fabric. It seems to stretch a lot and the walking foot helps to prevent the stretching while sewing.
6. Clip the corners of the pillow so that when you turn it right sides out the corners look better.
7. Turn the pillow right side out and check to make sure that all your ruffles stayed in the right spot. If not, then unpick that spot and sew it again. I swear that every pillow I make I end up unpicking a couple ruffles :)
8. Put your pillow into the pillow sham and ENJOY!
I had the nicest lady contact me about make a pillow for her using her sons old burp cloths and clothing. I hadn't ever made a pillow using baby clothing before but I was excited for the challenge.
She gave me the dimensions of the pillow she wanted to cover and I went to work. I made it rag style (surprised? Probably not. lol) and reversible because she had so many different cute prints.
For your own custom throw size pillow made from your baby's stuff she no longer needs you go visit my etsy shop

.jpg)
.jpg)
.JPG)







 She gave me the dimensions of the pillow she wanted to cover and I went to work. I made it rag style (surprised? Probably not. lol) and reversible because she had so many different cute prints.