Showing posts with label vinyl. Show all posts

Dry Erase Binders and Tablets for Back to School and Teacher Appreciation Gifts

Disclosure: This post is sponsored by Wallternatives. I received a free sample of the product for the purpose of this review. All opinions are my own.


I think we might just be the last people in the US of A to go back to school.  My girls just barely started yesterday.

Now, let me start out by saying that I am cheap.  My friends make fun of me, my husband makes fun of me, my kids complain All.  The.  Time. that I am cheap. 

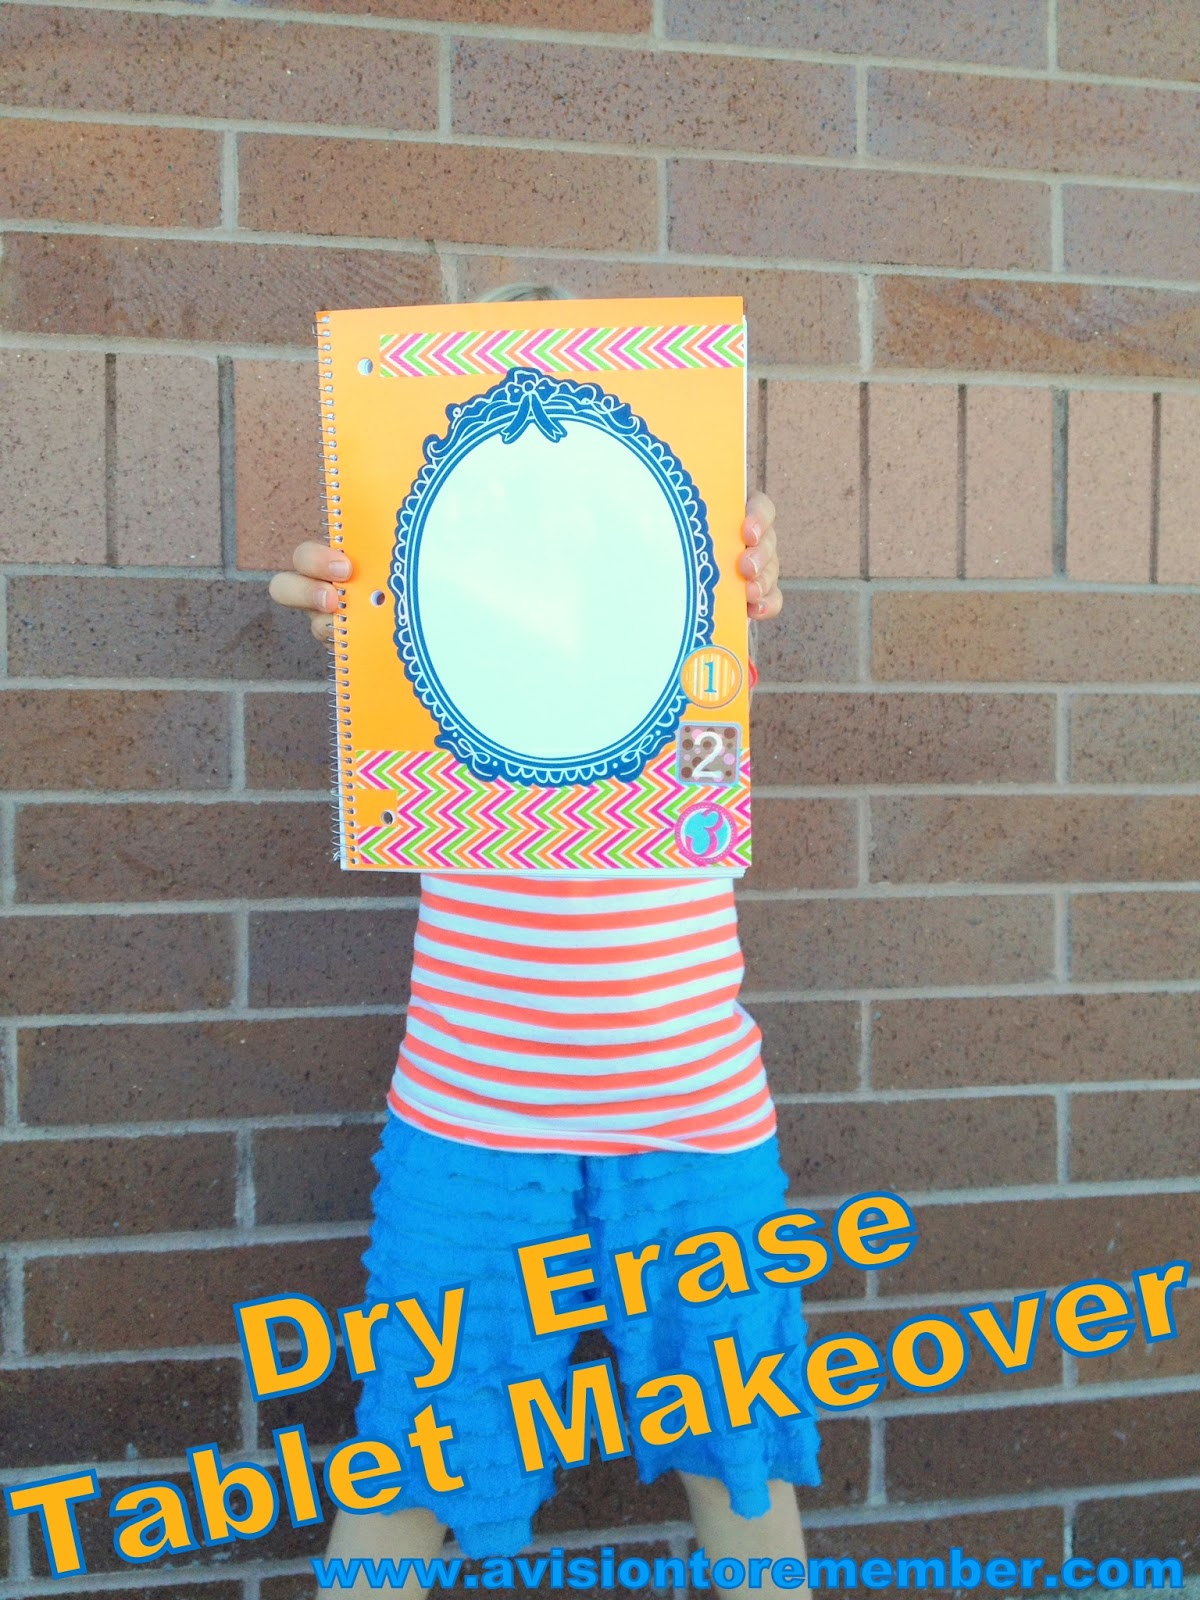
But this time I think it worked to their advantage when we took some cheap (17 cents +Staples ) tablets and binders and gave them a little facelift with a couple of simple vinyl pieces

dry erase notebook for back to school


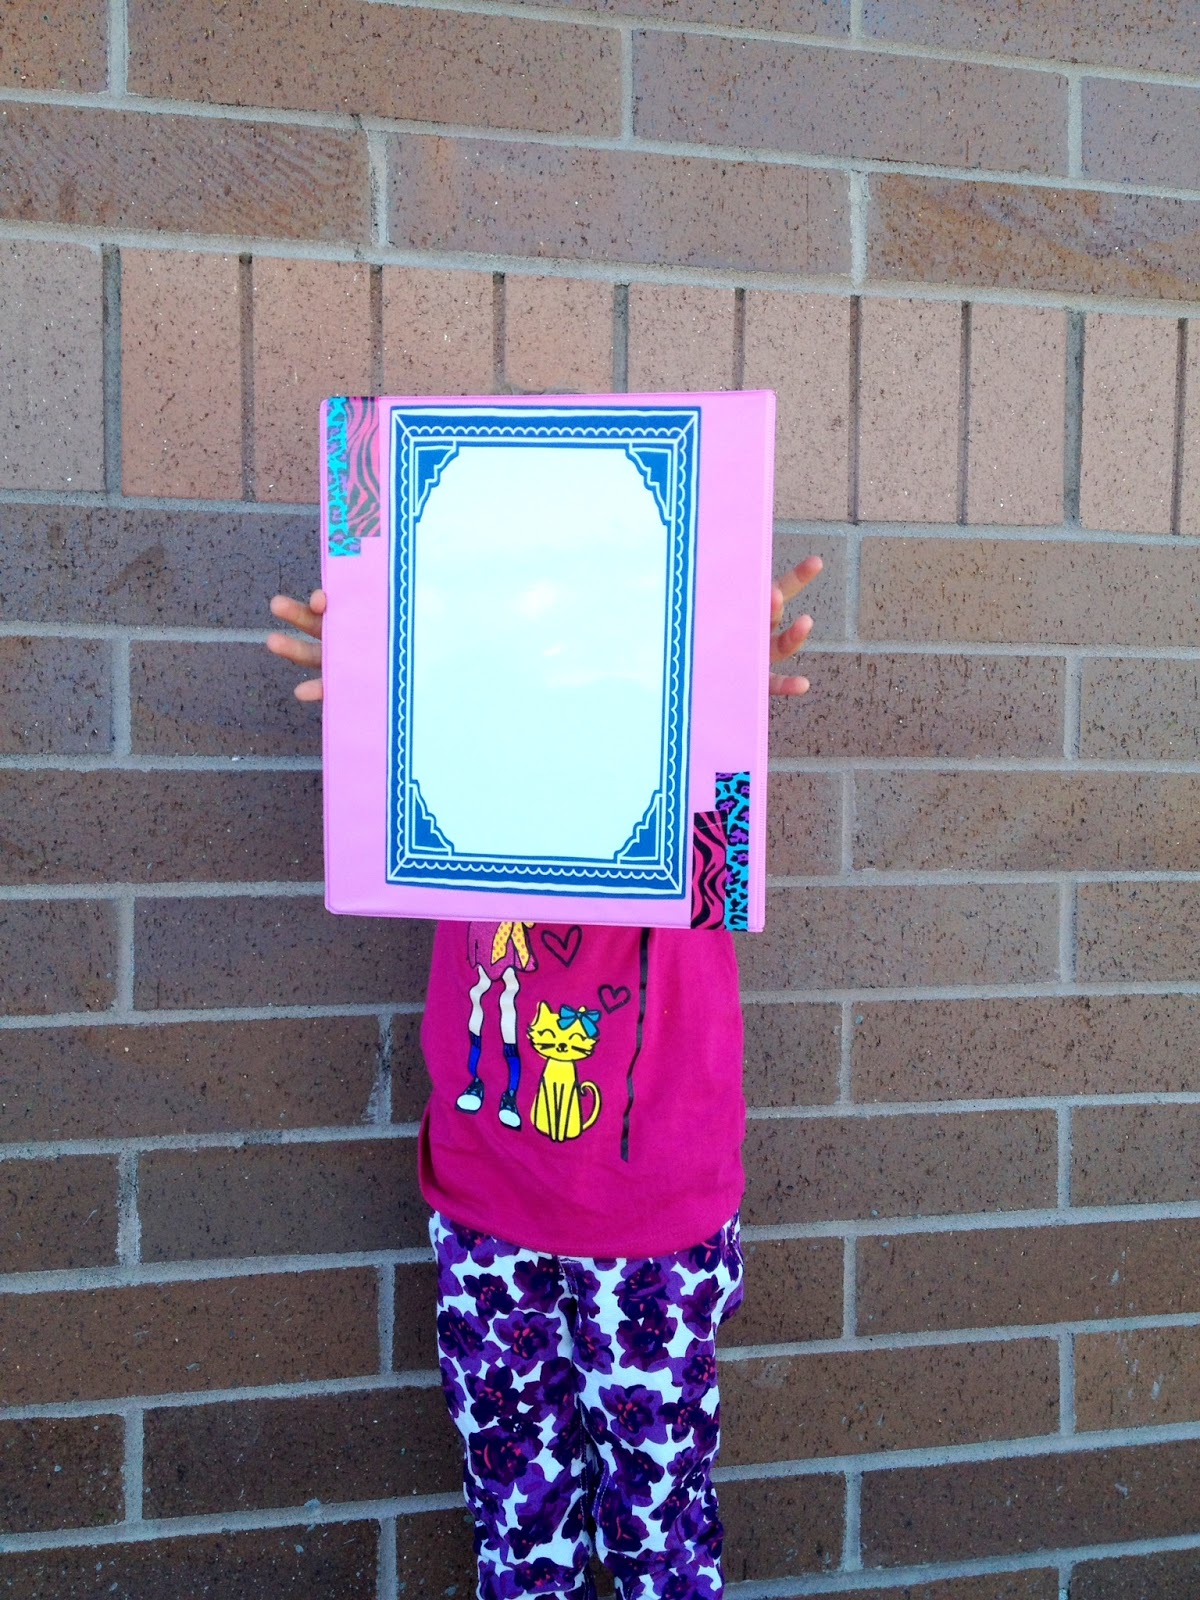
The first one here is my kindergarteners binder.  I took a +Wallternatives Blue frame, a piece of dry erase vinyl, and some thin +Duck Brand Tape

A little side note about the Wallternatives Blue Photo Frame Fabric Decal Set..  They come in a set of 6 so I went through and picked which of the frames would fit the binder and the tablet the best.  There are smaller ones and larger ones.  If I remember right the rectangle one on the binder is the largest of all the frames. 


First I measured what size the frame was and cut the dry erase vinyl about a 1/2 inch bigger.  Then I placed the dry erase first on the binder and then the frame.  Then a little accent with the Duck Tape and my kindergartener was one very happy little girl!

dry erase binder for back to school
 For my 3rd Graders table we basically did the same thing, but we added a couple stickers to the mix as well. 
dry erase notebook for teachers gifts

I am so glad that my girls enjoyed putting these together.  They were so excited to be able to have a something that NO ONE ELSE would have in the entire school.

So, in the end 2 happy girls = 1 very happy mom!

Oh and if you are looking for some really cute vinyl, removable wallpaper, and super cute chalkboard decals head on over to Wallternatives.  Seriously, they have the cutest stuff!

Easy Monogramed Wreath Tutorial

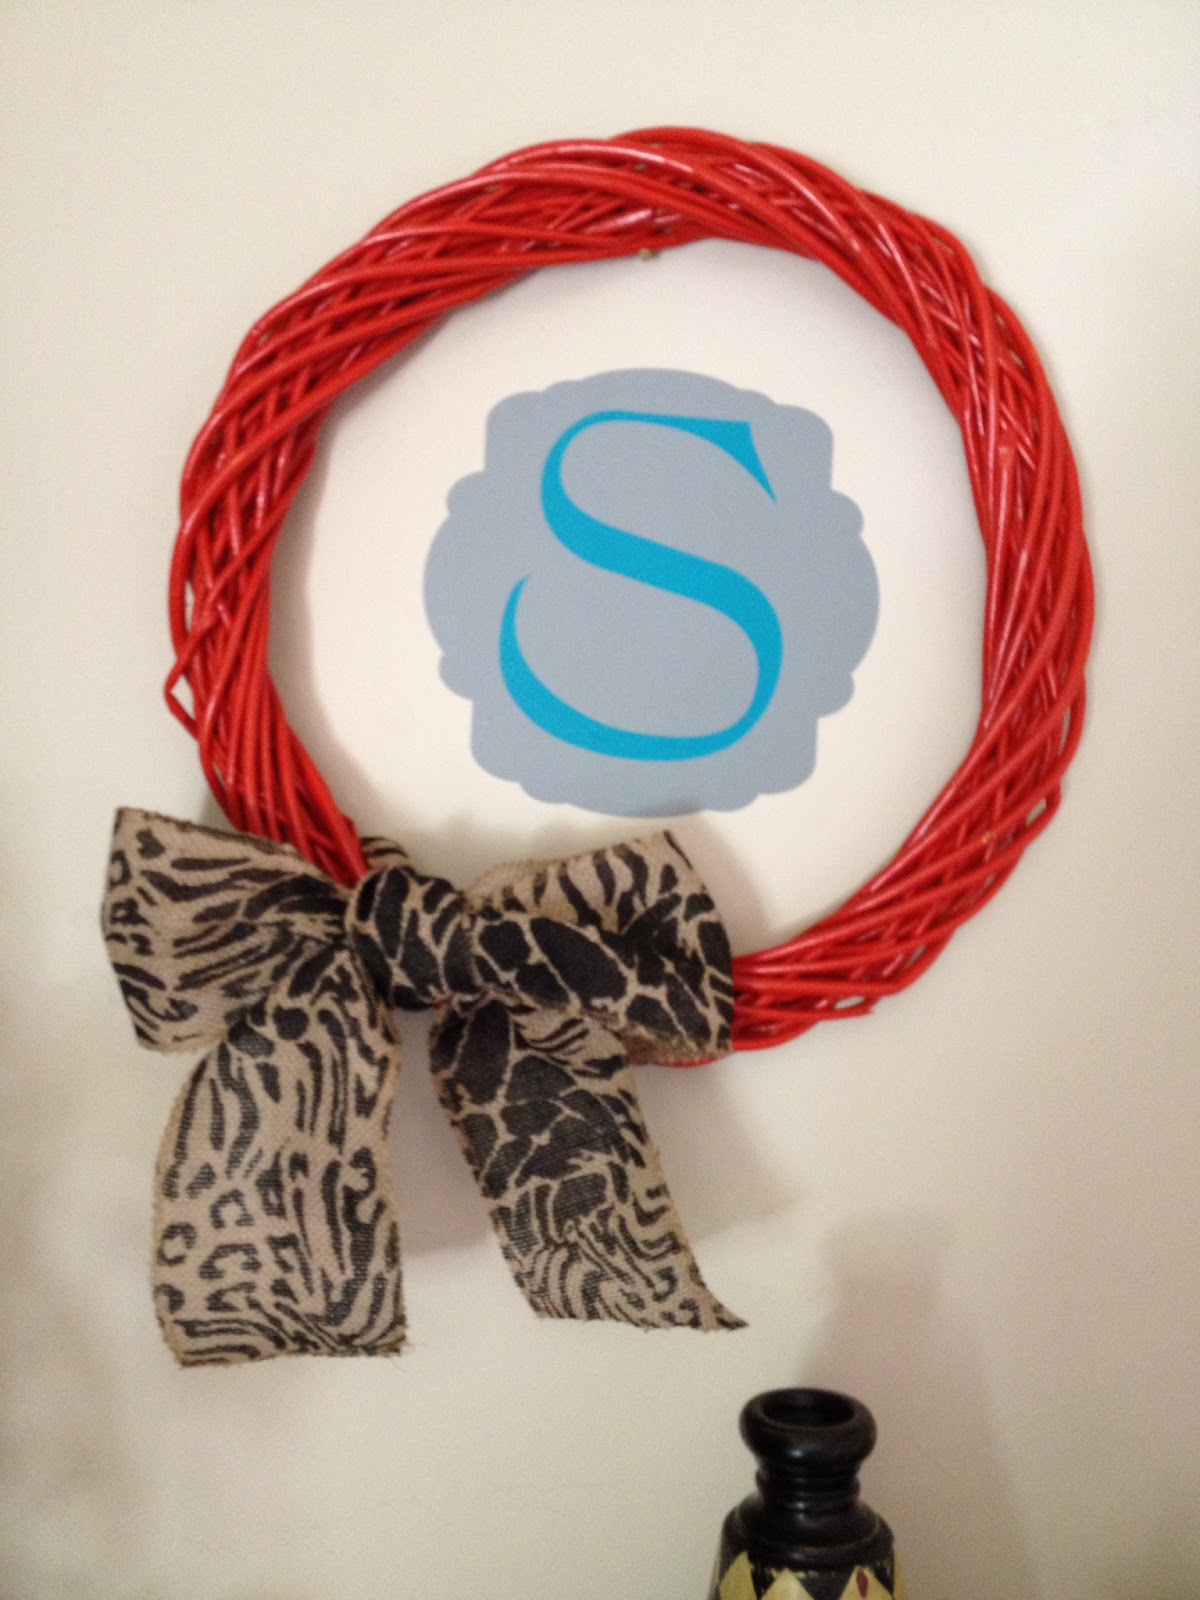
I have slowly been working on the ginormous wall above my piano.  The 3rd piece that I have added is this cute monogram wreath.  It was a simple and quick addition to the wall.  Plus it cost next to nothing!  Mine kind of project!

How to make a large wreath into a bright wall art with a little monogram.  Simple, Huge Impact 


First I made the wreath at the same time as the one that is on my front door HERE

using a wreath as wall art

Then I took some Vinyl from +Expressions Vinyl in Middle Gray and Turquoise Blue

Then in the +Silhouette America online store I found a file called "Frame 2".  I did a little editing to the frame and deleted the little frame circles inside the frame and then I deleted the inside frame. 

Then I found a font that I liked the "S" in and cut that out in the turquoise blue vinyl

Before I put the vinyl on the way I layered the 2 vinyl pieces that I cut.  Then placed it on the wall where I wanted it.  Then I hung up the wreath.

This whole project seriously took me less than an hour.  Even with waiting for the paint to dry.  I did however paint the wreath a few days before I hung it up on the wall.

I love how my wall is turning out.  Its full of color and isn't so BLAH!

To see the rest of the wall go to HERE

DIY Old Cabinet Door Upcycle to Family Room Wall Art Plus a Giveaway

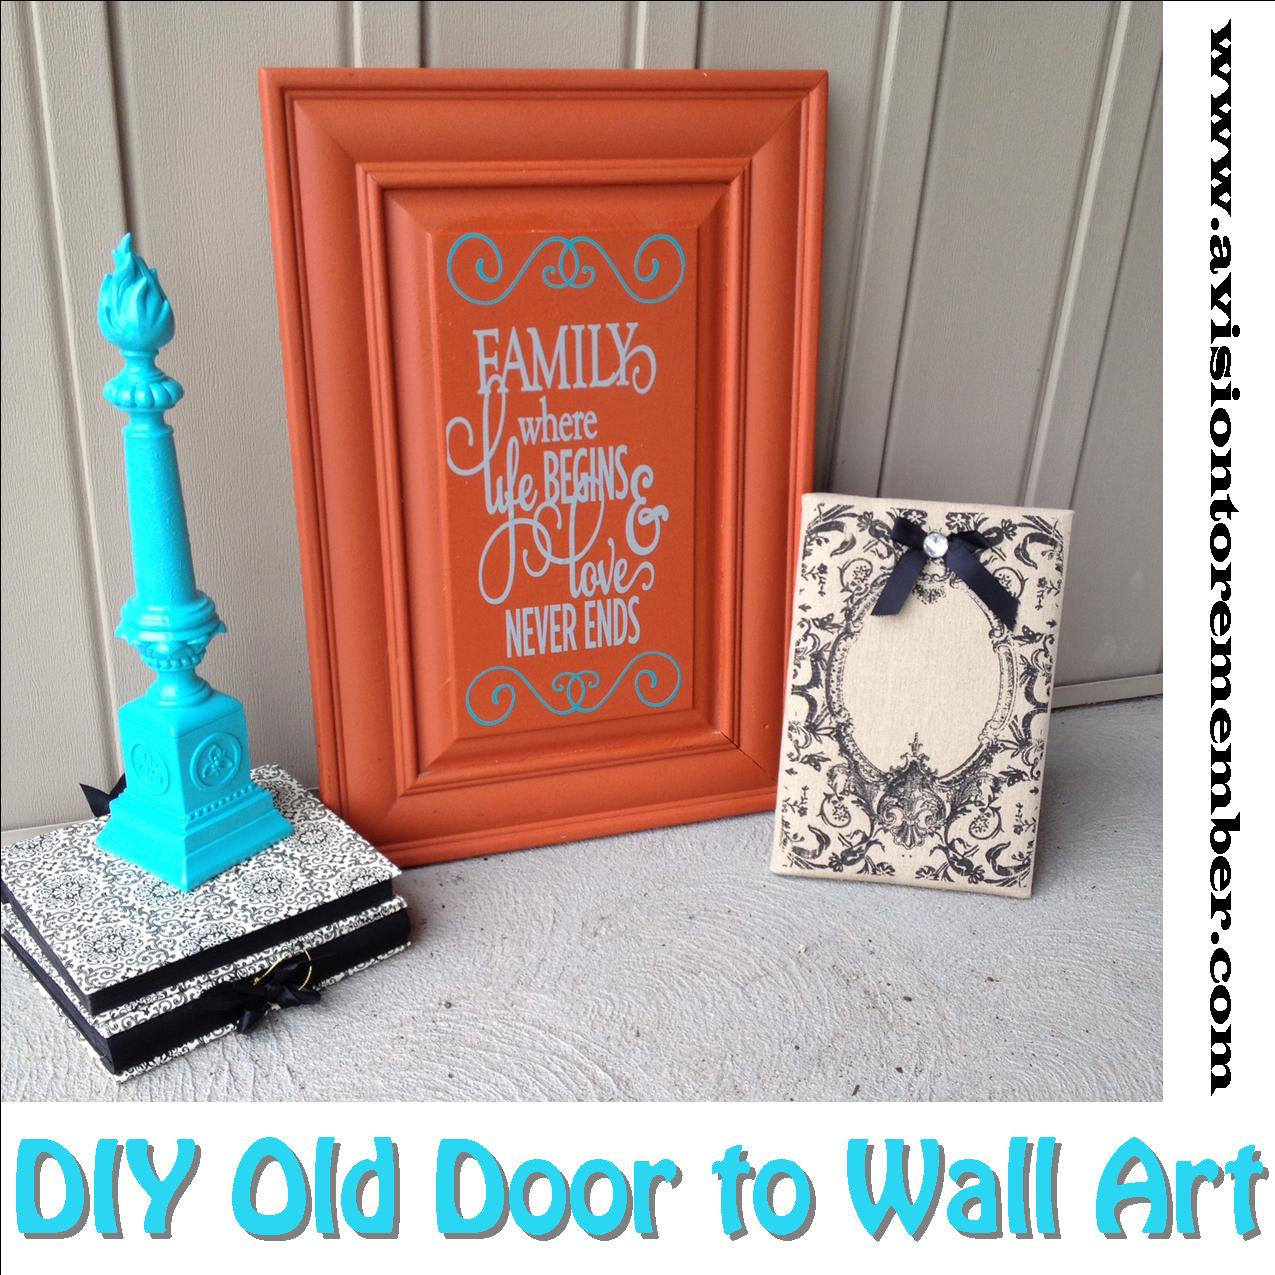
I found this old cabinet door at the local Thrift Store +Deseret Industries a couple years ago.  I knew that I wanted to turn it into some kind of wall art.  So while I was painting I painted it orange.  Then I set it aside and found it a few months ago.  Have you ever done that?!?  Seriously,  sometimes I wonder if I will ever get all my projects done that I have already started on....

DIY Old Cabinet Door Upcycle to Family Room Wall Art

So I whipped out my mom's trusty ol +Silhouette America and found this this silhouette file to cut out the words.  For the turquoise top and bottom I used a design call "swirl" but I couldn't find the link to it...Sorry!

The Vinyl Colors that I used came from +Expressions Vinyl.  The gray is the medium gray interior color and then turquoise blue for the Scroll


DIY Old Cabinet Door Upcycle to Family Room Wall Art 

I ran into a couple problems while I was working on the vinyl part of this project.  First off, the transfer paper that I have was REALLY sticky (I bought it off of Ebay).  It didn't want to let go of the vinyl.  At first I thought that the vinyl wasn't sticky enough, but that wasn't the case.  

I recut the vinyl a second time, but this time I used Press and Seal instead of the transfer tape and it worked perfectly!  

I had also asked a few of my buddies over on Instagram and Facebook what they would recommend trying and most everyone said to do a layer of modge podge and then try adhering the vinyl.  I didn't work for me, but I think it would if your transfer tape isn't super sticky.  


I can't wait to get this beauty hung up next to my Clock in the next week or so.  I just need to find something to put on the other side of the clock opposite of this.  Any ideas?

 
DIY Old Cabinet Door Upcycle to Family Room Wall Art

Make sure to enter the giveaway below so that you have a chance to win $25 gift card to ExpressionsVinyl.com 

Also, you all get a nice little coupon code if you would like to go purchase some of this awesome vinyl from Expressions Vinyl.  It is avisiontoremember. 
Follow on Bloglovin


a Rafflecopter giveaway

Hot Pink and Turquoise Girls Bedroom

I don't know if you remember. It was so long ago, but last fall we decided to move the 2 older girls downstairs.  They were so excited to get to sleep in the basement and on BUNKBEDS!  So after searching Craigslist, facebook groups, and thrift stores I finally found these wooden bunk beds, a dresser (that isn't in their room), and a desk.  
I was so excited.  I got to work painting everything with a little help (wink, wink)

Notice the cute little Owl on the bottom bunk.  The pattern can be found here, plus its free!


Room Before Picture.  Lovely Beige Walls. 


I  *finally* got the curtains done, and convinced the girls to clean up their room so that I could take pictures.  But in all seriousness.  The convincing included me throwing everything that was not photographable out into the hall with instructions to clean it up.  Mean mom....I know. 

Love the curtains, and so do the girls!  PS If you want your own curtain similar you can head on over to my Etsy Shop


This dresser I had my parents pick up a couple years ago from Craigslist in Arizona.  I am so jealous of their Craigslist.  Idaho Craigslist is definitely lacking to say the least.

I even let my oldest keep her "participation" trophy's out.  Even though I still don't understand why people give out participation trophy's.  Dumbest thing ever!


Even Minnie was able to make her debut.

Oh and the cute little metal chair came with the bunkbed set.  The person I bought them from didn't have a need for the chair anymore.  It was ugly, and boyish blue, with lovely boy stickers all over it.  Thanks to my awesome F-I-L, all that crap was burned off and then the chair got a lovely powder coat for a little bit extra durability. 

For those of you that follow along with me you might remember that I also redid their bathroom to match their bedroom.  Go HERE for a little pic
 Follow on Bloglovin

Stenciled Wall Art with Vinyl Letter

With little Baby Boy on the way I have been thinking a lot about what his nursery is going to look like.  I don't know why deciding on colors that aren't girly, but still appeal to me have been so hard!  Seriously!  I don't think I was cut out to be a mom to a boy!

Finally, I decided on doing mustard yellow, gray, and black.  Luckily for me, the nursery is already painted gray, so I am one step closer than I was before to getting his room done.  Thankfully, I still have 3 more months to get prepared for this little bundle of joy.

The first piece of decoration that I have made for his little room is a stenciled board with a Vinyl Letter on it. (Now hopefully we don't decide on a different name...eek!)

Here's how its done:

1. Cut a board down to the desired size.  My vinyl piece measured 12 inches long so I cut my board 14 inches long.

2.  Spray paint it (or roll it) your desired color

3.  After that has dried take the stencil that you would like the pattern of and lay it on top of your board.  My stencil was a little smaller than my board so I had to move the stencil around and paint it several times.

I would suggest NOT spray painting it like I did.  I centered the stencil on my board and sprayed it first and then I had to lay the stencil down 4 different times in each corner to finish the entire board off.

Next time, I would start in 1 corner and spray the stencil and then move it to the other corners, making sure to line up the stencil each time.  It would lessen the amount of times you would have to move the stencil and spray.

Also, you will either need to be REALLY quick when you are repositioning and spraying each time, OR wait after each spray for the paint to no longer be tacky.  Otherwise, the paint will stick to your stencil when you move it.  I am not very patient so I tried to be as quick as I could which worked for the most part, but not completely.

I used the Small Casbah Trellis stencil from Royal Design Studio Stencils

One other note.  I didn't want my stenciling to be perfect and clean.  I wanted a little rustic, not perfect look to it.  IF I wanted the stenciling to be perfect, I would have been A LOT more careful in the stenciling. 


4. Now take your vinyl letter and put it onto your board.

I used the the Classic Letters Monogram Vinyl Wall Decal from Wallternatives.  They not only have the letters, but they have a ton of amazing different vinyl and fabric decals for your home.  Seriously, head on over and check their website out.  It is amazing!  I especially love all of their designs in Chalkboard Vinyl. 


5.  You are finished!  Isn't it cute!
Follow on Bloglovin
 

Subscribe

Enter your email address:

Delivered by FeedBurner

Let's Get Social

Image HTML map generator