Mothers Day Gifts and Craft Ideas for Kids

 This is your friendly reminder that Mother's day is just around the corner.  Funny cause as I was preparing this post I kept thinking "Moms are the ones that read my blog...they won't be making themselves any gifts!"  But alas, I still did the post.  So you can "accidentally leave this blog post open on your computer so your husband will see it and "hopefully" get an idea or 2 on what to help your kids make for you! 

So here is a quick roundup of a few kids crafts that I found on the blogosphere this morning.  First off a few links with tons of craft ideas:

Mothers Day Crafts - Kids Books - Children's Activities and Crafts for Mother's Day
 

Then we all could use a cute bouquet for Mother's Day.  Especially if it comes in our favorite drink!
Handmade Website
Or a candy bar bouquet?
733Blog
The little ones could draw your faces:
Bitsy Creations
First Grade a la Carte~put the things they love about their mom on the stems or a job they will do for Mom
 
I Can Teach My Child Footprint Art
For more Mothers Day Craft Ideas visit my Mothers Day Pinterest Board
  Follow Me on Pinterest

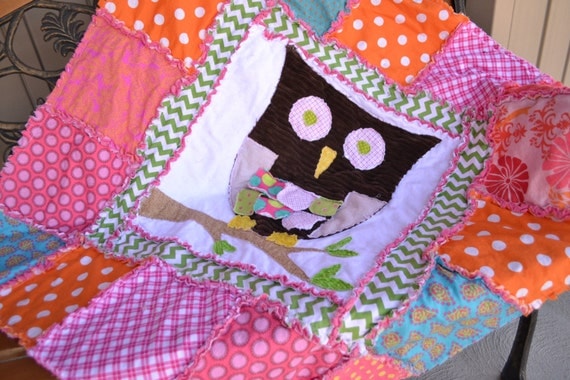
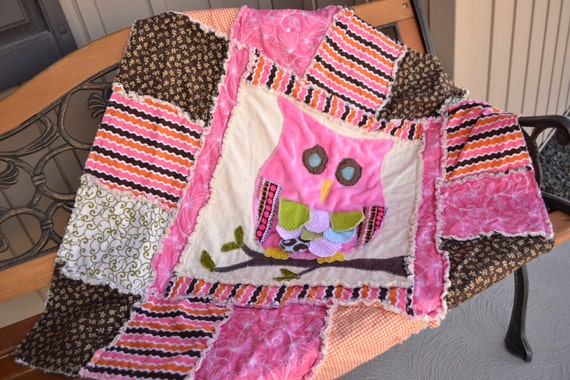
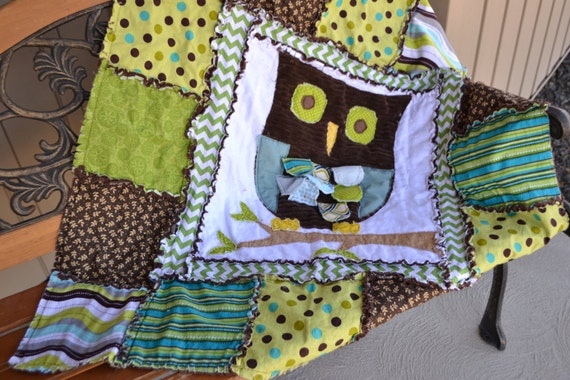
Owl Rag Quilts!

I am in love with these owl quilts!  I think my favorite would have to be the orange, pink, green, and turquoise one!

Isn't it cute!

The other girl one is just as cute!  I love the soft minky owl.

Of course I had to do another boy owl quilt.  This time I did it in green, brown, and turquoise. Again, with a soft minky owl and 3-d scallop feathers.


If you would prefer to make your own...you can go to HERE.  But please remember to share a picture with me!  I love to see how different people make the same quilt pattern their own. 
Follow Me on Pinterest

Easy Stroganoff Meatball Recipe~Kid Friendly


Let me start off by saying that I have the taste buds of a 4 year old.  I am so picky!  I hate it.  I want to love salmon, red sauce on pizza, sausage, hot dogs, peppers, tomatoes, grapefruit and many other "normal" foods.

As a kid I would rather go hungry than eat the meals that I hated!

So, I often times try to hide things my girls don't like (and me) in other things that we do like.  This time it was green peppers in meatballs.

Recipe:
1 lb hamburger (I used elk burger cause that's what I have in my freezer)
1/2 c bread crumbs or crushed crackers (sometimes I will use oatmeal as well)
1 egg
little bit of milk to help hold the mixture together
1 medium onion finely chopped (I used my food processor)
1 medium green pepper
2 cloves garlic
1 drop liquid smoke (love this stuff!)
1 tsp Worcestershire sauce
Salt and Pepper to taste
1 tsp Lawry's salt
Any other seasonings of choice

Thaw hamburger if needed and combine all the ingredients. 


Sorry this picture is bad.  My girls were taking the pictures for me cause my hands were dirty.  I like to use my cookie scoop to make perfect size meatballs. 

I place them onto my cooling rack for cookies that is on a cookie sheet lined with tin foil (for easy cleanup).  That way the meatballs are baked out of their grease. 

Bake the meatballs at 350 for 20-30 minutes. Don't over bake them or they will get really dry.  For the stroganoff sauce I just use cream of mushroom soup.  Its easy and quick.  Serve the soup and meatballs over some spaghetti noodles and enjoy!

Nursing Cover Clip Tutorial~Perfect Way to Turn any Blanket into a Nursing Cover

Ever just wish you had an extra hand when you were nursing to hold the blanket up so baby would stop revealing your goodies to everyone around you?  Well here is a simple solution that doesn't include packing around one more big thing in your diaper bag. 

1.  You will need a 7/8 ribbon cut to 20 inches and 2 - 1 inch suspender clips
NOTE-this is the length that fits me well.  I would say I am average size.  You might want to measure around your neck to see if this length will work for you

2. thread the ribbon through the clip with the short end on the back side of the clip.  Sew with a straight or zig-zag stitch.  When I do a straight stitch I like to go back and forth over it a couple times to make sure that it is secure.
3.  Heat seal the ends of the ribbon to give them a clean finished look.  Then throw in your bag!  I also like to use these clips to secure pacifiers, sippy cups, toys, or whatever else to a car seat or stroller or even baby so I don't have to keep track of all the little things. 

If you don't want to make your own there are some available in my shop HERE.  If the color you are wanting isn't there send me a message and I will get one made for you in the right color.  6f25198df53de9928f78ae808896436ada5e722287c9eb650a

Pink Lace Flower Girl Twirl Skirt Tutorial

pink flower lace chiffon girls skirt
 My middle girl LOVES skirts, dresses, and all things girly!  I ended up putting all of her pants away in storage because she wouldn't wear them.  All she has now are dresses, skirts, and leggings.  But she will only wear leggins with a skirt or dress.  NEVER alone.  Seriously, she is all girl! 
pink flower lace chiffon girls skirt

 So I made all of my girls matching dresses, cause that's what craft mom's do, Right? 
up close of 3 inch waistband and lace flower chiffon with satin underlay
up close lace chiffon and waistband


 I got my fabric from Wholeport.  The pink rose chiffon lace from HERE and the pink satin from HERE.  The wide elastic waistband I got from Ruffle Fabric

Below I have the basic instructions for those of you that already know how to sew:


how to make a 2 layer skirt with satin and lace chiffon
pink flower girl skirt under skirt part
under skirt in pink satin

 A few more details:
1.  Cut your pieces of fabric as directed above
 2. Sew your trapezoid pieces together.  Hem the bottom and top.  I used my serger
3. Cut your elastic the size you need it.  Sew it together
4. Take all 3 pieces (the over skirt, underskirt, and waistband) and layer them with the underskirt on the bottom with seams on the inside, then the over skirt, and finally the waistband with the right side on facing the over skirt.  You will have all 3 layers even and layered on top of each other so that you can sew them all together at 1 time.
5.  Finished!

PLEASE NOTE:  These instructions will work great for any size.  I made 3 skirts, a 12 month size, 4t size, and girls 8.  They worked across the board.  I am excited to make me one now!  I haven't decided if I want the overlay to be as full on me as it is on the girls.   hmm So hard to make a decision!

Follow Me on Pinterest

How to Make Regular Curtains Longer and Add Embellishments for Custom Curtains

If you are like me, then you want awesome designer looking curtains for cheap and easy. Its not difficult to find a decent set of plain curtain panels for under $10/panel, but the chances that the curtain is longer than 84 inches long or embellished how you want it to be is not good! This method is also great to color block curtains too!
designer curtains in minutes

Today, I want to share with you how I make my curtains the custom length that I need and add a little trim to them to make them appear expensive and professional. The same method works great for shower curtains too! You can see the shower curtain I did for my Master Bathroom HERE. The green curtains I am using today I found at Ross's for $7.99/panel. Then I bought some home decor weight fabric to add onto each of the 2 panels. I got 1 yard. I also purchased enough of the bead trim to trim each of the panels going horizontally, plus a couple inches for each panel so that I can fold over the trim and not see the raw edges.

how to lengthen a curtain and add embellishments
Serge all edges of new fabric


 First, figure out how long you want your curtains to be. I needed to add a couple of inches. I bought 1 yard of the fabric that I added onto the curtain. I cut that fabric in half so I added 18 inches (minus the seam allowance) onto each panel. If you own a serger, serge the edges. This will help the fabric to not fray and give it a cleaner look.  Heads up: I used a home decor fabric that measured 56 wide and my curtain panel was 54 wide so it was the perfect width.  If your fabric isn't the right width then you will need to carefully piece your fabric together so that you don't disrupt the pattern (ie my fabric has an ornate damask print and if I needed to piece it together I would want to be VERY precise in piecing it so your eye wouldn't be drawn to the seam)

how to lengthen a curtain and add embellishments
Figure out how long you want the curtains (with your children's help!)
Next, lay your curtain out with the right side facing up.  Measure how far up you want the seam to be where the curtain meets your new fabric.  Make sure when you are figuring out how long you want your curtain and how far down you need the new fabric to be to account for a seam allowance.  I used a 1/2 inch seam allowance.  Mark on the curtain with a fabric safe pen or marker where you want the seam to be.  Flip over your new fabric. 
how to lengthen a curtain and add embellishments
pin new fabric in place
how to make curtains longer in minutes
make sure to leave some overhang for later
Next pin the right side of your curtain to the right side of your new fabric. You will need to make sure that you leave an inch or so overhang on each side of your curtain with the new fabric so that you can fold it over and sew it onto the curtain panel.

how to make curtains longer in minutes
Lay out curtain and additional fabric
 Next fold over your bottom of your new fabric and sew it over just a 1/4 of an inch to hide the serged edge.  If you don't have a serger fold the fabric over once and sew it and then fold it over again and sew it.  That way you won't see the raw edge at all.

how to embellish a curtain
Fold over bottom and sew 1/4 seam allowance


Next fold over your extra inch on each of the sides and sew it down onto the curtain.  If you have enough you can fold some of the extra under and then sew and then you wouldn't see the seam from your serger.  If you don't have a serger then fold it under twice so that you don't see the raw edge.  


upcycle curtains
Fold over left over on side and sew down


Last to add the embellishment trim to your curtain you can pin it into place right on top of your seam, or just eyeball it and sew it into place.  A note about trims: some regular sewing machines can't handle the thick braided trims so be careful when sewing them onto your curtains.  Before I got my industrial machine I tried to stick to the skinnier trims or glued them into place using heavy duty upholstery fabric glue. 
how to add border to curtain
Sew on Trim


Don't you just love how they turned out?  I love that I was able to get custom designer style curtains for around $12/panel.  Perfect for my budget and my expensive tastes!how to make curtains longer and add embellishmentshow to make curtains longer and add embellishments
If you want to see the rest of my girls nursery you can go HERE Follow Me on Pinterest

Let's Get Social

Image HTML map generator


Featured Post