Mod Circle Quilt Pattern


I have had this design in mind for awhile now but just barely had the time to get it down on paper and then all sewn up.

I made this quilt for me, but as soon as it was done my 18 month old took it and has never let me have it back.  Funny little girl.  She tries to drag it with her wherever she goes.

It measures 50x50 and is made with a combination of cotton and flannel fabrics on the front, and minky on the back.  The hot pink zebra print fabrics have been pleated to give the quilt some texture.  Also the circles have all been raw edge appliqued.  The back is super soft minky fabric.  I love it :)

I quilted this blanket as a quilt as you go quilt (which means you can quilt the blanket as you are sewing it together.)  2 steps in 1!  Making it a super quick and fun quilt to make. 

The quilt pattern is available HERE.  I am also going to be including the instructions to make a car seat tent to match this adorable blanket. 


Photobucket

Sunbeam Primary Talk-Jesus Birth


My 4 yr old gave a talk in Primary yesterday.  So I had her tell me about the birth of Jesus.  As she was telling me about him I wrote it down.  Then I googled all the keywords and found corresponding pictures so she could do her talk by herself.  I left this talk in Word so that you can edit it if you would like.  To find the talk please go HERE or click on the picture and print it. 

This is the 2nd talk that she has given.  To find the first go HERE


Photobucket

12 days of Christmas Countdown Quilt. Advent Calendar

Finally!  The Advent Rag Quilt is Finished!  Yippee :)
I used the Easy Peasy Rag Quilt Pattern.  
Instead of cutting out the squares as directed I cut out trapezoids.  They measured 9 inches on 2 sides, then the short side was 9 inches and the long side was 14 inches.  It made the pockets pretty big.  I think next time I make a quilt like this I will do it 9x9x9x12 instead. 

Then on each trapezoid I cut out these adorable vintage fabric snowmen that I received from a church swap. 
For the numbers I cut them out of fabric with my cricut keystone cartridge. 
Then I sewed along the top of each trapezoid so that it would fray.
Then I sewed it together like usual except I did not sew the top of the trapezoid in with the other fabrics so that it would create a pocket.
Here are all the cut outs that my husband and I colored the other day
On the back I wrote what we are doing on that particular day.

My daughter asks me every day if we are going to start with the countdown blanket.  She is so excited for it.


Photobucket

Part 1 of 12 Days of Christmas Advent Calendar

I showed you all a Glimpse at the 12 days of Christmas countdown quilt that I made for my daughter.  My plans were to reveal it to you all today but sadly the weather has just not allowed for pictures being taken outside the last couple of days.  So you will just have to deal with a part of our calendar.

To get ready for the 12 days of Christmas I printed off THESE pictures (they are numbers 5-7)  The picture above is taken from that website.  Head on over there and print your own off.

I printed them off onto cardstock, had my husband help me color them (I am not an Artsy craft person, more like a sewing crafts person), and then I figured out what we were going to do each of the 12 days.  I have a scripture to read and also a Jesus movie to watch (we have lots of the living scripture dvds) every one of those days.  Then we also have something to do or something to learn about (like make a present for dad, what do bells symbolize at Christmas time, etc).  I will go into more detail when I show you the pictures of the finished product.    

Then I cut out each piece (I ended up printing off extra of the camel and sheep so I would have 12 big objects) and laminated them.

Even though the 12 days of Christmas hasn't officially started yet, I took the nativity scene to church and let the girls tape them to the back of the pews.  It kept them entertained.  The kids in nursery loved sticking them to the walls later.  So there are so many ways to use this fun little nativity. 


Photobucket

Rag quilt Christmas Stocking

Christmas is my favorite time of they year.  I love the smells, the colors, but most importantly the feeling.

I love to sew and this year I decided to sit down and create my baby her very own stocking. 


 Throughout this pattern please use a 1/2 inch seam

Here is how I made it:
1. Cut out 48 strips of coordinating fabric.  Each strip needs to measure 9 inches by 2.5 inches
2. Now take each strip of fabric and place sandwich 2 on top of each other with wrong sides together.  So now you will have 24 fabric sandwiches.
3.  Take 2 of the sandwiches and place them together.  Sew down the long side of the fabric sandwich.
4.  Repeat with 10 more fabric sandwiches.
5.  You will now have a rectangular piece of fabric.
6.  Now make another rectangular piece of fabric with the remainder pieces of fabric
 7. Lay your 2 rectangles on top of each other with wrong sides together.
8.  Take a stocking that have already and lay it down on top of your fabric and cut out the shape. (if you need a little more width just add a piece of fabric where you need it)
8.  Now sew those 2 pieces of fabric together around the outer edges BUT NOT THE TOP.  You will be sewing 4 pieces of fabric together at the same time
 9. Cut out a piece of fabric that measures 4 inches by 1 inch.  This will be the hoop to hang your stocking up with.
11. Sew down both long edges of the piece of fabric.  Stick the short ends of the piece of fabric in between the sandwiched fabric at the top of the stocking. 
12.  Sew around the top of the stocking.  You will be sewing 2 layers of fabric together.
13.  Now take some short blade scissors and cut all the raw edges of your stocking.
14.  Wash and dry the stocking.
15.  Enjoy!


Christmas Stocking available HERE


12 Days of Christmas Countdown Quilt

Here is a sneak peak to our 12 days of Christmas Countdown quilt.  I LOVE how it is turning out.  It does still need to get clipped and washed before I can show you the entire thing.  ENJOY!


Photobucket

Dr. Seuss Christmas Trees = Awesome Kids Craft


Remember yesterday?  Those fun trees?  If you don't go HERE

Well I sat down with extra fabric from my halloween daughters costume 
It was fleece fabric.  In a nice BRIGHT lime green.  I am so glad that I found it while we were cleaning up after the tornado last week ripped through the basement 

First, I cut out a bunch of different circles.  You know me...no the circles were not perfectly round by any means.  They were all just guesstimates.


Then my daughter put a dab of glue in between each layer of fabric.

Then she glued on random beads all over the trees...as you can see she is such an artist!

Last night as we were laying in bed she told me that making those trees was a lot of fun and thanks mom.

That totally made my day!   I LOVE being a mom.  Best thing ever (most of the time)

Annual Humanitarian Quilt


Every year our community gets together to make school bags, stuff childrens toys, donate quilts, and eat soup. It is a great time to serve others and to come together as a community and bond.
This year I was a little short on time so I did a quick fat quarter twin size quilt.
To make the quilt:
I cut 20 squares that are 18x18 inches wide. I wanted them to be square, but this would work just as well if you used fat quarters.

Then I sewed all the squares together.

My mother in law helped me tie the quilt

Then I used a full size flat sheet for the backing. Which made the binding really easy

I just folded over the sheet and sewed it down. I know that is not the "proper" way to do things, but it works just fine for me.

Halloween Costume: Princess Frog DONE

My oldest decided this year that she wanted to be the Princess and the Frog with her sister.  Both of them being frogs. This definitely makes my life easy....right.

For one thing...I despise dressing up like a "princess"  Why?  I don't really know.  Maybe cause EVERYONE does it.  Everyone wants to be a princess.  Well girls hate to break it to you, but really you are a princess.  But you aren't one of those fantasy princesses.  You are a full blown princess because you are a daughter of God.

But you don't need a name like Cinderella, or Tiana, or Aeriel.

Nope any nice pretty name will do.  Why?  Because you are you.

So when my daughter didn't want to be the princess in the dress, but the frog.  I jumped at the chance.

Plus, I could make a costume that is warm.  Which is a must in the Idaho fall.  Who knows if we will be trick or treating in the snow or in our shorts.  It really could go either way.  Honestly.  We've done both....

but most of the time it is in the snow or really cold and windy.  
Princess and the Frog Costume made from Fleece

Happy Birthday Honey! Football Rag Quilt

All my husband wanted for his birthday was a football quilt.
He is a huge Brett Favre fan. Hence the #4 on both sides. This blanket is a nice representation of his football love. Torn between 2 teams, the former Favre team (Green Bay Packers) and the current Favre team (Minnesota Vikings)
I will say that he has yet to use it. He was however impressed. I think. The direct quote from him is "I knew you were making it. I am a great detective. Its not quite what I was thinking."

Yes, I was trying to surprise him. Yes, he kinda designed it. No, I am not great at hiding things,

I used the Addy Mae Pattern found HERE

Essentials for Cleaning


Now I am not going to pretend that I have a clean house 100% of the time. I don't. I feel like 90% of the time my house looks like the above picture. Thankfully, I really know better that it is not that bad.

I hate cleaning. I put it off for as long as I possibly can.

I do like to be organized though.

Weird I know.

So when I do clean, here are the things that I HAVE TO HAVE to get the job done

Water:
I think this is the 1 most important element in cleaning. If you have water you can clean almost anything. It may be a little more difficult without some of the following tools, but one can always manage as long as you have water. At least that is my opinion.

Rags:
I like to have rags like this, but I know many people that use old clothing that they would have thrown away instead of wash rags. I like this type of rag because it holds in lots of water and it can scrub fairly nicely.

I use rags like this for many things like:
  • cleaning bathrooms
  • mopping floors
  • wiping baseboards and walls
  • cleaning out cupboards
  • cleaning the fridge
  • etc
I do keep my cleaning washrags separate from my rags that I use to clean my face.
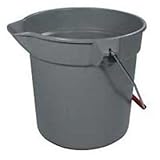

Bucket:
When I am really doing a good cleaning job (like washing walls and floors and everything in between) I want to have a bucket next to me. That way I am not running to the sink in the bathroom or kitchen all the time and then dripping water back to where I was working at. It just makes life tons easier. One could also use a pot or a large bowl, but make sure to clean it really well before eating out of it later on.
I LOVE Windex. I have not really tried other window cleaners. Very rarely do I stick to a brand, but I have stuck to this brand.
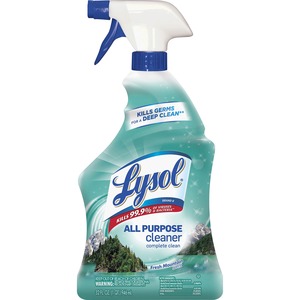
I ALWAYS have an antibacterial cleaner handy. This is what I use to clean my bathrooms and kitchen counters. Everything just feels so much cleaner afterwards.
Vacuum:
Isn't this vacuum dreamy?!? I think I might actually vacuum everyday if it looked this good. But seriously, this is essential!


Broom:
Gotta have it. I use to to sweep the floor (obvious I know), but I also use it to get cobwebs down (yes I have them too) from the ceiling. My mom even defended herself from a mouse with one

Scrub Brush:
I love having a scrub brush to scrub the floors and the bathtub. They do a great job with those harder to clean jobs.

Now I think I have motivated myself enough to have a cleaning day. What do you use to clean?

Subscribe

Enter your email address:

Delivered by FeedBurner

Let's Get Social

Image HTML map generator


Featured Post

How to Memorize The Living Christ - Simple and Easy