Humanitarian Scrappy Quilt for the Needy

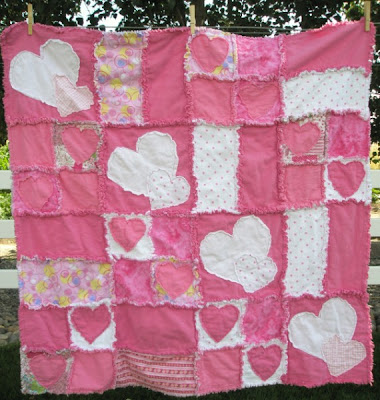
Our ward (its an Area of People organized by the Church of Jesus Christ of Latter-Day Saints) asked every family to bring a blanket for our Christmas party. Each blanket would be donated to the LDS church to send to people that need them. Humanitarian scrappy strip quilt twin size
They asked for colorful...thats what I gave them....
Humanitarian scrappy strip quilt twin size with sheet for backingMy intention was to make this full size, but I only had enough scraps for a twin size...
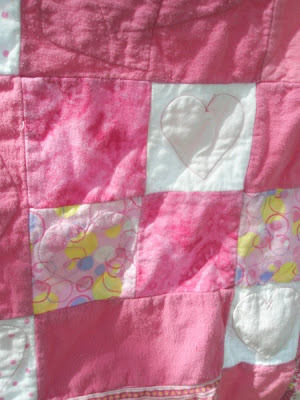
Humanitarian scrappy strip quilt twin sizeI ended up tying this quilt (I really, really, really wanted to quilt this blanket but just did not have time on my side)

Every single one of those pieces of fabrics came from a previous quilt that I had made.  They were all scraps that I hadn't used.  It was soooo nice to be able to use things that I already had in my scraps stash!

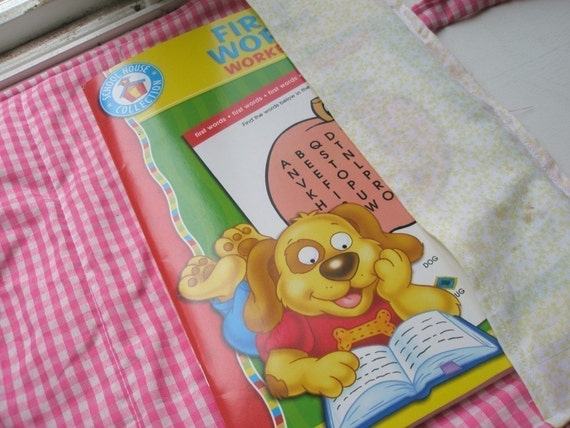
I used a twin size sheet for the backing so that I would not have to sew one together
Humanitarian scrappy strip quilt twin sizeTo bind it I folded the sheet over about a 3 inches and just sewed along the edge. I did not bother with turning the edge of the sheet over because they are already finished nicely on a sheet. The above picture is the corners that I did. I would sew down along the edge of the sheet all the way to the end of the blanket. Then I would move the blanket so that I could sew down the next edge...I folded the sheet that would be the binding, so that it was a triangle in the corner and then folded it over the blanket so that it looked like it was a miter corner. Even though I don't think technically it is (who knows). Then I pinned the corner down and just did the edge (I did not sew the corners down yet.

I did that all the way around the quilt and then went back and just sewed down the corners at the end
Humanitarian scrappy strip quilt twin size(here I am sewing down the binding of the blanket)

It is a good thing that I ended up not having enough scraps to do a full size; this blanket took up the entire living room as it was when I was tying it. I don't think I would have had enough room to tie a full size blanket. Thanks to my MIL she helped me finish tying this blanket..

Oh and all the yarn for tying was different colors. I used green, pink, and a multicolored (purple, yellow, and blue I think) yarns for this blanket.

These scraps all came from the rag quilts that I have been making over the last 6 months. This blanket is full of memories and I hope that the person who gets it loves it and keeps them warm...

How to Prevent Sewing Machines from Moving While Sewing

I don't know if you have this problem too, but as I sew, my sewing machine will slowly move and bounce around.

So then, when I stop sewing, I have to push my sewing machine back into its place.  It happens with my serger too!
So annoying!

How to Make Wired Ribbon Flowers: The Simplest Flowers EVER


 UPDATE:
This was one of my first tutorials.  It is still popular today.  I NEEEED to update it with new pictures, but that, as you all know, takes lots of time.  lol

I hope you enjoy this little tutorial on how to make wired ribbon flowers


Pencil and Notebook Case Sewing Pattern by A Vision to Remember

I don't know about you but my daughters are constantly carrying around crayons, pencils, markers, coloring books, Notebooks and anything else to feed their creative sides.  They love to color and draw!

This is my solution:  A Pencil and Notebook Case.  It is perfect for them to pack around all their coloring supplies and keep it nice and organized.  A Win-Win in my book!

Pencil and Notebook Case Sewing Pattern by A Vision to Remember This pretty coloring book case is now available in my Etsy shop

Front Cover of the Pencil and Notebook Case Pattern with Raw Edge Applique Flowers

I just adore the fun raw edge appliqued flowers.  They are perfect to add a little dimension to the case, plus its just stinking cute

How fun is that?
Inside Cover of the Pencil and Notebook Case

The pattern includes all the information that you will need to complete your own pencil and notebook case.  It also includes the pattern pieces for the appliqued flowers.

This pattern is a great project for the kiddos to try out!  My 7 year old daughter decided she wanted to give one a try.  Here is her version


Image HTML map generator

Fabrics can be found at:
www.avtrfabrics.com

Cupcake Cake with Gum Drop Flowers

It will be my sisters birthday next week but we were with her in AZ this last week so we threw her a surprise b-day party. I made her a really cute cake with the wilton cupcake cake tin

It is called the Giant Cupcake Pan. So much fun with a huge impact. 

 You can find it here (Amazon Affiliate Link) and most stores that have wilton have this pan.

cupcake birthday cake

Stroller/Shopping Cart Caddy Tutorial

I absolutely adore my stroller.  It is a +phil&teds Jogging Stroller.  It can be a 1 seated stroller or a 2 seated one.  It is lightweight.  Its easy to push. Its divine!  The only problem...not much storage space.  So I have devised a little stroller caddy to help with the storage issue. This tutorial will also work for umbrella strollers and a shopping cart if needed. 

My favorite Stroller by Phil and Ted
Click the picture above to take you to Amazon. ADPhil and Ted Storage solution
Fabric Stroller Caddy Pattern by A Vision to RememberThe caddy features easy snaps to attach the stroller handle bar.  Also, large pockets so that you can take whatever you need!

It even includes little loops to hook toys to for the little one riding in the back of the stroller.
How to attach toys to a Stroller


Pockets with elastic so that your stuff doesn't fall out when you are running around.  Super important!


How to Add Elastic Pockets


I designed this with the Phil and Teds Stroller in mind. My stroller has a seat that sits below the
front seat. This is where my baby sits. So I put the ribbon rings at the bottom so that I could attach toys to it. It will help to keep her entertained.

How to sew a Stroller Caddy

Items needed:
snaps
fabric (about 1/2 yard of 2 colors)
grosgrain ribbon (about 32 inches)
1/4 inch elastic

Instructions:

  1. Measure how wide you want your caddy to be. Mine was 21 inches.
  2. Measure how long you want your caddy. I wanted mine about 13 inches (if I were to do this again I would make mine 9-10 inches long)
  3. Cut 2 pieces of fabric the width and length that you would like. I had two different colors that I was working with.
  4. Cut a piece of fabric 5 inches smaller than your width measurement. Mine was 21 inches so I cut mine 16 inches. So cut the piece of fabric 16 (or whatever your number is) by 6 inches.
  5. Cut 2 strips of fabric 1 inch wide by 24 inches. Sew those two strips together and turn and press. Cut into 3 equal pieces. These are for the straps that attach to your stroller/shopping cart so if you would like them longer then cut them longer.
  6. Turn the ends of your strips inside and sew them so that you have a nice finished edge
  7. Cut your ribbon into 4 equal strips. Heat seal the ends to prevent fraying. (I use these to attach toys to for my baby to play with.
  8. Turn you big pieces of fabric right sides together and pin your straps in the proper place. Sew around and make sure to leave a big enough space to turn it right side out.
  9. Turn right side out.
  10. Take the elastic and sew it across the top part of your smaller piece of fabric as close to the top as possible. While sewing stretch the elastic as much as possible to create the gathering.
  11. Turn the elastic under and sew. Repeat again so that you have no raw edge showing.
  12. Attach the piece of fabric to the larger piece of fabric and turn the raw edge under as you are sewing it.
  13. Sew straight lines on the pocket to create smaller pockets. make sure to leave enough space in the middle for later
  14. Fold over the big piece of fabric leaving an inch or two space at the top. Sew down the sides to create one big pocket.
  15. Sew down the middle to create two pockets.
  16. If you would like the toy rings at the bottom then sew the ribbon on at the bottom
  17. Attach snaps to the straps at the top
How to Make a Stroller Caddy by A Vision to Remember


And now you have a fun shopping cart/stroller caddy.

This would work great with a phil and teds stroller, an umbrella stroller, a jogging stroller, and a shopping cart. If you have any other uses for it, it would be great to hear from you.
Another idea I have is to make this into an apron. The only thing that you would change is to make straps to go around the waist (or you could use ribbon). I tried this on my 3 yr olds waist and it would fit perfectly (could be a few inches shorter). I just need to make it for her.


Image HTML map generator

Fabrics can be found at:
www.avtrfabrics.com

Heart Applique Rag Quilt Pattern by A Vision to Remember

A simple and beautiful rag quilt pattern featuring appliqued hearts.  This rag quilt is made with several different sizes of squares and rectangles.  Its not just your boring everyday square rag quilt. 

heart applique rag quilt pattern by A Vision to Remember I just love the way that this blanket turned out. It was so much fun to do. I love coming up with new designs.
Back view of the Heart Applique Rag Quilt Pattern by A Vision to Remember Even the back of the rag quilt is pretty with the heart appliqued stitches showing through.

You can purchase the quilt pattern in my Etsy shop or Craftsy Shop


Image HTML map generator

Fabrics can be found at:
www.avtrfabrics.com

Butterfly Applique Rag Quilt Pattern by A Vision to Remember

Butterfly's remind me of summer and spring. I am a huge fan of warm lazy days, hanging out with my family, and enjoying life.To me that is what this quilt represents.  Love, Family, and Beauty.

This rag quilt pattern features large appliqued butterfly's.  It is gorgeous and perfect for that special little girl!

Butterfly applique Rag Quilt Pattern by A Vision to Remember

Flower Applique Rag Quilt Car Seat Tent Pattern

UPDATE: This was the first rag quilt car seat tent that I made. I still look back on it fondly! It was my daughters. The colors may not be the style for today, but I love it!

Introducing the Flower Applique Rag Quilt Car Seat Tent Pattern by A Vision to Remember


Look at how cute that flower is on the handle

Sorry about the sideways picture.  Gah!

When my daughter was first born my mom and I were walking through Walmart with the Cream Flower blanket over the top of my car seat. I did not want people to see that my baby was only a couple of days old and I wanted to keep her as safe as possible from germs etc.
People were stopping and staring at the car seat and asking if I made it. It gave me an idea to convert the blanket into a cover for the car seat and later the blanket will be used in the stroller and whatever else suits our fancy.

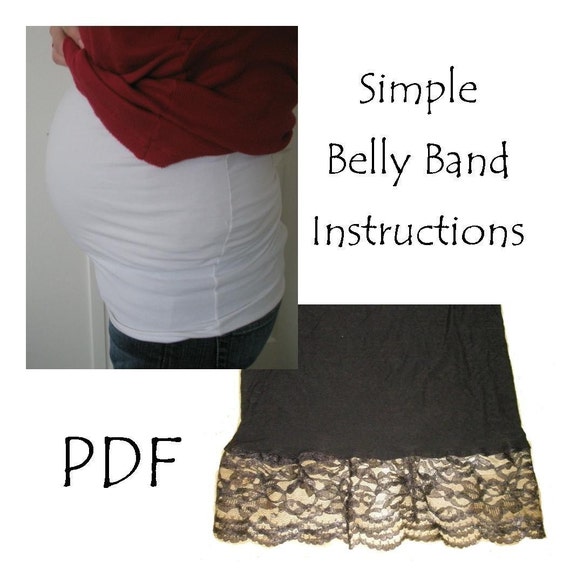
Pregnancy Belly Band Pattern by A Vision to Remember

This pattern is coming to you from desperation!

I am 32 weeks pregnant and I cannot find anything to help cover up my growing belly without going out and buying an entire new wardrobe!

The Simple Belly Band Pattern is available in my Etsy Shop
Pregnant belly band sewing pattern by A Vision to Remember

There are a few really awesome things about this pattern....

Subscribe

Enter your email address:

Delivered by FeedBurner

Let's Get Social

Image HTML map generator


Featured Post

How to Memorize The Living Christ - Simple and Easy