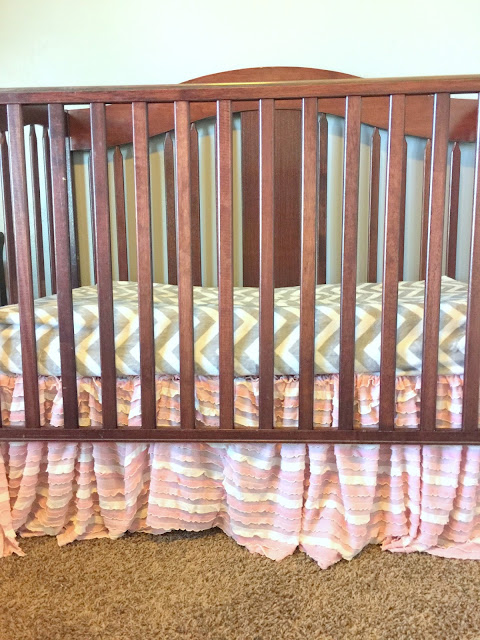
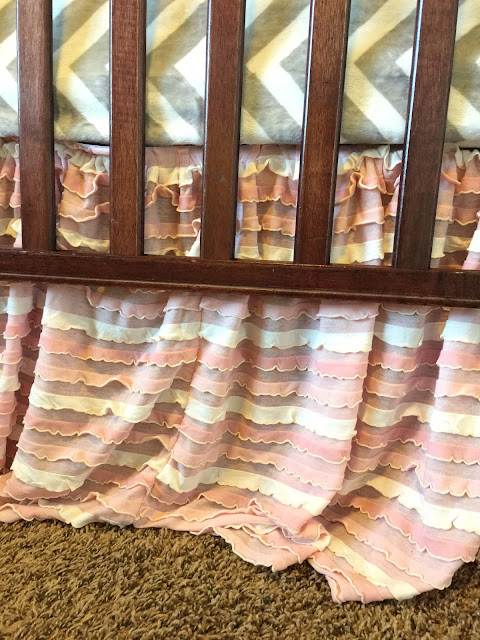
I think this has gotta be one of my most favorite crib skirts. Its ruffly, its girly, and its oh so soft!
My favorite part has gotta be that it can be dressed up for your fancy lil one, or it can be casual for your everyday laid back tom girl. Am-I-Right?
I love that it combines a little bit of frills, with a little bit o-modern.
The fabric that I used comes with beautiful pinks and cream ruffles. There are 2 different shades of pink, one lighter than the other. The ruffles don't overlap, toning down the frilliness of the skirt.
The Ultimate Roadside Rescue Ugly Chair
A few weeks ago, I spied this ugly chair in the borrow pit close to my house. I thought "that chair could be cool, but someone probably will be back for it when they realize it fell out of their car"
Then a couple days later my husband said "hey did you see that chair on the side of the road?"
Me "Yes, I did"
Husband "Why didn't you get it?"
That was enough for me! I picked it up later that day.
Then a couple days later my husband said "hey did you see that chair on the side of the road?"
Me "Yes, I did"
Husband "Why didn't you get it?"
That was enough for me! I picked it up later that day.
How to Restore an Old Park Bench with Spray Stain
{affiliate links below}
We've had this park bench for several years. It sits out on our front porch, out of the sun, for the most part. But even with it only seeing the sun in the early morning, it has still weathered. I didn't want it to get worse for wear, otherwise it might get beyond repair!
Pastel Frilly Baby Girl Rag Quilt for an Infant Crib by A Vision to Remember
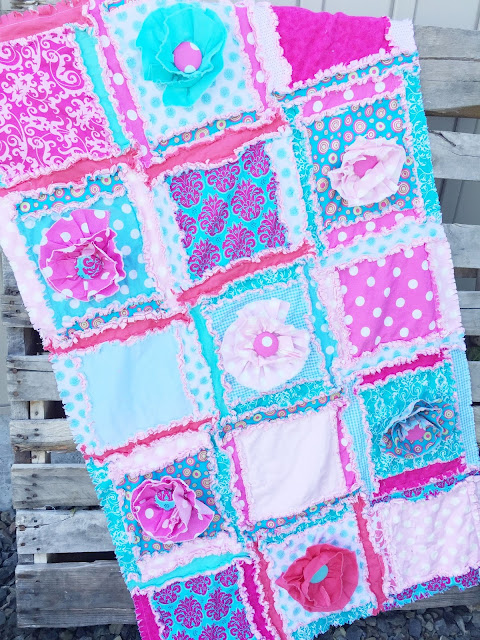
I am so excited! I just sent off this quilt with a little bumper set. I love the pastel colors combined with the bright colors. The baby pink with the hot pink, the turquoise with the baby blue. Then when you include the ruffle flowers onto every other square; its just the icing on the cake! The frilly baby girl cake!
My favorite fabric (that is out of print now) is the damask hot pink and turquoise fabric. It has been my favorite for a couple of years and I am so sad to see my bolt of fabric slowly be depleted! Do you have a favorite fabric like that?
It is definite fabric hoarding at its best!
A Close up of the damask fabric and a ruffle flower. The ruffle flowers have a fabric covered button for the middle of the flowers.
The quilt can be found in my Shop or if you want to sew your own quilt you can purchase the pattern here

Simple Organization for a Sewing Room Cutting Table
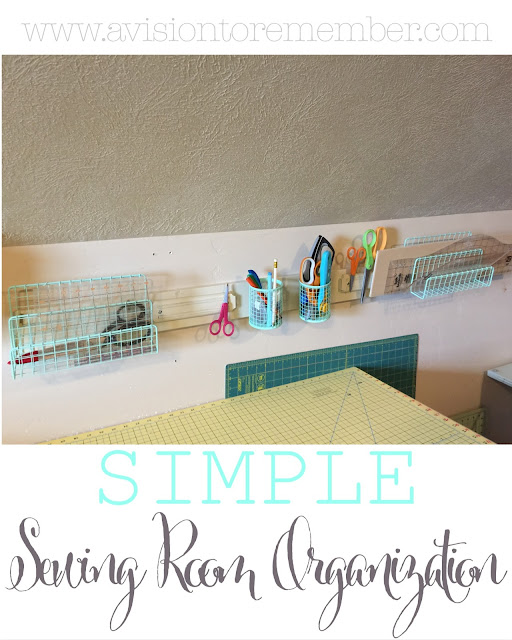
I don't know if you remember awhile back, I posted my craft room. It worked really well at that point, but lately, not so much. My quilting rulers, rotary blades, pins, pencils, scissors, making pens, and all those little sewing gadgets that I have at my cutting table have been cluttered. I sit down a pair of scissors and 2 seconds later they are buried under piles of fabric and I can't find them anymore!
Please tell me I'm not the only one!?
I've had on my mind for the last few months that I need to do something. It's not efficient. I was wasting time, energy, and getting frustrated. So when I walked into the Dollar Spot section in +Target and saw these cute paper holders ($3/each), and pen holders ($1 each), I knew that they would work perfectly for my quilting rules and other cutting accessories.
As soon as I got home, I hurried to my garage and looked for board that would work and had my husband cut it down to size.
Then I spray painted the board to match my walls and trim.
Then I used wood screws and secured the board to the studs in the wall.
To secure the baskets to the board I used picture hanging hooks. I also used the little c hooks for the pencil holders
Then I also screwed some magnetic pieces to the board (I found them on Ebay) and painted them the same color as the board.
I just love how simple (and cheap!) this board ended up being. Plus, it will keep me a lot more organized, which equals being more efficient, which gives me more time to spend with my little kiddos.
#win-win

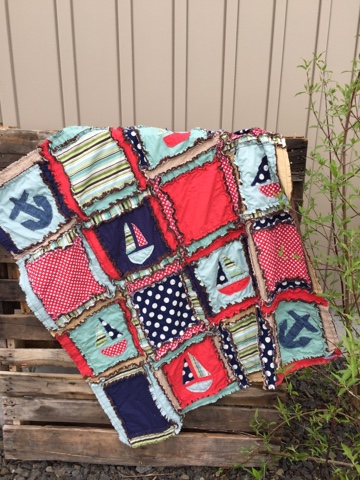
Nautical Rag Quilt for Crib Bed
This is another fun quilt that I was able to make lately. It is a nautical themed one in Red, Navy Blue, Tan, and Seafoam Green.
It is definitely not your ordinary novelty themed quilt for a baby boy. I love that it has a modern take on a very ordinary theme.
It is definitely not your ordinary novelty themed quilt for a baby boy. I love that it has a modern take on a very ordinary theme.
Baby Receiving Blanket with Satin Binding in 10 Minutes Flat! The Quickest Receiving Blanket Ever
This is such a simple and quick quilt to sew! It also is fairly inexpensive, depending on how expensive your fabric is that you have chosen to work with.
Plus, you can complete it in 10 minutes. Seriously, It is that quick. That's what makes it the perfect baby shower gift for someone in a time crunch (like I always seem to be)
First you will need:
1 package of Satin Blanket Binding
1 Yard of Knit Fabric-Cut into 36" square
Sew the binding to the knit fabric. There are a ton of really great tutorials and videos online of how to do binding. Doing satin binding is a little bit easier than regular binding because you can sew both the top and the bottom on at the same time. Satin binding has already been folded over perfectly and there is a nice crease down the middle. So shove that crease all the way over to the edge of your knit fabric. If you want you can use wonder clips, alligator hair clips, straight pins, or whatever else you use to secure your fabric in place. Now top stitch that binding to your knit fabric.
When you get to your corner, sew all the way to the edge, then pull your blanket out of the machine, and gently fold/crease your binding so that it will go down the next side of the blanket. Make sure that your point on the outside of the blanket and the inside corner all line up.
And now you are all finished and have an absolutely adorable baby quilt. It really should be quick. It really is the perfect last minute baby shower gift. Quick, cost effective, and pretty darn cute!
Make sure to check out these awesome blog posts to help you on your sewing journey for the new little one

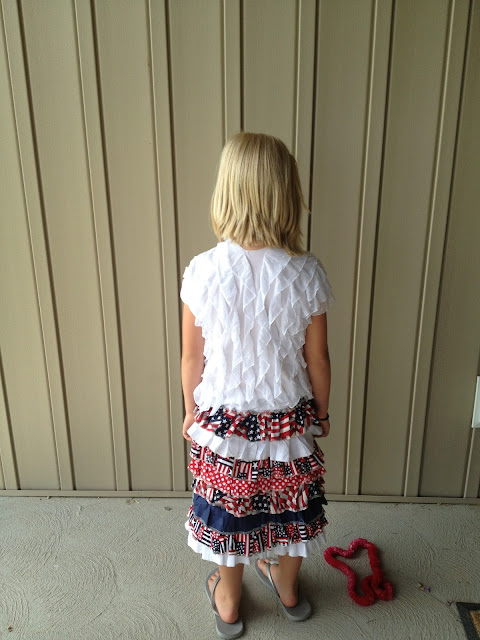
4th of July Ruffle Skirts to Show your Patriotism

I love sewing my girls matching outfits. Weird? I think so, but still its so much fun. Plus, in reality they are only going to want to match each other for a couple more years so I have to take advantage of it!
 |
| 4th of July Girl Ruffle Skirts |
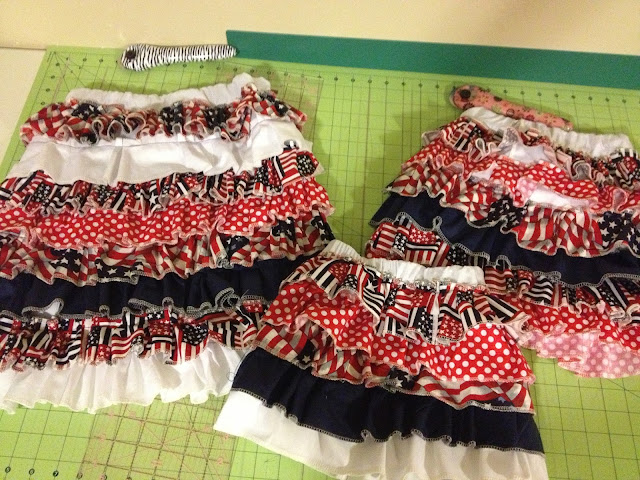
I did make a few changes though...I used fabric, so I needed to ruffle each piece of fabric. I also used my serger to serge the bottom edges of each ruffled fabric.
This the back view of the skirt
I also made the shirts, because they had no white shirts without stains on them....any other moms out there run into this problem...all...the...time?!
For the shirts I used 2 inch white ruffle fabric. I will be adding a tutorial on how I did that later on.
The skirts all laid out after being completed.
I am so grateful that I have been given the ability to sew for my girls. They love every...piece...that I make for them. I know that won't last forever, but I love it for now!

Subscribe to:
Posts (Atom)
Subscribe
Let's Get Social


