Finishing a Rag Quilt Edge

Have you every wondered how to finish a rag quilt? We hope that this post you will find helpful in finishing a rag quilt edge.

Rag quilts are a fun and unique type of quilt. They are quick to assemble, and do not require quilting. There are times though that I like to change up the way I finish my rag quilt. Some of these methods are not standard for finishing a rag quilt, but they can make adding minky to the back much easier.

 
Adding minky to the back or a traditional cotton/flannel quilt back is another way to finish the quilt. We use the inside out method and then top stitch around the edge of the quilt to create a beautiful edge. For more info check out this blog post on adding a minky back to a rag quilt


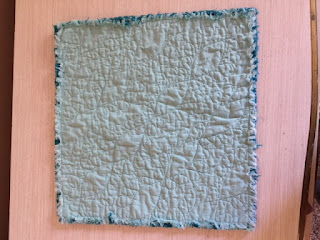
The traditional, and easiest, way to finish a rag quilt is to stitch around the entire perimeter with a 1/2'' seam allowance. Then clip the outer edge of the quilt, just as you have clipped the seam allowances. This is the method that I use the most, and is the standard way to finish your quilt. If you want this type of finished quilt to be more than a lightweight quilt, then make your quilt with the batting layer


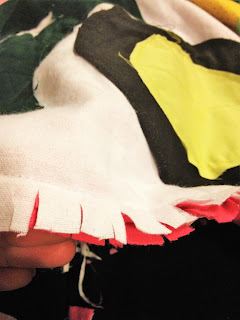
This is also a fairly common way to finish a rag quilt. For this method, fold the outer edge of the quilt 1/2'' over the front of the quilt, and then topstitch 1/4'' from the fold. You can clip the 1/4'' seam allowance or leave it to fray without clipping.

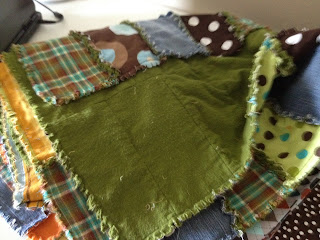
You can use the traditional way to finish a quilt, with binding, for a rag quilt. This method will give a you a nice, clean finished edge like a regular quilt.


  Image HTML map generator

Rag Quilt with Batting

Typical quilts are made by first creating a quilt top, then by making a quilt sandwich that includes the quilt top, batting, and backing. Rag quilting short cuts the quilt top assembly and creates the quilt top while sewing the backing and batting pieces at the same time.

You have several different options for the middle layer.

Warm and Natural Batting

Warm and Natural batting will give your quilt a really nice weight. If you choose to use this as your middle layer, you will need to cut the batting pieces 1'' smaller than the bottom and top layers so that the batting doesn't show in the exposed seams on the top of the quilt.

You will not be able to use batting for patterns like the Flying Geese, the Hourglass Pillow, or the Arrow Quilt because as you are assembling your quilt you will be cutting sewn pieces, and then sewing them again. Your batting would show in the exposed seams.

Diamond Rag Quilt Pattern by A Vision to Remember
Arrow Rag Quilt Pattern by A Vision to RememberRoadways rag quilt pattern by avisiontoremember

If you use Warm and Natural for your middle layer, you must quilt each and every one of your fabric sandwiches. If you don't, the batting will move around and ball up in your quilt when it is washed. One easy way to quilt the sandwiches is to sew an X in the sandwich from point to point. But you can quilt the block using any quilting technique.

Examples of sewing squares together before sewing the quilt together: 

X from corner to corner


Quilting like on a quilt over entire block 


Straight line quilting

Flannel Fabric for Rag Quilt Batting

For the middle layers in my quilts, I prefer a coordinating layer of flannel. The flannel will add color to your quilt in the exposed seams, while still adding weight.

Cut the middle layer the same size as the bottom layer. This middle layer works well for the quilt assembly method where pieces are sewn together and then cut to make different shaped blocks. Quilts like Flying Geese, the Hourglass Pillow, or the Arrow Quilt will be perfect for flannel middle layers.

Rail Fence Rag Quilt Pattern by A Vision to Remember

Another reason I prefer flannel for the middle layer is that it keeps the cost of the quilt down. Flannel costs about half as much as Warm and Natural batting.

Below is a quilt I made with black flannel batting, red flannel back, and kids pajamas as the top of the quilt. I loved how it turned out.  It was very warm and snuggly!


 I used the easy peasy rag quilt pattern for the above quilt. It can be found in our rag quilt pattern shop on etsy.


  Image HTML map generator

Washing a Rag Quilt

Once your quilt has been sewn and clipped, you will need to wash it.

A LOT of little threads will fall off your quilt at this point. Those threads can wreak havoc on your washing machine, especially newer machines. To avoid this problem, run the blade of a butter knife across the seams to help start the fraying process before you put the quilt in the machine. Take the quilt outside and shake it vigorously. This will remove many of those loose threads.


If you plan on quilting and binding the quilt, you will need to clip and wash the quilt.  Then you will quilt and bind the quilt to finish it off. 

I have a basic washing machine that doesn't have a lot of bells and whistles, and it has held up well and I wash several rag quilts every week for the last three years.

Another option is to wash the quilt at a laundromat. But make sure that you butter knife your quilt first and shake it off before washing the quilt there.

When you dry your quilt, many more little threads will come off. The lint filter will catch a lot of them, and you will need to clean it several times during the drying process. I also like to throw an old towel in with the quilt. The towel helps catch those loose threads, and it helps dry the quilt more quickly.

We created a quick little video that shows our process of washing quilts. It is simple and quick. No bells or whistles


  Image HTML map generator

Subscribe

Enter your email address:

Delivered by FeedBurner

Let's Get Social

Image HTML map generator


Featured Post

Where Can I Buy Personalized LDS Baptism Gifts Online?